
How to Extract the Text from PDFs Using Python and the Google Cloud Vision API
- The Tech Platform

- Feb 18, 2021
- 8 min read

This winter, I discovered that Wellesley College, where I am currently a senior studying Media Arts and Sciences, has an archive of over a hundred year’s worth of course catalogues, admissions guidelines, and yearly bulletins. I was immediately electrified by the potential for fascinating data which could be drawn from these documents, but the first step would have to be converting them to text, as there are not many analytical methods which can be run on scans of old, browned PDFs.
Thus began my search for a way to quickly and effectively run OCR on a large volume of PDF files while retaining as much formatting and accuracy as possible. After trying several methods, I found that using the Google Cloud Vision API yielded by far the best results of any of the publicly available OCR tools I tried. As I could not find any single, comprehensive guide to using this amazing tool to run simple OCR applications, I decided to write this one, so that anyone with a little programming knowledge can put this wonderful tool to use.
What You Will Need to Follow These Instructions
An installation of Python 3 and pip on your computer
A text editor for editing code — I use Visual Studio Code
A way to run Python programs on your computer.
You will also need a payment method to enter into your Google Cloud account, although you will not need to spend any money to complete this tutorial. A debit card, credit card, or Google Wallet accoutn will do.
Setting up Your Google Cloud Vision Account
In order to run optical character recognition using Google Cloud Vision, you first need to have a Google account. This will allow you to login to Google’s dashboard for cloud services. One of the many services which are accessible from this dashboard is file storage, which we will be using to host the PDF file we will be converting to text.
Because the advanced machine learning algorithms which we will be accessing via the Cloud Vision API run in the cloud, we will need to upload our PDF to a “bucket” of files hosted by Google, so that it will be accessible.
This tutorial will show you how to write the end result, a text file containing all the text in your PDF, to a location on your computer.
If you are not logged into a Google account, go to google.com and log in or make an account. I assume my reader requires no further guidance for this step.
Once you are logged into your Google account, follow this link to your Google Cloud dashboard. Accept the terms of service if you are asked to do so. You should land on a page which looks similar to this one.

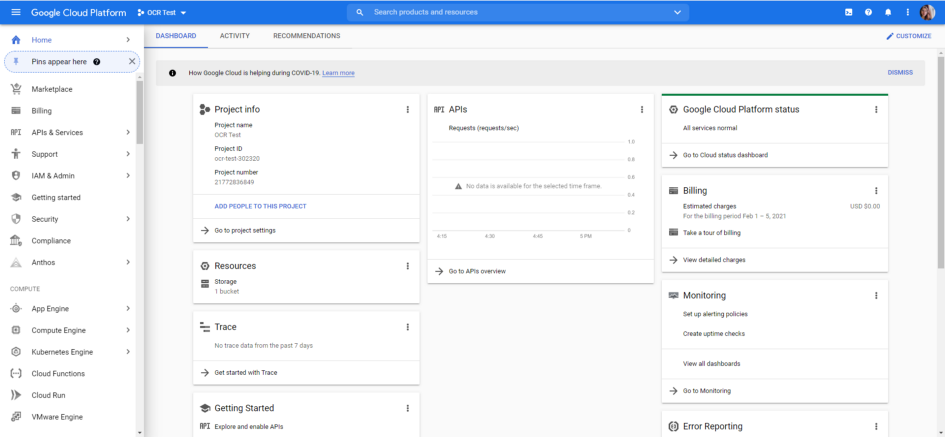
The Google Cloud Platform Dashboard
3. Click on the dropdown menu just to the right of the logo which says Google Cloud Platform. Mine says “OCR Test”, which is the name of my currently open project, but yours will say something different. A window will pop up with a list for recent projects and a “New Project” button in the top right corner. Click the button to make a new project. Give your project a name which will help you remember what you’re using it for. You don’t need to worry about any of the other fields. Click “Create”. Once your project has been created, make sure to select it by opening the window again and selecting it from the list of recent projects.
4. You should now see the Project Info, APIs, and other information panels for your newly created project, as in the screenshot above. In the “Getting Started” panel on the bottom left, click “Explore and Enable APIs”. This will allow you to choose the Google APIs you want to be able to use for this project.

APIs & Services
5. In the menu bar at the top of the screen, click “Enable APIs and Services”. This will take you to the API Library. Search for “Cloud Vision API” and select it.
6. Click “Enable” to make the API available to your project. This will take you to your overview page for the Cloud Vision API. In the top right corner of the screen, click “Create Credentials”.
7. Choose “Cloud Vision API” from the drop down menu under “Which API are you using?” and under “Are you planning to use this API with App Engine or Computer Engine,” select “No, I’m not using them”. Click the blue “What Credentials Do I Need?” button.
8. Now you will be able to create a key so that you can authenticate yourself when you try to connect to the Cloud Vision API. Choose a service account name you will remember, and set your role to “Owner”. Set the key type to JSON. Click continue. You will now be able to download a JSON file containing your credentials.
You now have a project on the Google Cloud Platform, which will be able to use the Cloud Vision API. The next step is to upload your PDF document so that it is stored in the cloud. Then, you can write the script to convert it to text.
9. If it is not already open, click the navigation menu on the left side of the Google Cloud Platform, and scroll down until you see “Storage”. Click on it — this will open a drop-down menu. Select “Browser” from the dropdown menu. At this point, you will need to enable billing if you have not done so already. If you have Google Pay, you can use it here — otherwise, you will need to enter external payment information. This will vary depending upon how you pay, so I will not give instructions. Once you’re done, you should see a dialogue with the option to “Create a Bucket”.
10. Give your bucket a unique name. This is a storage repository within the project you created earlier. Set where to store your data to “multi-region” and the default storage class for your data to “standard”. Click “Create”.
You now have a bucket set up, where you can upload files so that they can be accessed by any APIs which are enabled for the current project. You can upload the PDF file you would like to transcribe by dragging and dropping it from wherever you keep it on your computer.
You are ready to write a program which can access both this file and the Cloud Vision API by connecting to Google Cloud services and providing the key you downloaded earlier.
Installing the Necessary Libraries
Now that you have everything you need set up on the Google Cloud side of things, we will move to installing the necessary tools on your computer and using them to extract text from a PDF file.
First, you may need to make some installations. Open your terminal and navigate to a folder where you will keep the python script you write. Enter the following commands.
pip install google-cloud-vision
pip install google-cloud-storage
These use pip to install two Python libraries with tools for interacting with the Google Cloud Vision and Cloud Storage APIs, respectively. Next, run
pip freezeThis will check if you’ve installed everything you should have. You should have the following, although most will likely be newer versions.
google-api-core==1.14.3
google-api-python-client==1.7.11
google-auth==1.6.3
google-auth-httplib2==0.0.3
google-cloud==0.34.0
google-cloud-core==1.0.3
google-cloud-storage==1.20.0
google-cloud-vision==0.39.0
google-resumable-media==0.4.1
googleapis-common-protos==1.6.0
google-api-core==1.14.3
If you don’t have any of them, use pip to install the ones missing.
Finally, you need to set your Google Application Credentials — that is, you need to register where you’re keeping the json key you downloaded earlier, so that when you run programs using Google Cloud services, your computer can authenticate itself as belonging to your Google account.
You can find excellent instructions on how to do this on any platform here. Once you have done this, you will be able to run programs which use Google Cloud Services from the command line.
Writing the Script
Now we get to the fun part — writing a script to actually perform optical character recognition on our chosen PDF! Make a new Python file and open it with your preferred code editor. I will explain each part of the script I used so that you can understand it as you substitute in your information. You can find the whole of the script here, on my Github, as well. Try to follow along with each step before downloading it to tinker with.
The first step is to import the libraries we will need.

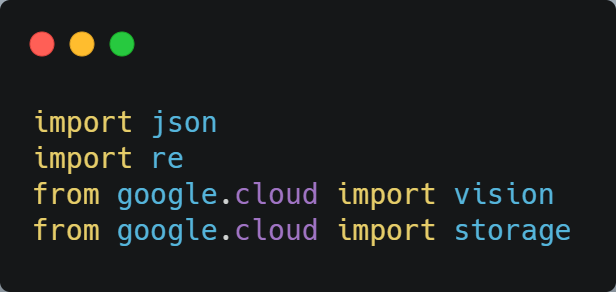
We need to import json so that we can handle Cloud Vision’s outputs. re is a library which will allow us to use regular expressions to match particular patterns in strings.
Vision and storage from google.cloud will allow us to use the Google Cloud Vision and Google Cloud Storage APIs.
2. The next step is to write a function to detect all the places in our PDF file where there is readable text, using the Google Cloud Vision API. Make sure to read the comments in this function, so that you understand what each step is doing.

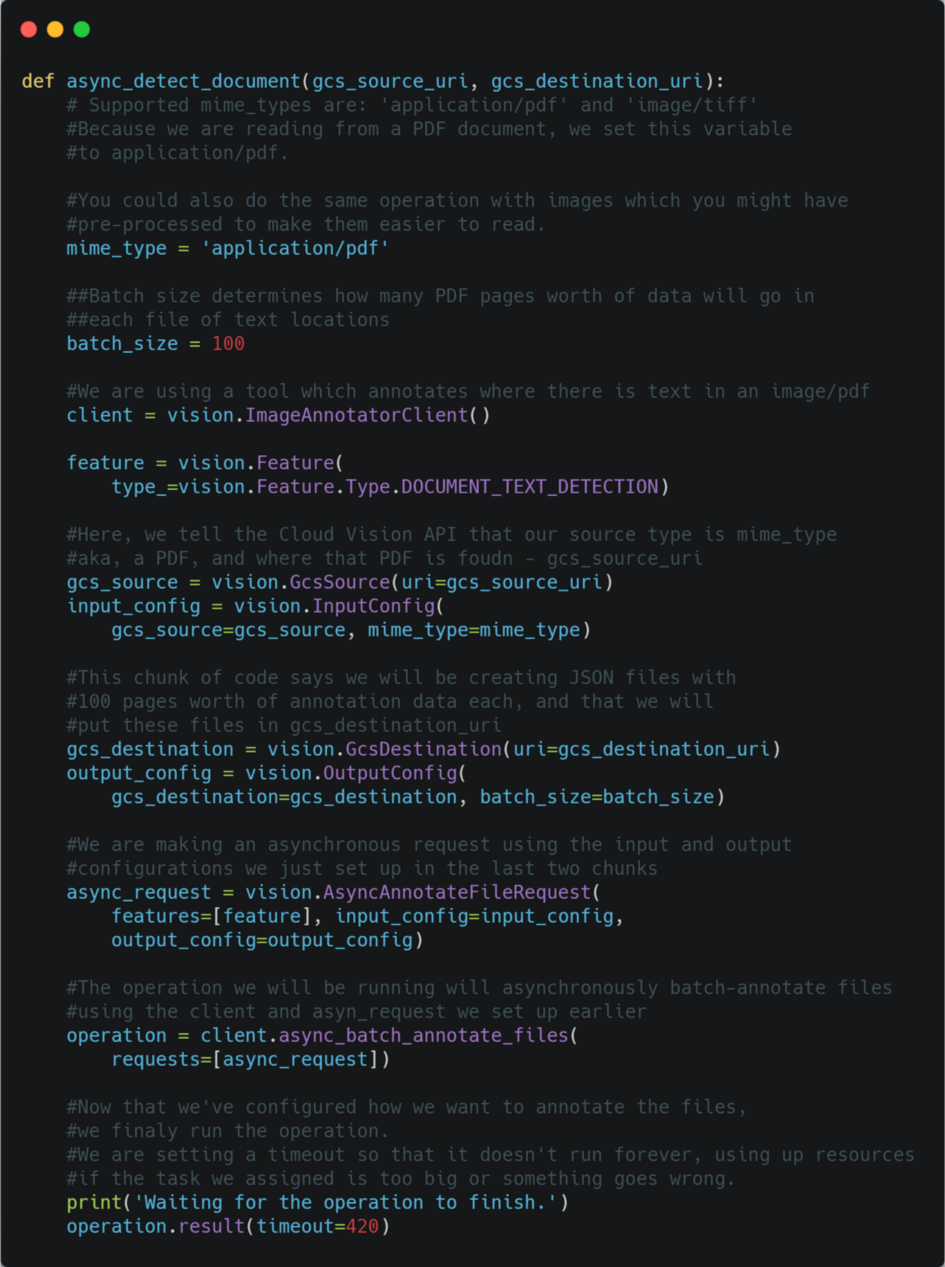
Function to annotate where there is text in your PDF file
In addition to the comments explaining this function, here are some things to note. You may expect that when we run Google’s amazing OCR tools on a document, we will get a text file in return. Actually, this function will just output a json file — or several, depending on the size of your PDF — containing information about where there is text in the file. Actually getting the text so we can read it is the next step. This function takes two inputs. The first, gcs_source_uri is the location of your PDF file in Google Cloud storage. The second, gcs_destination_uri is the location in Google Cloud Storage where you want the json files containing your file annotations to go.
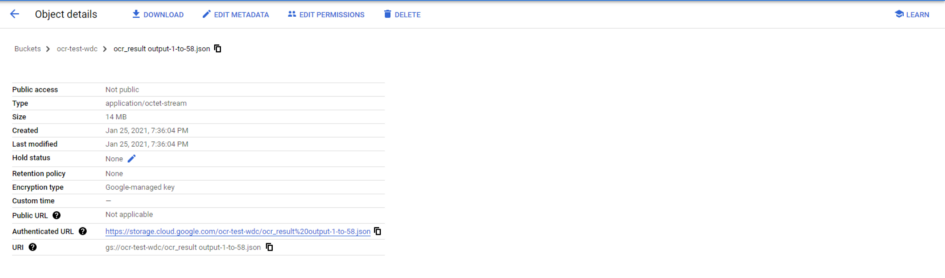
URI is the term for a file location in Google Cloud storage. You can think of it as a URL within Google Cloud Storage, or like a path on your computer. It describes where, in the hierarchy of files you keep on google cloud, a particular file can be found. To find the URI of a file, you can double click on it to see details about it and copy the URI from the table of data you will thus open.

To generate your annotations, you will write a line at the bottom of your Python file calling the async_detect_document function. Mine looks like this.

The first URI is the path to a PDF document stored in my google cloud storage bucket, from which I want to read. The second leads to a folder in which I am saving all of my document annotations.
3. Now that we have annotated our PDF, we can finally use Cloud Vision to go to each location where there is text and read it into a text file! My code for doing this follows. Again, be sure to read the comments.

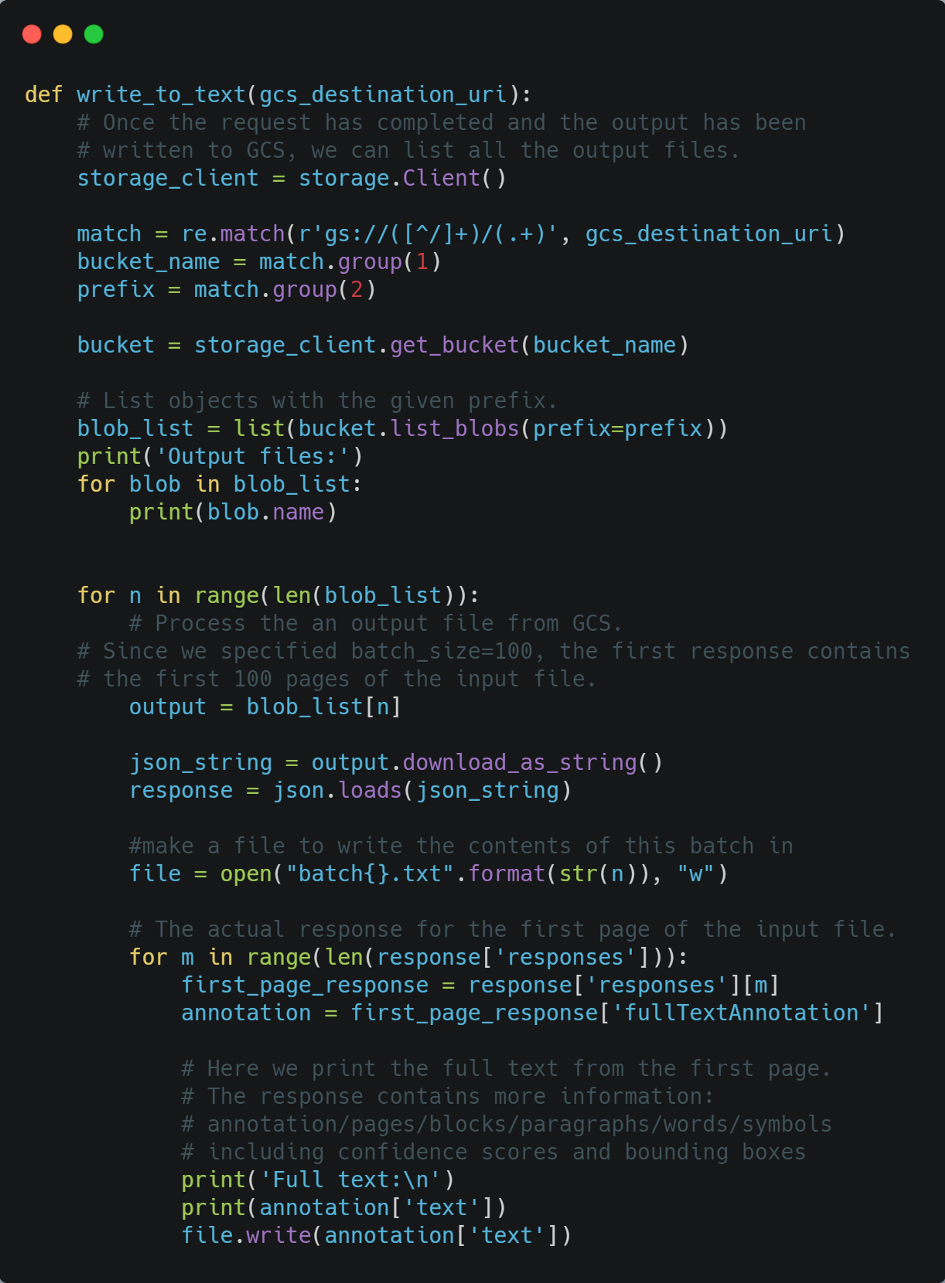
This function takes just one argument: the URI of the location where we stored our annotations. It will output the results of the transcription into a text file in your currently active directory, in addition to printing them in your terminal.
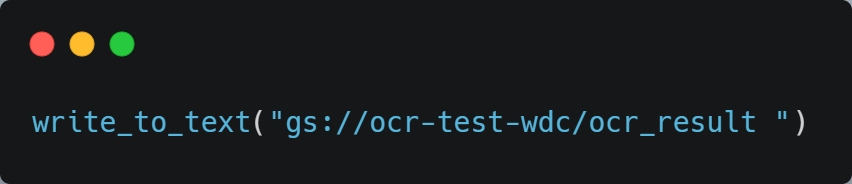
Here’s how I called it, using the same directory as before.
Congratulations! If all went well, you should now be in posession of a text file containing a line-by-line transcription of all the machine-readable text in your PDF. You may be surprised by how much could be read — it even works on some handwriting.
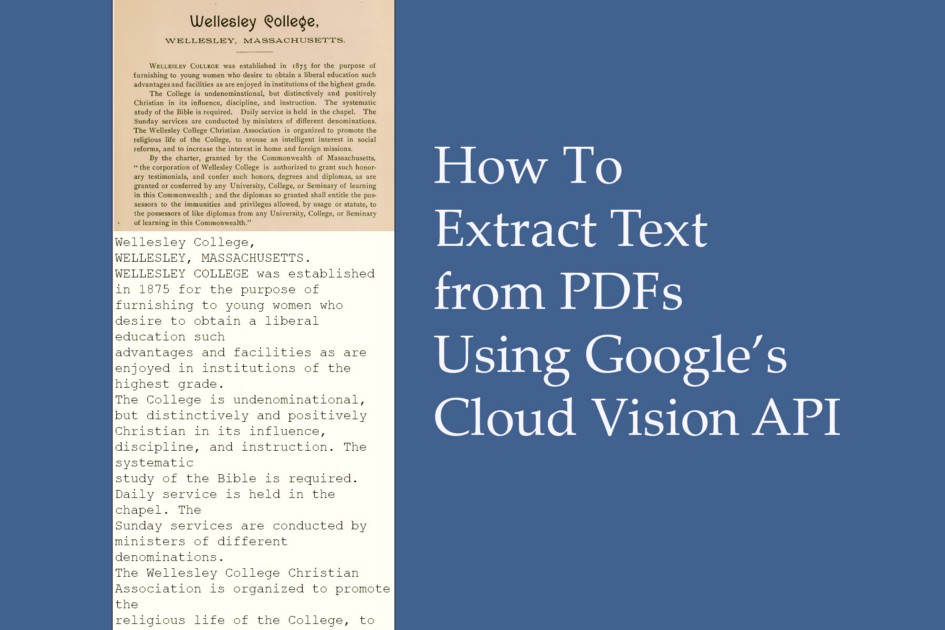
Here is a side-to-side comparison of some of my results. This is a page from a course catalogue I drew from the Wellesley College archives, dating from 1889. Despite the fact that I used a totally un-pre-processed PDF as an input file for this test, the results are highly accurate, even for names and foreign words.


Source: Medium
The Tech Platform


Comments