
Whisper Model in Azure OpenAI: A Complete Guide
- The Tech Platform

- Oct 17, 2023
- 8 min read
The Whisper model stands as a prominent example of cutting-edge technology. Azure OpenAI has integrated this state-of-the-art automatic speech recognition (ASR) system, making it accessible and usable for a wide range of applications.
In this comprehensive guide, we'll explore the Whisper model within the Azure OpenAI ecosystem. We will delve into its architecture, its remarkable capabilities, and most importantly, how to leverage the power of the Whisper model effectively in your projects.
By the end of this guide, you'll have a deep understanding of what makes the Whisper model tick and how to harness its potential to enhance speech recognition and transcription.
Table of Contents:
Whisper Model in Azure OpenAI
Whisper Model via Azure OpenAI Service
Whisper Model via Azure AI Speech
Introduction to Whisper Model?
Whisper is a general-purpose automatic speech recognition (ASR) model from OpenAI. It is trained on a massive dataset of diverse audio and text, and can perform multilingual speech recognition, speech translation, and language identification. Whisper is able to transcribe audio in a variety of accents and languages, and can even handle noisy environments and technical language.
Whisper is a powerful tool for a variety of applications, including:
Transcription: Whisper can be used to transcribe audio recordings, such as podcasts, lectures, and meetings.
Translation: Whisper can be used to translate speech from one language to another. This can be useful for translating customer service calls, interviews, and other types of audio content.
Language identification: Whisper can be used to identify the language of a speech recording. This can be useful for routing customer service calls to the appropriate language queue, or for identifying the language of a video before translating it.
Whisper is still under development, but it has the potential to revolutionize the way we interact with audio and video content. By making it easy to transcribe, translate, and identify languages, Whisper can help us to communicate more effectively and efficiently.
Here are some examples of how Whisper can be used:
A journalist can use Whisper to transcribe an interview with a foreign leader, and then translate the transcript into English.
A student can use Whisper to transcribe a lecture, and then generate a summary of the lecture.
A customer service representative can use Whisper to translate a customer's call from one language to another.
A video streaming company can use Whisper to identify the language of a video before translating it into multiple languages.
Consider the below architectural diagram of the Whisper Model. The model consists of two main components:
An Encoder
A Decoder
The encoder takes as input an audio waveform and produces a sequence of hidden vectors. The hidden vectors represent the acoustic features of the audio waveform.
The decoder takes as input the sequence of hidden vectors from the encoder and produces a sequence of text tokens. The text tokens represent the words in the transcribed speech.

The Whisper model is trained using a technique called supervised learning. In supervised learning, the model is given a set of training examples, each of which consists of an audio waveform and a corresponding transcript. The model learns to predict the transcript of the audio waveform by minimizing the difference between the predicted transcript and the actual transcript.
Once the Whisper model is trained, it can be used to transcribe new audio waveforms. To transcribe an audio waveform, the model simply takes the audio waveform as input and produces a sequence of text tokens as output.
Whisper Model in Azure OpenAI
The Whisper model is a speech-to-text model from OpenAI that is available in both Azure OpenAI Service and Azure AI Speech. The model is trained on a massive dataset of multilingual audio and text, and can transcribe audio files in 57 languages.

When to use the Whisper model:
When you need to transcribe audio files in multiple languages.
When you need to transcribe audio files that contain noisy or challenging audio environments.
When you need to transcribe audio files that contain a mix of languages and accents.
How to use the Whisper Model
Before knowing how to use Whisper Model you should know that:
The Whisper model is available through both the Azure OpenAI Service and the Azure AI Speech service. Here is a comparison of the two options:
Feature | Azure OpenAI Service | Azure AI Speech |
|---|---|---|
Pricing | Pay-as-you-go | Pay-as-you-go |
Supported Languages | 57 | English |
Transcription | High | High |
Scalability | Moderate | High |
Ease of use | Moderate | Easy |
Additional features | Translation, code generation, creative text generation | Diarization, word-level timestamps |
Examples of when you might choose to use the Whisper model via the Azure OpenAI Service:
You need to transcribe audio files into text in multiple languages.
You need to translate transcribed text into another language.
You need to generate code or creative text from the transcribed text.
Examples of when you might choose to use the Whisper model via the Azure AI Speech service:
You need to transcribe a large number of audio files.
You need to transcribe audio files in real-time.
You need to use additional features, such as diarization and word-level timestamps.
Method 1: Whisper Model via Azure OpenAI Service
To use the Whisper Model via Azure OpenAI Service:
You need:
An Azure OpenAI resource
A deployed Whisper model
An audio file to transcribe
Below is the step-by-step guide to using Azure OpenAI Service to transcribe audio files:
STEP 1: Create an Azure OpenAI Resource.
To create Azure OpenAI Resource, Click "+ Create" in Azure OpenAI.

Now, enter the basic information such as:
Subscription
Resource Group
Region
Name
Pricing Tier
Click "Next".

Now, select "All networks, including the internet, can access this resource" network option.

Click "Next".
If you have any tags to add, provide the tag name and its corresponding value in the Tags section. If not, simply proceed by clicking "Next."
Review all the information you've entered thus far.

Click "Create" after reviewing all the information.
STEP 2: Deploy the model
Under the "Resource Management" section, click "Model Deployment" and select the model from the list that you want to deploy.
STEP 3: Retrieve your endpoint and key
Click on the Azure OpenAI resource that you created now. In the left panel, click "Keys and Endpoint".

Copy the Whisper APIs
STEP 4: Create and assign persistent environment variables for your key and endpoint.
For Windows Command Prompt:
setx AZURE_OPENAI_KEY "REPLACE_WITH_YOUR_KEY_VALUE_HERE"
setx AZURE_OPENAI_ENDPOINT "REPLACE_WITH_YOUR_ENDPOINT_HERE"
For Windows PowerShell:
$env:AZURE_OPENAI_KEY = "REPLACE_WITH_YOUR_KEY_VALUE_HERE" $env:AZURE_OPENAI_ENDPOINT = "REPLACE_WITH_YOUR_ENDPOINT_HERE" For Unix or Linux Terminal:
export AZURE_OPENAI_KEY="REPLACE_WITH_YOUR_KEY_VALUE_HERE"
export AZURE_OPENAI_ENDPOINT="REPLACE_WITH_YOUR_ENDPOINT_HERE"
Replace "REPLACE_WITH_YOUR_KEY_VALUE_HERE" and "REPLACE_WITH_YOUR_ENDPOINT_HERE" with your actual key and endpoint values.
STEP 5: Transcribe your audio file. This is done using the curl command in the command line. curl is a tool that allows you to transfer data to or from a server. In this case, you’re sending a request to the Azure OpenAI Service to transcribe your audio file.
Here’s the command:
curl $AZURE_OPENAI_ENDPOINT/openai/deployments/MyDeploymentName/audio/transcriptions?api-version=2023-09-01-preview
 -H "api-key: $AZURE_OPENAI_KEY"
 -H "Content-Type: multipart/form-data"
 -F file="@./wikipediaOcelot.wav"
Replace MyDeploymentName with the name of your deployed Whisper model and ./wikipediaOcelot.wav with the path to your audio file.
STEP 6: Check the output:
The output of the curl command will be a JSON object containing the transcribed text.
Example output:
JSON
{
    "text": "The ocelot, Lepardus paradalis, is a small wild cat native to the southwestern United States, Mexico, and Central and South America. This medium-sized cat is characterized by solid black spots and streaks on its coat, round ears, and white neck and undersides. It weighs between 8 and 15.5 kilograms, 18 and 34 pounds, and reaches 40 to 50 centimeters 16 to 20 inches at the shoulders. It was first described by Carl Linnaeus in 1758. Two subspecies are recognized, L. p. paradalis and L. p. mitis. Typically active during twilight and at night, the ocelot tends to be solitary and territorial. It is efficient at climbing, leaping, and swimming. It preys on small terrestrial mammals such as armadillo, opossum, and lagomorphs."
}
Method 2: Whisper Model via Azure AI Speech
Azure AI Speech is a managed service offered by Microsoft Azure that provides industry-leading speech capabilities. It includes several features:
Speech-to-text: This feature transcribes audio into text, allowing for high-accuracy transcriptions of audio files.
Text-to-speech: Also known as speech synthesis, this feature converts text into humanlike synthesized speech.
Speech translation: This feature translates spoken audio into other languages.
Speaker recognition: This feature can identify and verify the speaker during conversations
Azure AI Speech Studio is a set of user interface-based tools for building and integrating features from Azure AI Speech service into your applications. You can create projects in Speech Studio using a no-code approach, and then reference those assets in your applications by using the Speech SDK, the Speech CLI, or the REST APIs.
To create and use the Whisper Model via Azure AI Speech, you need to use batch transcription. Here are the steps to do so:
Create an Azure AI speech Account
Deploy the Resource
Create a batch transcription job
Submit your audio files to the job
Get the transcription result.
Step 1: Create an Azure AI Speech account
To create an Azure AI Speech account. go to Azure OpenAI Service => Speech Service.

Within the Speech Service section, click on "+ Create" to initiate the creation of a Speech service account.
Provide all the necessary information under the "Basic" section.
Click "Next."

Enter the required details for Network, identity, and tags.
Click "Review + create"

Review all the information you've input up to this point for accuracy.
Once you've verified the details, click "Create" to proceed.

Now, the resource deployment process will commence.
After the deployment is successfully completed, click "Go to resource"
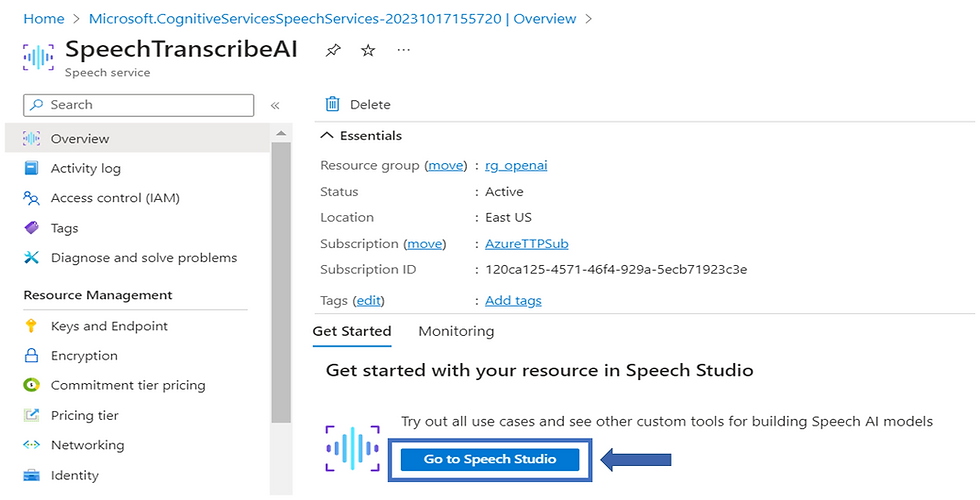
From the resource, navigate to "Speech Studio"

In Speech Studio, find and click "Batch speech to text"
Step 2: Deploy the Resource
Now, after creating the resource, you have to deploy the resource.
Step 3: Create a batch transcription job
This is done using a REST API call. REST API is a set of rules that developers follow when they create their API. One of these rules states that you should be able to get a piece of data (called a resource) when you link to a specific URL.
You can use tools like Postman or curl in the command line to make these API calls. The command line is a text-based interface that can be used to input commands directly to your computer’s operating system.
Here’s the API call to create a batch transcription job:
POST https://<region>.api.cognitive.microsoft.com/speechtotext/v3.0/batch Authorization: Bearer <your_auth_token>
Content-Type: application/json
{
    "name": "<job_name>",
    "sourceLanguage": "<source_language>",
    "targetLanguage": "<target_language>",
    "model": "<model_name>",
    "inputs":
    [
        {
            "url": "<url_to_audio_file>"
        }
    ]
}
Replace the following values:
<region>: The Azure region where your Azure AI Speech account is located.
<your_auth_token>: Your Azure AI Speech authentication token.
<job_name>: A name for your batch transcription job.
<source_language>: The language of the audio file you are transcribing.
<target_language>: The language you want the transcription to be translated to.
<model_name>: The name of the Whisper model you deployed.
<url_to_audio_file>: The URL of the audio file you want to transcribe.
Step 4: Submit your audio files to the job
Once you have created a batch transcription job, you can submit your audio files to it using the following REST API call:
POST https://<region>.api.cognitive.microsoft.com/speechtotext/v3.0/batch/<job_name>/inputs Authorization: Bearer <your_auth_token>
Content-Type: multipart/form-data
The body of the request should be a multipart/form-data request with the following parts:
file: The audio file you want to transcribe.
Step 5: Get the transcription results
Once your audio files have been transcribed, you can get the transcription results using the following REST API call:
GET https://<region>.api.cognitive.microsoft.com/speechtotext/v3.0/batch/<job_name>/results Authorization: Bearer <your_auth_token> The response will be a JSON object containing the transcription results for each audio file.
Example:
[
    {
        "id": 1,
        "name": "my_audio_file.wav",
        "status": "Succeeded",
        "text": "This is the transcription of my audio file."
    }
]
You can use the transcription results for any purpose you need, such as generating subtitles for a video or creating a transcript of a meeting.
Can I transcribe multiple audio files at once using this method?
You can transcribe multiple audio files at once using this method. When creating a batch transcription job, you can include multiple audio files in the “inputs” array of the API request. Each audio file is represented as an object with a “url” property that points to the location of the audio file.
Here’s an example of how you can modify the API request to include multiple audio files:
{
    "name": "<job_name>",
    "sourceLanguage": "<source_language>",
    "targetLanguage": "<target_language>",
    "model": "<model_name>",
    "inputs":[
        {
            "url": "<url_to_audio_file_1>"
        },
        {
            "url": "<url_to_audio_file_2>"
        },
        {
            "url": "<url_to_audio_file_3>"
        }
        // Add more as needed
    ]
}
Just replace <url_to_audio_file_1>, <url_to_audio_file_2>, and <url_to_audio_file_3> with the URLs of your audio files. You can add more audio files by adding more objects to the “inputs” array.
Once you submit this request, Azure AI Speech will create a batch transcription job that transcribes all of the specified audio files. You can then retrieve the transcription results for each audio file using the API.
Conclusion
The Whisper model in Azure OpenAI offers immense potential for enhancing speech recognition and transcription. Its user-friendly architecture and versatility make it a valuable tool across various domains. With this guide, you now have the know-how to harness Whisper's capabilities and drive innovation in voice technology and beyond.


Comments