
Vue.js Transition
- The Tech Platform

- Mar 17, 2021
- 4 min read


Vue.js transition has various ways of applying the transition to HTML elements when elements are added or updated in the DOM. Working with these Vue.js transitions is much more easier as Vue.js provides a transition component that goes around/ wraps the element or component which is due of animation. Transition, as the word sounds, is when a change occurs while something moves from one state to another. State in the sense starting point and the ending point. Vue applies transition effects when elements are inserted, updated, or removed from the DOM.
How does Vue.js Transitions Work?
Let us explore how these Vue transitions work,
While designing a transition, with Vue’s ‘transition’ component, we need to check for default style and how does the element actually appear when not in transition state. Let me explain with a simple example,We want a text to transition on and off the screen and fade the text as it transitions, here the default style should be opacity:1 as this would be the style transition on and off the screen. Default transitioning style for any HTML element is defined by the browser. We need not define the default styling as the element appears in the same default style.
Syntax:
<div v-if=”show” transition=”my-transition”></div>Attribute ‘transition’ can be used along with,
v-if: Conditional rendering of a block
v-show: Conditional displaying of an element
v-for: Rendered for insertion and removal of element from DOM, for animation changes
Dynamic components: Used to switch between multiple components
When an element is inserted or removed from DOM, Vue will:
Automatically check whether the target element has CSS transitions or animations, and hence add or remove the CSS classes
Try finding out a JavaScript transitioned hooks object which might be registered through Vue.transition(id, hooks) or by passing with id ‘my-transition’. If found, appropriate transition hooks are called at different stages of transition.
If in case, there are no JavaScript hooks found and no CSS transition/ animations, then DOM operations like insertion and deletion will be executed on the next frame immediately.
Listing out some of the transition effects on DOM elements,
Using JavaScript to directly manipulate DOM elements during transition hooks
Integration of 3rd party CSS animations
Used for positioning of SVG nodes
State transitions help in setting size and other properties of elements
Integration of 3rd part JavaScript animation libraries
Automatically applying classes for CSS transitions or animations
Animating numbers, calculations and colors used for displaying
Examples of Vue.js Transition
Following are the examples are given below:
Example #1 – Simple Fade in and Out Transition
Code:
<!DOCTYPE html>
<html>
<head>
<title>Vue.js transition</title>
<script src="https://unpkg.com/vue"></script>
<script src="https://unpkg.com/marked@0.3.6"></script>
<script src="https://unpkg.com/lodash@4.16.0"></script>
<style>
.fade-enter-active,
.fade-leave-active {
transition: opacity 2s;
}
.fade-enter,
.fade-leave-to {
opacity: 0;
}
</style>
</head>
<body>
<div id="demo_transition_fade">
<button v-on:click="show = !show">
Click Here
</button>
<transition name="fade">
<p v-if="show">Text is shown in a transition mode</p>
</transition>
</div>
<script>
new Vue({
el: "#demo_transition_fade",
data: {
show: false
}
});
</script>
</body>
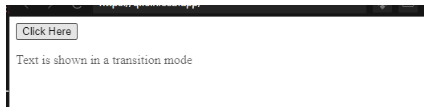
</html>Output:

On clicking on the button, text fades in as below,

On clicking again, text fades out
Text was being faded out.
There are 6 transition classes to handle the element being displayed or removed, Enter transitions happen when the component is being displayed or enabled. Classes under Enter transition are v-enter, v-enter-to and v-enter-active Leave transitions happen when the component is being removed or disabled. Classes under Leave transitions are v-leave, v-leave-to and v-leave-active
Prefix v- being a default while using a transition element.
Let X and Y be two separate states for transitioning
V-enter: It is the class used to define what X part of transition is, defines the starting state and added before the element is inserted.
V-enter-to: It is the class used to define what Y part of transition is, defines the ending state and removed when transition or animation is complete
V-enter-active: It is the class used to define how to move from X to Y, active state and applicable during entering phase. It also defines the duration, easing curve and delay in entering transitions
V-leave: It is the class used to define the starting state to leave.
V-leave-to: It is the class used to define the ending state to leave.
V-leave-active: It is the class used to define the active state for leaving, active state and applicable during leaving phase. Applied when leave transition is triggered, removed when transition is complete. It also defines the duration, easing curve and delay in leaving transitions.
Example #2 –Bounce transition of text
Code:
<!DOCTYPE html>
<html>
<head>
<title>Vue.js bounce transition</title>
<script src="https://unpkg.com/vue"></script>
<script src="https://unpkg.com/marked@0.3.6"></script>
<script src="https://unpkg.com/lodash@4.16.0"></script>
<style>
.bounce-enter-active {
animation: bounce-in 0.9s;
}
.bounce-leave-active {
animation: bounce-in 1.5s reverse;
}
@keyframes bounce-in {
0% {
transform: scale(0);
}
50% {
transform: scale(1.4);
}
100% {
transform: scale(1.1);
}
}
</style>
</head>
<body>
<div id="demo_transition_bounce">
<button @click="show = !show">Click Here</button>
<transition name="bounce">
<p v-if="show">
Vue.js transition bounce is being shown here using v-if
</p>
</transition>
</div>
<script>
new Vue({
el: "#demo_transition_bounce",
data: {
show: false
}
});
</script>
</body>
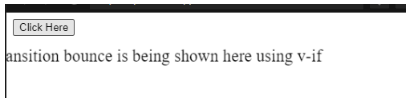
</html>Output:
On clicking the on the button, text bounces on the console,
Similarly on clicking again, bounces out of the console.
Example 3 – Custom Transition Classes in Vue.js
Code:
<!DOCTYPE html>
<html>
<head>
<title>Vue.js customized transition</title>
<script src="https://unpkg.com/vue"></script>
<script src="https://unpkg.com/marked@0.3.6"></script>
<script src="https://unpkg.com/lodash@4.16.0"></script>
<link
href="https://cdn.jsdelivr.net/npm/animate.css@3.5.1"
rel="stylesheet"
type="text/css"
/>
</head>
<body>
<div id="custom-transition">
<button @click="show = !show">
Click Here
</button>
<transition
name="custom-classes-transition"
enter-active-class="animated tada"
leave-active-class="animated bounceOutRight"
>
<p v-if="show">Transitions classes being customized</p>
</transition>
</div>
<script>
new Vue({
el: "#custom-transition",
data: {
show: true
}
});
</script>
</body>
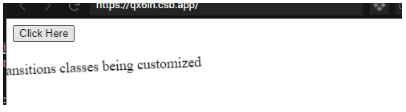
</html>Output:

When on clicking,
On clicking again,
Note: All the transitions shown here can not be captured through a screenshot.
With this, we come to an end of the topic ‘Vue.js Transition’. We have seen what transitions are meant to be in Vue.js along with its syntax. Illustrated a few examples through which we have simple kind of transitions. Got to know how Vue.js transitions work and what are all the classes of transitions, enter/ leave transitions. With this fundamental knowledge over transitions, it is way much easier to see how CSS animations work which will also help us to understand JavaScript animations.
Source: educba
The Tech Platform


Comments