Set up Vim as your Rust IDE
- The Tech Platform

- Sep 15, 2020
- 3 min read
The Vim text editor is a great development environment for programming Rust applications.
The Rust programming language is designed to implement systems programming with safe concurrency and high memory performance in a way that feels familiar to C++ developers. It's also one of the most loved programming languages in Stack Overflow's 2019 Developer Survey. Text editors and integrated development environment (IDE) tools make writing Rust code easier and quicker. There are many editors to choose from, but I believe the Vim editor is a great fit for a Rust IDE. In this article, I'll explain how to set up Vim for Rust application development.
Install Vim
Vim is one of the most commonly used command-line text editors in Linux and Unix. The latest version (as of this writing) is 8.2, and it offers more flexibility than ever in how you can use it.
Vim's download page provides multiple options to install it with binary or packages. For example, if you use macOS, you can install the MacVim project, then expand Vim's capabilities by installing Vim plugins.
To set up Rust for development, download Rustup, a handy Rust installer utility, and run the following in your terminal (if you use macOS, Linux, or any other Unix-like operating system):
$ curl --proto '=https' --tlsv1.2 -sSf https://sh.rustup.rs | shChoose an installation option from the interactive prompt. Then you will see output like:
stable installed - rustc 1.43.1 (8d69840ab 2020-05-04)


Rust is installed now. Great!

To get started you need Cargo's bin directory ($HOME/.cargo/bin) in your PATH
environment variable. Next time you log in this will be done
automatically.

To configure your current shell run source $HOME/.cargo/env
Syntax highlighting
Vim allows you to configure your runtime by defining it in the .vimrc file. To enable syntax highlighting, open your .vimrc file (or create one if it doesn't exist):
$ vim ~/.vimrcAdd the following in the .vimrc file and save it:
filetype plugin indent on
syntax on
The first line turns on the detection, plugin, and indent configurations all at once. The second line enables syntax highlighting. These features will help you manage your developer workflow in Rust. Learn more in Vim's help file.
Create a Rust application in Vim
To create a new Rust HelloWorld application (hello.rs) using Vim, enter:
$ vim hello.rs Enter the following Rust code to print Hello World! in the console:
fn main() {
      println!("Hello World");
 }
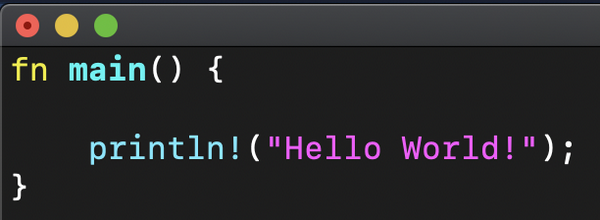
It should look something like this:
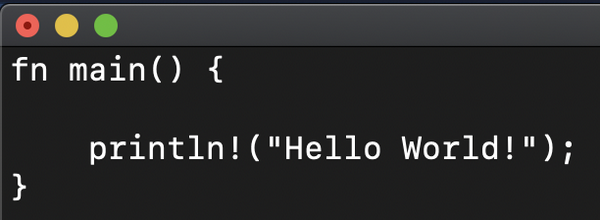
Here's what it would look like without syntax highlighting:
Did you notice how Vim automatically indented and organized the code? That is because of the first line you entered in the .vimrc file.
Great job! Next, you will build this application using Rust's package manager, Cargo.
Cargo integrations
Cargo makes creating applications easier. To see how, create a Cargo-based HelloWorld application. If you don't already have Cargo installed on your Linux or macOS system, enter:
$ curl https://sh.rustup.rs -sSf | shThen create a package with Cargo:
$ cargo new my_hello_worldIf you look at the directory structure, you'll see Cargo automatically generated some source code and directories. If you have tree installed, run it to see the directory structure:
$ tree my_hello_world
my_hello_world
├── Cargo.toml
└── src
    └── main.rs

1 directory, 2 files
Open the main.rs source code file in Vim:
$ vim my_hello_world/src/main.rsThe code is the same as in the HelloWorld example you created manually above. Replace World with Rust with Vim:
fn main() {
      println!("Hello, Rust with Vim");
 }
Use :wq to save your changes and quit Vim.
Compile your application
Now you can compile your first Rust application using cargo build:
$ cd my_hello_world
$ cargo build
Your terminal output will look similar to this:
Compiling my_hello_world v0.1.0 (/Users/danieloh/cloud-native-app-dev/rust/my_hello_world)

    Finished dev [unoptimized + debuginfo] target(s) in 0.60s
You may see a warning message because you reused the sample package name, my_hello_world, but you can ignore it for now.
Run the application:
$ target/debug/my_hello_world
Hello, Rust with Vim!
You can also use cargo run to build and run the application all at once:
$ cargo run

    Finished dev [unoptimized + debuginfo] target(s) in 0.00s
     Running `target/debug/my_hello_world`
Hello, Rust with Vim!!
Congratulations! You set up Vim editor for Rust IDE on your local machine, developed your first Rust application, and built, tested, and ran it using the Cargo package manager tool. Run cargo help If you want to learn other Cargo commands.
Source: opensource.com


Comments