Register The Power BI Application In Azure AD - Power BI Embedded - Step By Step - Part Two
- Dhruvin Shah

- Mar 23, 2019
- 2 min read
Overview
In this article, we will talk about how we can register our Power BI application with Azure AD.
There are two ways to register the Power BI application with Azure AD.
Using Power BI portal
Using Azure AD
Before we start, I suggest you look at my first article.
Now, let’s get started,
Register your Power BI Application using Power BI Portal
Register your Power BI Application using Azure AD
Register your Power BI Application using Power BI Portal
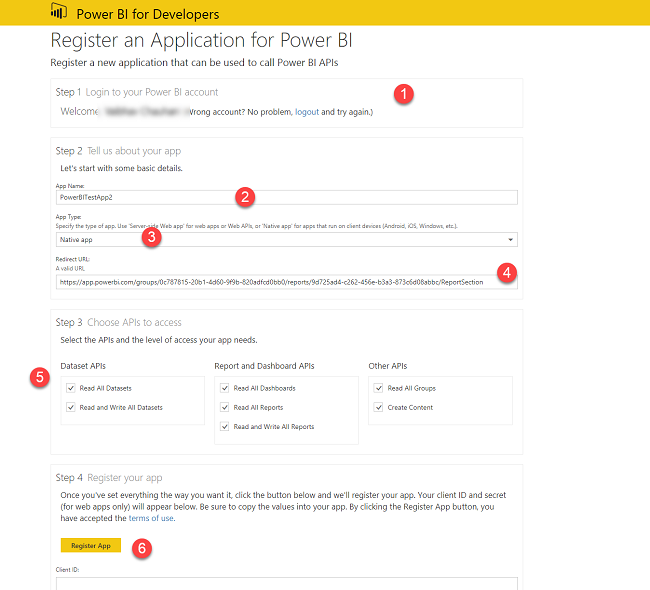
1. Access Power BI portal using the following URL.
https://dev.powerbi.com/apps
2. Sign in with Power BI Pro account
3. Add the following information to your App.
App name = any name of the application
App type = Choose from Server-side Web app or Native app
Redirect URL = Any valid URL for redirection. Here, we will add Report URL as a redirection URL. You can give any URL name like this, http://localhost:80/redirect
Here, we will choose Native app.
Now, there may be a question in your mind, when to use Native app and when to use Web app?
It's simple, when you have app data with your Power BI application, you can go with Native app.
For more details about it, please refer to the the following thread. http://community.powerbi.com/t5/Developer/App-Type-Selection-for-Embedding-content-for-Non-Power-BI-users/m-p/242062#M7562
Choose APIs to access: Select the permissions from the check boxes.
4. Click on Register App. It will generate the Client ID. Copy the Client ID for Future reference.
Register your Power BI Application using Power BI Portal
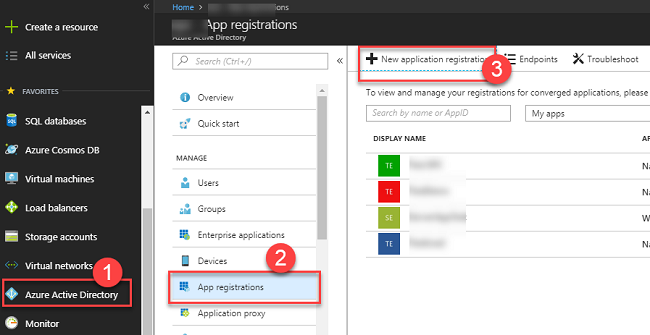
Log in to the Azure Portal using https://portal.azure.com
From the left side, select Azure Active Directory, go to App registration, and click on "New application registration".
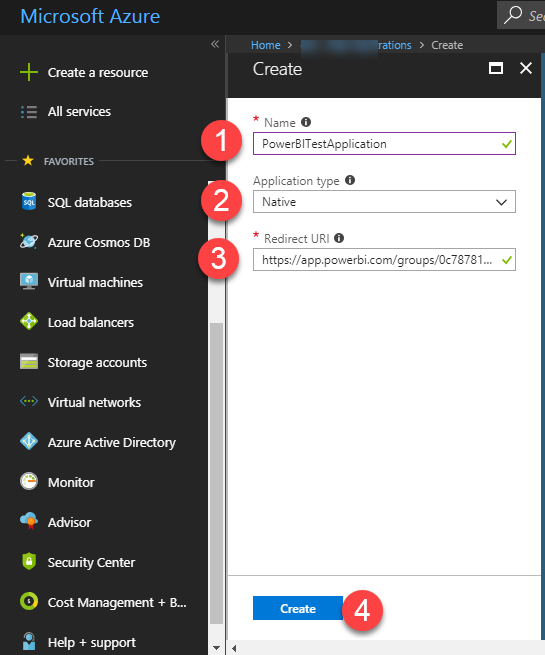
It will ask for the following information,
Name = any name of the application
Application type = Choose from Web app/ API or Native app
Here, we will choose Native app.
Now, there may be a question in your mind, when to use Native app and when to use Web app?
Simple, when you have app data with your Power BI application, you can go with Native app.
For more details about it please refer to the following thread:
http://community.powerbi.com/t5/Developer/App-Type-Selection-for-Embedding-content-for-Non-Power-BI-users/m-p/242062#M7562
Set the redirect URL. It may be any URL. We have set Report URL as Redirect URL. You can give any URL name like this:
http://localhost:80/redirect
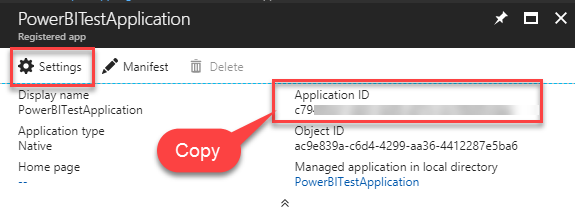
It will create an application in Azure AD. Now, copy the Application ID as shown from the following image. We will use it in the future as a reference.
Now, we need to have the following permissions for the Power BI app in Azure AD.
a. Windows Azure Active Directory
b. Power BI Service
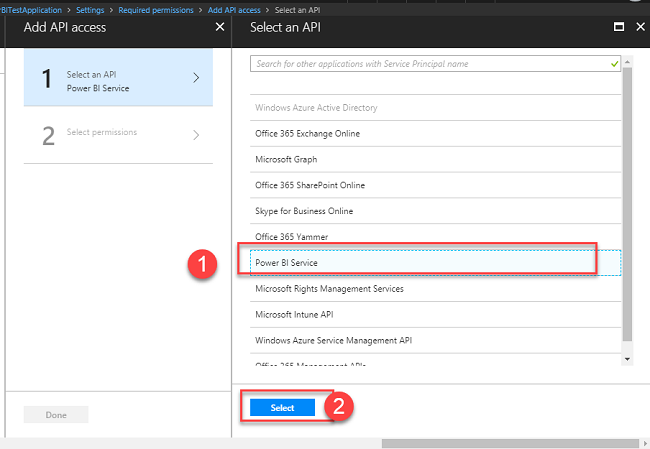
To create and assign new permission, click on Add button. Click on Select API
Choose Power BI Service and click on Select.
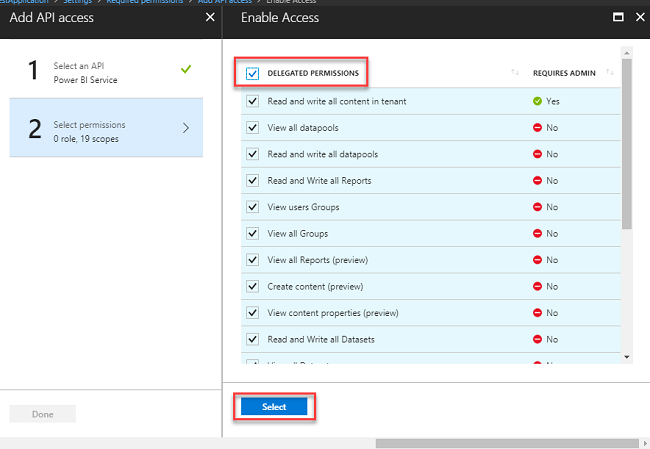
Assign all delegated permissions and click on Select.
For Windows Azure Active Directory, assign all delegate permissions.
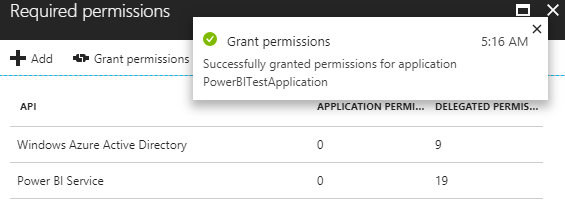
All assigned permissions will look like the following image.
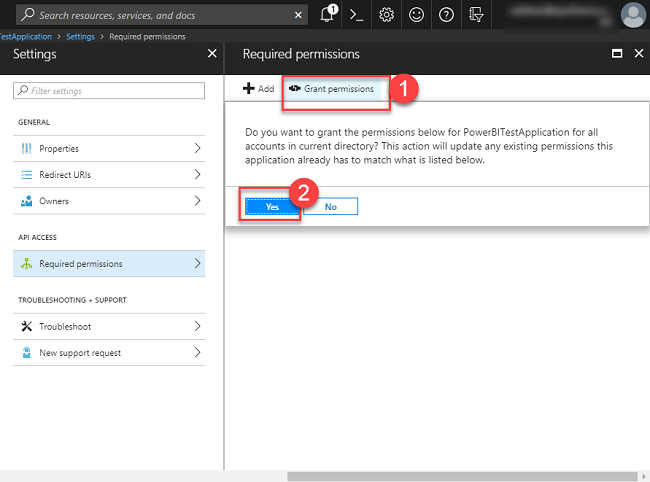
Now, it’s time to grant and assign the permission to already created Power BI application.
From App setting, click on Required Permission and select Grant permissions. Click on Yes.
Conclusion:
This is how we can register an app with Power BI portal and Azure portal. Hope you loved this article!
Stay connected with me!













Comments