
Real-time Streaming with SignalR and Angular
- The Tech Platform

- Jun 30, 2021
- 6 min read
Updated: Oct 13, 2023
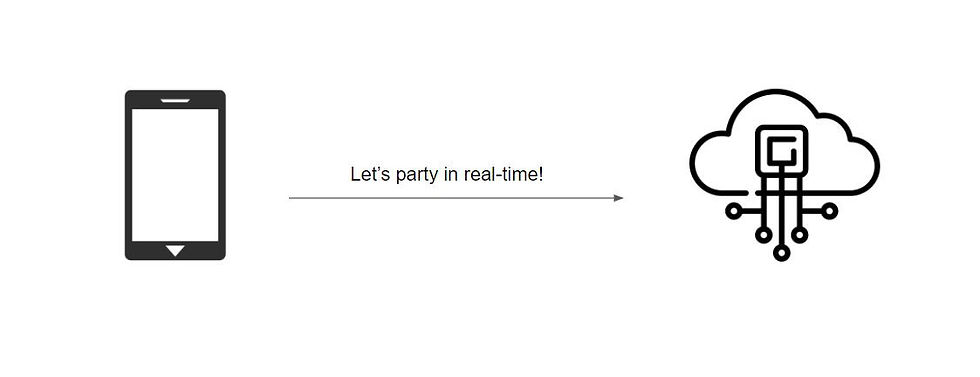
SignalR is a tool that helps web servers and clients communicate in real time. It does this by using a variety of different transports, including WebSockets, Server Sent Events (SSE), and Long-polling. SignalR automatically selects the best transport to use based on the capabilities of the client and server.
When a client connects to a server using SignalR, SignalR will try to establish a WebSocket connection if possible. If a WebSocket connection cannot be established, SignalR will fall back to using SSE or Long-polling.

WebSockets are the best transport for real-time communication because they allow for bi-directional communication between the client and server. This means that the server can send messages to the client at any time, and the client can also send messages to the server at any time.
SSE and Long-polling are older transports, but they are still supported by SignalR for compatibility reasons. SSE and Long-polling both work by having the client periodically poll the server for new messages. This is not as efficient as WebSockets, but it is still a viable option for clients that do not support WebSockets.
Here is an example of how SignalR could be used to implement a real-time chat application:
The client opens a SignalR connection to the server.
The server sends a message to the client to welcome them to the chat.
The client sends a message to the server to say hello.
The server sends a message to all connected clients to say that the client has joined the chat.
When a client sends a message, the server sends that message to all connected clients.
Also Read:

Negotiation process
When a client connects to a server using SignalR, it first goes through a negotiation process. During the negotiation process, the client and server agree on which transport to use. If the client and server both support WebSockets, then WebSockets will be used. If either the client or server does not support WebSockets, then SSE or Long-polling will be used.
SignalR Demo
The SignalR demo you mentioned is a financial screen board that displays real-time data. The demo uses ASP.NET Core SignalR to send and receive data between the client and server.
The demo works by having the client connect to the server using SignalR. Once the client is connected, the server starts sending real-time data to the client. The client then displays the data on the financial screen board.

SignalR Server Configuration
To configure a SignalR server in ASP.NET Core, you need to:
Create an ASP.NET Core web application.
Configure SignalR in the Startup.cs file.
Create a SignalR hub.
Create SignalR Client Library
Grid Data Binding
STEP 1: Create ASP.NET Core App
Open Visual Studio.
Go to File >> New Project.
Choose "ASP.NET Core Web Application" and follow the setup process.
If you encounter any configuration difficulties, refer to the official Microsoft documentation tutorial for guidance.

STEP 2: SignalR Config Setup
In the Startup.cs file, make the following changes:
// Inside the Configure method
app.UseEndpoints(endpoints =>
{
    endpoints.MapControllers();
    endpoints.MapHub<StreamHub>("/streamHub");
});

// Inside the ConfigureServices method
services.AddSignalR(options =>
{
    options.EnableDetailedErrors = true;
});
In the launchSettings.json file:
"profiles": {"WebAPI": {"commandName": "Project","launchBrowser": false,"applicationUrl": "https://localhost:5001;http://localhost:5000","environmentVariables": {"ASPNETCORE_ENVIRONMENT": "Development"}}}To enable CORS, modify the Startup.cs class:
public void ConfigureServices(IServiceCollection services)
{
    services.AddCors(options =>
    {
        options.AddPolicy("CorsPolicy", builder => builder
            .AllowAnyMethod()
            .AllowAnyHeader()
            .AllowCredentials()
            .WithOrigins("http://localhost:4200"));
    });
    // ...
}

public void Configure(IApplicationBuilder app, IWebHostEnvironment env)
{
    // ...
    app.UseCors("CorsPolicy");
    // ...
}
If you encounter issues with enabling Cross-Origin Resource Sharing, consult the official Microsoft documentation.
STEP 3: SignalR Hub Setup
A SignalR hub is a critical component of the SignalR library in ASP.NET. It serves as a communication center that enables real-time, bidirectional communication between a server and connected clients. SignalR hubs provide a high-level programming model for sending messages to clients and receiving messages from clients.
Key Concepts:
Methods on Hub: In a SignalR hub, you define methods that can be called by both the server and connected clients. These methods can be invoked by name, and they serve as the primary means of communication. In essence, you define a set of actions that the server and clients can perform.
Invocation: Invocation is a core concept in SignalR. It means calling methods on a hub. You can invoke a hub method from the server to communicate with clients, or you can invoke methods on the hub from the client side to communicate with the server. This bidirectional communication allows you to create interactive and real-time web applications.
Clients and Hub: The hub acts as an intermediary between the server and connected clients. You can use the hub to broadcast messages to all clients, specific clients, or individual clients. For example, you can broadcast a message to all clients using Clients.All. You can also communicate with a single client, known as the "Caller," because they initiated the communication.

StreamHub Example:
In the provided example, a StreamHub class is created, inheriting from the base Hub class. This class is responsible for managing connections, groups, and messaging in the SignalR application.
Statelessness: It's important to note that the hub class is stateless. Each invocation of a method on the hub creates a new instance of the hub class. This means that you shouldn't store state in instance properties of the hub. Instead, it's recommended to use static properties or external data storage to maintain state for connected clients.
Useful Properties and Methods:
Clients: This property provides access to connected clients and allows you to target specific clients for communication.
Context: The Context property provides information about the current connection, including details like the ConnectionId, which is unique to each client. This allows you to identify and interact with individual clients.
Groups: SignalR allows you to organize clients into groups, making it easier to send messages to multiple clients at once.
Key Methods:
OnConnectedAsync(): This method is called when a new connection is established with the hub. You can use it to perform any necessary setup or initialization when a client connects.
OnDisconnectedAsync(Exception): This method is called when a connection with the hub is terminated or disconnected. You can use it to perform cleanup or additional logic when a client disconnects.
UpdateParameters Method: In the provided example, there's an UpdateParameters method that accepts a connection ID from the Context. It's used to send data back to the client at a certain interval. This method demonstrates how you can use the unique ConnectionId to target specific clients.
They allow us to perform any additional logic when a connection is established or closed. In our application, we’ve also added UpdateParameters method that gets a Context connection ID and uses it to send back data at a certain interval. As you can see we communicate over a unique ConnectionID which prevents a streaming intervention from other Clients.
Create a StreamHub class that inherits from the Hub class. Implement methods for communication with clients:
public class StreamHub : Hub
{
    // Add methods for communication with clients
    // Example: OnConnectedAsync, OnDisconnectedAsync, UpdateParameters
    // ...
    public async Task Send(FinancialData[] array, IClientProxy client, string connection)
    {
        await client.SendAsync("transferdata", array);
    }

    public override Task OnDisconnectedAsync(Exception exception)
    {
        // Handle disconnection
        // ...
        return base.OnDisconnectedAsync(exception);
    }
}
In your client application, register events to listen to messages from the server:
// Inside your Angular component
private registerSignalEvents() {
    this.hubConnection.onclose(() => {
        this.hasRemoteConnection = false;
    });
    this.hubConnection.on('transferdata', (data) => {
        this.data.next(data);
    });
}
STEP 4: Create SignalR Client Library
Create an Angular project and install SignalR:
npm install @microsoft/signalrIn your Angular app, you can use a SignalRService to connect to the SignalR hub. Here's a simplified version of the service:
import { HttpClient } from '@angular/common/http';
import { signalR, HubConnection } from '@microsoft/signalr';
import { BehaviorSubject, NgZone } from '@angular/core';

export class SignalRService {
    public data: BehaviorSubject<any[]>;
    public hasRemoteConnection: boolean;
    private hubConnection: HubConnection;

    constructor(private zone: NgZone, private http: HttpClient) {
        this.data = new BehaviorSubject([]);
    }

    public startConnection = (interval = 500, volume = 1000, live = false, updateAll = true) => {
        this.hubConnection = new signalR.HubConnectionBuilder()
            .configureLogging(signalR.LogLevel.Trace)
            .withUrl('https://localhost:5001/streamHub')
            .build();

        this.hubConnection
            .start()
            .then(() => {
                this.registerSignalEvents();
                this.broadcastParams(interval, volume, live, updateAll);
            })
            .catch(() => {
                // Handle connection error
            });
    }

    public broadcastParams = (frequency, volume, live, updateAll = true) => {
        this.hubConnection.invoke('updateparameters', frequency, volume, live, updateAll)
            .then(() => console.log('requestLiveData', volume))
            .catch(err => {
                console.error(err);
            });
    }

    private registerSignalEvents() {
        this.hubConnection.onclose(() => {
            this.hasRemoteConnection = false;
        });

        this.hubConnection.on('transferdata', (data) => {
            this.data.next(data);
        });
    }
}
STEP 5: Grid Data Binding
In your Angular app component, you can use the data observable to bind data to your grid component:
constructor(public dataService: SignalRService) {}

public ngOnInit() {
    this.dataService.startConnection(this.frequency, this.dataVolume, true, false);
    this.dataService.data.subscribe(data => {
        // Update your grid with new data
    });
}
This setup will enable your ASP.NET Core SignalR application and Angular client to communicate in real-time. The server sends data updates to the client, which updates the grid with the new data.


Comments