
Protecting Office 365 SharePoint Data on Microsoft Flow
- Nakkeeran Natarajan

- Feb 18, 2019
- 2 min read
Updated: Mar 29, 2019
Here, let us look how we can protect the Office 365 SharePoint application data on Microsoft Flow. Microsoft Flow is used for connecting multiple services and applications. The data flows between multiple platforms, with the help of Microsoft Flow.
Imagine there are business critical data available on SharePoint and your organization doesn’t let data to move out of its controlled systems. As administrator, you can build environments and restrict the data flow with the help of Data Loss Prevention (DLP) policies.
DLP policies are created to restrict the data flow between business connectors and non-business connectors. The restrictions are made with help of data groups. The Data groups are of two types, Business data only and No business data allowed. The connectors can be added to these two data groups.
If you don’t want data to be available on social media platforms like Facebook or twitter, you can keep the social media connectors on “No business data allowed” group. The restriction cannot be made just for social media connectors; it can be applicable to any connector, if the connector is not listed under “Business data only” data group.
For the data loss prevention scenarios, let us create an environment on Microsoft Flow platform and create a new policy to protect the SharePoint data. Then we can categorize the connectors for testing DLP policy.
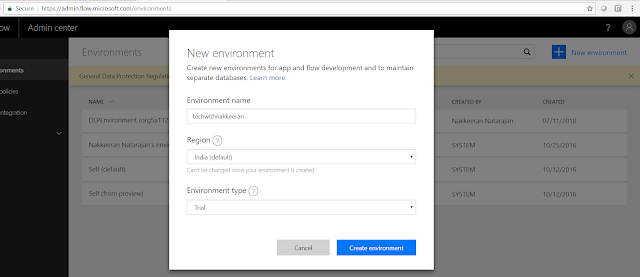
Creating Environment for DLP
From the Microsoft Flow portal, navigate to admin center using the settings on the top bar. Click on Environments from left navigation on the admin center. Create the new environment by inputting necessary details. While creating, it generally asks for creating database. You can create the same.

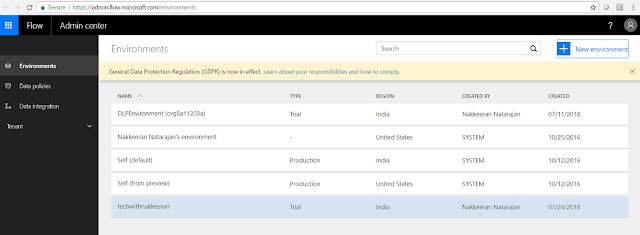
So now we have created the environment.
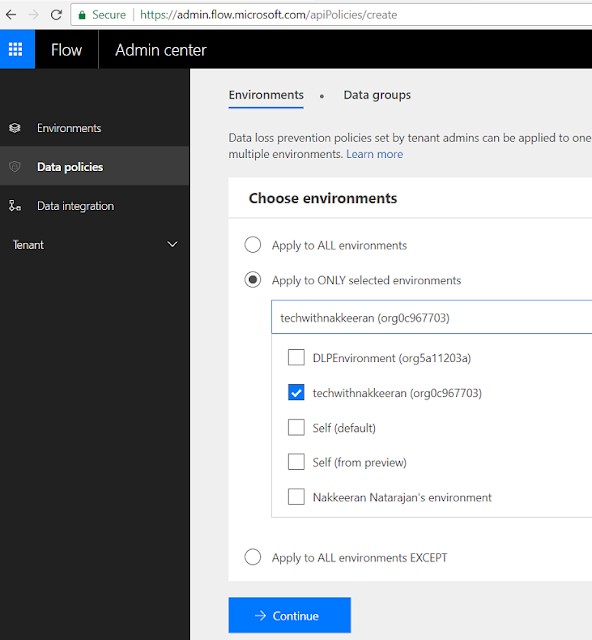
Creating DLP Policy
Navigate to Data Policies from left navigation on the admin center. Create a new policy. The new policy can be only applied to the required environments. While creating a policy, you can select the required environments. In this case, I am selecting the environment we have created in the previous section.

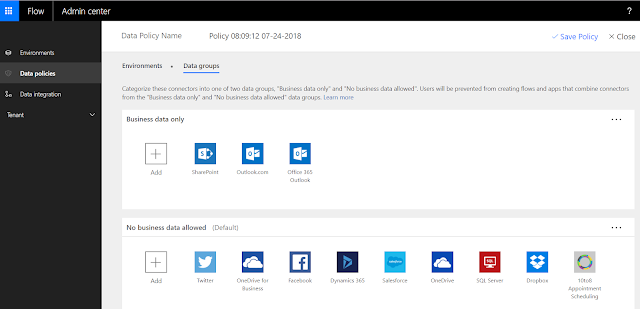
Click on continue to categorize the connectors into data groups. I keep just two connectors on “Business data only” group. And the rest all connectors (including social media connectors like Facebook, twitter, etc.) are listed under “No business data allowed” group. This means data can only moved between two connectors selected. Save policy.

Testing the DLP policy
Go to Microsoft Flow portal https://flow.microsoft.com
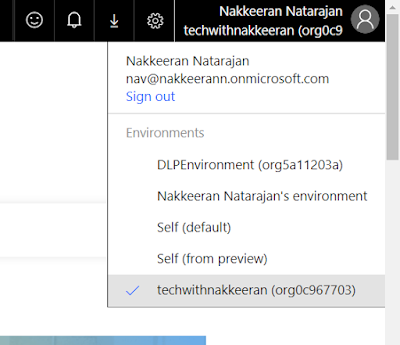
Change the environment by clicking on the user name on top right to custom environment created.

Go to My Flows tab and create flow from blank template.

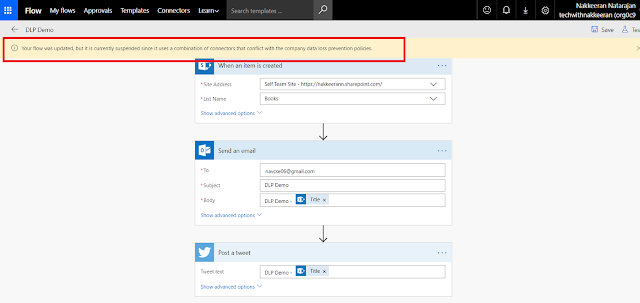
Let us think of example, where developers who are not aware of DLP policy goes creates a flow on a business logic “Whenever an item is created on SharePoint, send an email with item title and publish the data on to twitter as a tweet”.

Any such logic created will be suspended, until the connectors listed under “no business data allowed” data group are removed. In this case, twitter connector needs to be removed. (After removal, wait for some time and go back to turn on the flow)
But when you remove the twitter connector from the flow created, flow becomes active and it will be triggered whenever an item is created.

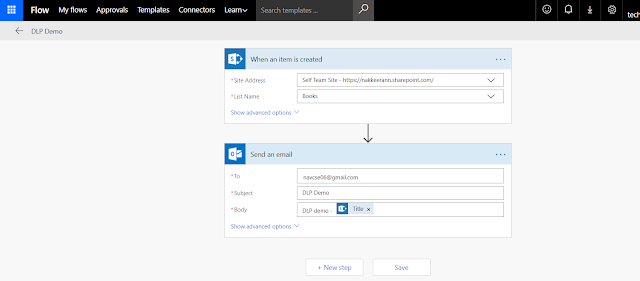
This way we are making sure of any business data loss with in the Microsoft Flow.


Comments