
NoSQL: Environment Setup & Installation on Windows
- The Tech Platform

- Nov 27, 2020
- 4 min read
In this part of this article’s series, we are going to install and set up all the necessary programs to make things work with MongoDB in a windows environment. I will directly provide you with links to download everything in order to make the process easier.
Installing the database
First, let’s start by going to the official: MongoDB page
You will find yourself on the database official website’s homepage
If you scroll the page a little you will see a button that says: Try MongoDB for free


Click on that button in order to open the next page, this page will show up the different versions of MongoDB that you can download.
Be careful to correctly select the community server edition and to click on the Windows installation tab.
At this point, you can start the download of the installer by clicking on the download package button.
By the time you have initialized the download, a registering form should have appeared on your page, but you can skip that if you want since it’s not mandatory to complete it.


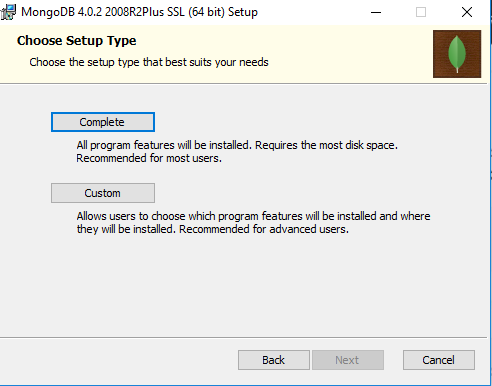
Once you’ve got the installer, just click on it and start the proper downloading process by selecting the complete download option.

Setting up our local machine for MongoDB
Unluckily, we are still not done with the installation process, To continue, we will need to make some last set up touches. The steps that we are going to follow from now on are mentioned here on the installation page of MongoDB.
As mentioned by the documentation, what we have done now was useful just to install MongoDB.
But we still have one missing piece :
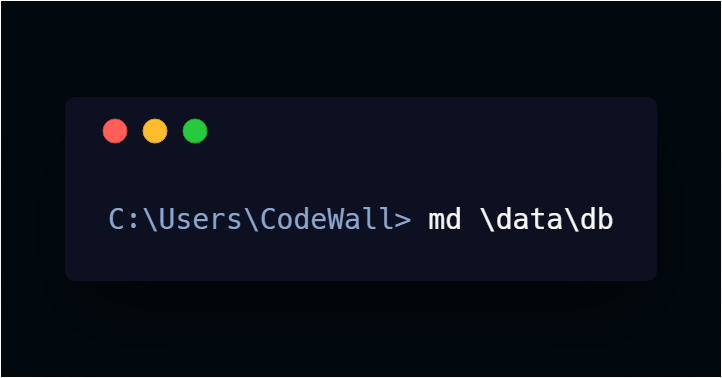
In fact, the database itself requires us to provide an actual location on our local machine to store the data that we will memorize inside of it. These data will be put in a folder called \data\db. And by chance, you don’t already have that folder on your local operating system. So:
Start the command prompt
Create the folder by typing in the command :

Starting up the MongoDB server
Now we need to start up the MongoDB server. To do this, you can refer the command shown in the Start your MongoDB database section on the page that I have linked to you previously. But for simplicity, I will provide you the command here:
"C:\Program Files\MongoDB\Server\4.0\bin\mongod.exe"Execute this command from the command line but please remember:
Whenever you will be working with MongoDB following this course, don’t forget to run this command! So if you turned off your machine and now want to start using MongoDB again, remember to start it first by using this command. You will only need to use it once before start working, and from that moment you will be good to go!
To this purpose, my advice will be for you to memorize this string somewhere on your machine so that you can have it easily ready to use.
Important note from the future
If you are reading this article months away from when it was first published, then probably the MongoDB environment got some changes, and so the version number on your server starting command will look something different based on the current version. To correctly use the command, refer to the link provided earlier on the page in the Start your MongoDB database section.
Or you can also check the version manually by going to:
C:\Program Files\MongoDB\ServerYou will be able to see a directory with a number on it representing the version number of the database installed on your local machine and adjust the command properly.
A companion tool : RoboMongo:
Now that we have everything set up for MongoDB, we will install another little tool called RoboMongo. This tool will help users visualize the data that are sitting inside our database.
To do this, follow along with these steps:
Go to the download section of this: website
Click on the: download Robo3t button and select the version of RoboMongo that you prefer ( you will have the choice for a portable version that will just give you the installer or for the complete version that will provide you with start menu and cool stuff like that ) and download the installer.
Once you are done, extract the files that you have downloaded and start the RoboMongo.exe file
Follow the installation wizard and complete the download
At the end of this process, you should have a window open that looks like this:


To establish a new connection to the local database that we just setup follow these steps:
Go to the file menu on the top left of the RoboMongo window
Select connect
Click on the create link button on top of the new window that appears.


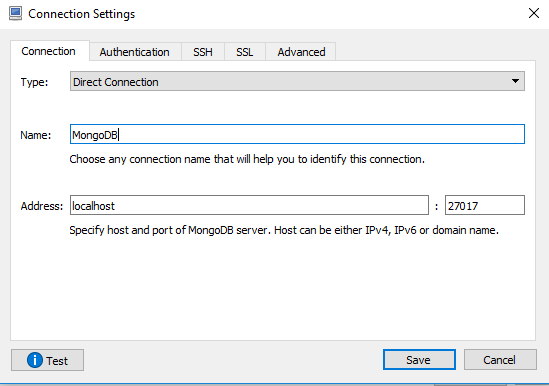
A database connection creation form will open, follow the steps:
Leave the Address as it is and change the name if you want
Click on the save button
Now select this new connection and click on the connect button

We are done!
And we are done also for this step! Now you will have all of your configurations properly set up and you are finally ready to start using MongoDB. In the next sections, we are going to introduce the basics of this database and we will also write our first lines of code! But just before that, I will be following up this article with a guide for Mac users so there is no head-scratching when following my series!
Source: Paper.li


Comments