
How to Setup Multiple Monitors on Windows 11
- The Tech Platform

- May 27, 2022
- 2 min read
Updated: Mar 23, 2023
The main benefit of using multiple monitors is that it gives you more screen space to get work done. Think about how many times you open new tabs and windows on your computer while working. You then constantly switch between the ones you are working on and the ones you are using for research, which is quite time-consuming.

Multiple monitors help you maintain focus while facilitating communication and creativity. You can use your primary screen to focus on important tasks, and only break this focus to glance at your secondary screen when anything important comes up. Occasionally, you might even want to watch something on Netflix on the horizontal screen while you wrap up work on your vertical display.
Steps to Setup Multiple Monitors
Step 1. Connect the Second Monitor
Check the type of connection that you might need to connect the second monitor. Find out if your computer supports VGA or HDMI. You might need a splitter, depending upon your requirements.
Once you connect the cables, turn the monitor on. At this point, if Windows 11 detects the new monitor, it will notify you and the second monitor will mirror your main display by default.
If it does not detect it automatically, follow the steps mentioned below:
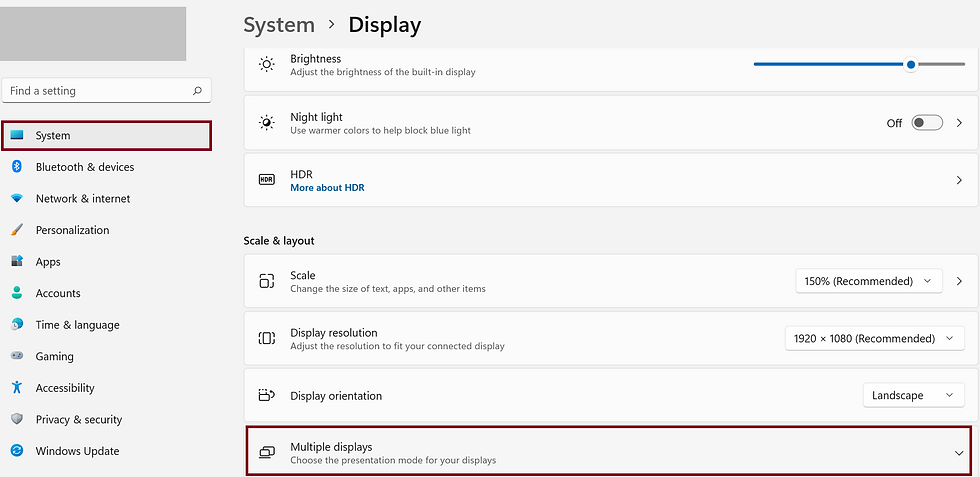
Launch Windows Settings and select System from the left pane.
Click on Display on the right side of the window.
Check if all the displays appear in the Display window. If one is missing, then expand the Multiple displays section and click on the Detect button.
If one of the displays is still missing, recheck the connections, restart the computer, and use the above steps again.
Step 2. Select the Main Display
Once the second monitor has connected successfully, it is time to choose the main display. The primary display will be your main workplace where Windows will display all the settings.
By default, when you add another monitor to your system, Windows selects the first monitor as the primary display. However, you can change this setting as per your requirements.
Follow these steps to choose a primary display:
Launch Windows Settings and select System from the left pane.
Click on Display on the right side of the window.
Select the preferred display and checkmark the box associated with Make this my main display option.
Step 3. Choose a Viewing Mode
Windows 11 offers the following 4 viewing modes for multiple monitors:
PC screen only - only your main display will be used.
Display - the secondary screen will mirror the display of your primary display.
Extend - the second screen will be an extension of the first screen, which is perfect for times when you want to work on a larger-than-usual screen.
Second screen only - only your secondary screen will be used.
To choose a viewing mode, press Win + P keys simultaneously to launch the Project feature. Simply select your preferred mode from the floating widget.
Alternatively, you can also choose a viewing mode from Windows 11 settings. Follow these steps if you wish to make the changes via Settings:
Launch Windows Settings and select System from the left pane.
Click on Display on the right side of the window.
Select the display that you wish to customize and expand the drop-down menu on the bottom right. Choose your preferred option from the list.
The Tech Platform


Comments