
Migrate data to Azure using AzCopy
- The Tech Platform

- Dec 24, 2020
- 2 min read

What is AzCopy? AzCopy is a Command Line utility that provides the capability of migrating the files from local on premises system to Azure storage account and move files in between the storage account such as copying files from a blob to another blob.
In this article, I’ll be focusing on migration data files from local system to Azure Blob storage with AzCopy Utility. So let’s begin…
Step 1: Download the AzCopy latest version v10 from below link : https://docs.microsoft.com/en-us/azure/storage/common/storage-use-azcopy-v10
Since, this is an executable file it does not require installation, just unzip and place within the suitable directory of the local system. It is available for Windows, Linux & Mac OS.
Step 2: Setup the System Path variable in Environment Variables settings to the directory where executable file is placed in local directory.

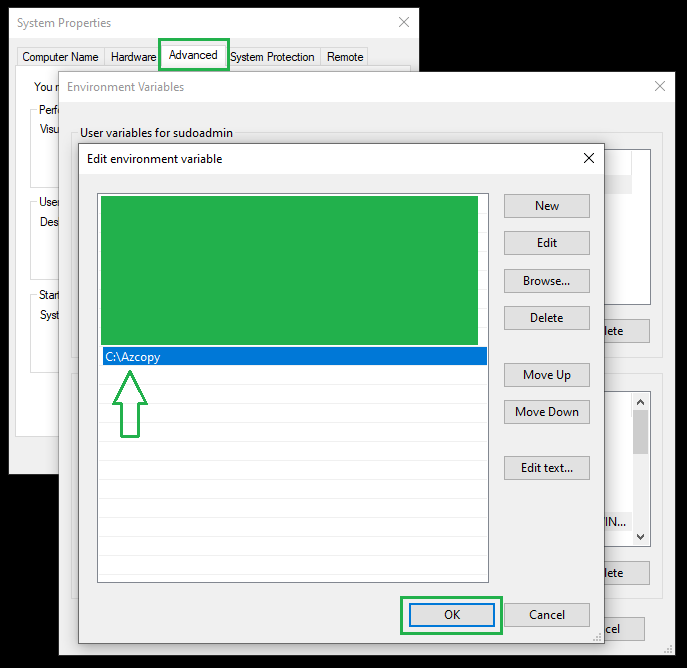
Environment Variable Settings
Step 3: Next step is to login using Azure Active Directory (AAD) from CMD. Another option is to login via Shared Access Signature (SAS) token.
We will go for option 1 i.e. using Azure Active Directory. It is very essential to note the appropriate roles are assigned (RBAC) to the users who are accessing the blob content.
To upload the files, it is necessary to have one of the among roles mentioned below:
Storage Blob Data Contributor.
Storage Blob Data Owner.
2. To allow only to download files, then following role should be assigned.
Storage Blob Data Reader.
Note: To summarize — it is mandatory to manage roles as per the needs. Without proper roles assigned you may run into issues or end up granting the unauthorized access to storage account.
Open cmd and enter the following command to connect to Authenticate via AAD.
azcopy login — — tenant-id “<tenant-id>”
Here, replace the <tenant-id> placeholder with the actual tenant Id of your organization in which your storage account resides. This will output a URL and code, open the link in the browser it will open a window to enter the received code.


Login to Azure Account using secret code

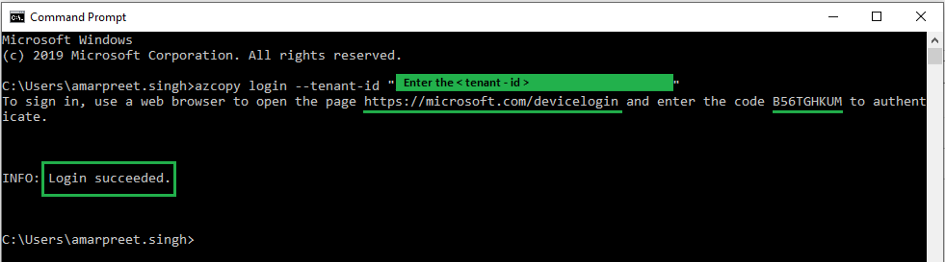
Login Succeeded!
Step 4: After successful login, enter the following command to copy files from local directory to Azure Blob Container.
azcopy copy “<URL-local-directory-path>” “<Azure-Blob-Storage-URL-with-destination-directory>”
Replace the placeholders with the appropriate URL information. If you want to copy all the sub folders from within the directory, append “ — — recursive” flag to the above URL. It will take some time to copy all the files depending on the file size.

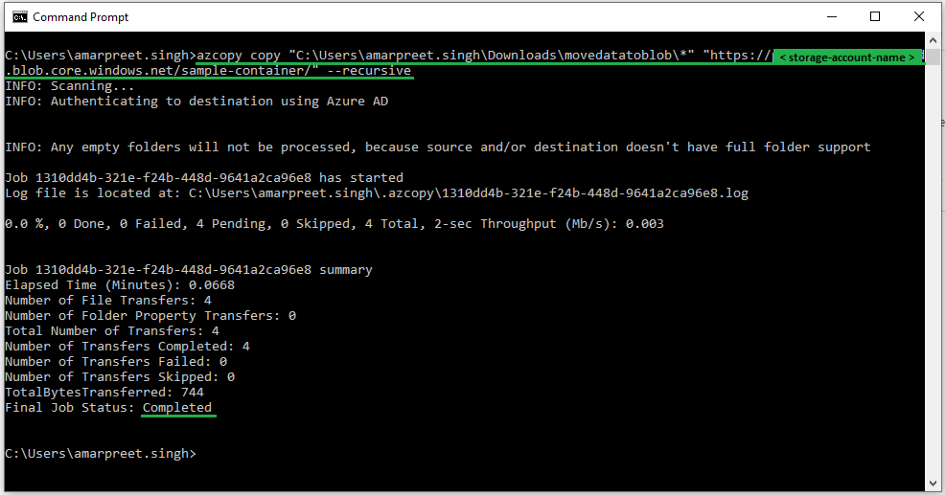
File Transfer Completed!
Finally, all the files are copied to the Azure Blob storage account. In the above image, we can see the entire summary of the executed job. In this example I had following .csv files on my local system to be migrated to Blob,
Test data table 1.csv
Test data table 2.csv
Test data table 3.csv
New_Directory (sub-folder)
Test data table 4.csv
Since I had sub folder “New_Directory” in my main folder, I had used “- — recursive” in the command all the 4 files mentioned in above list.

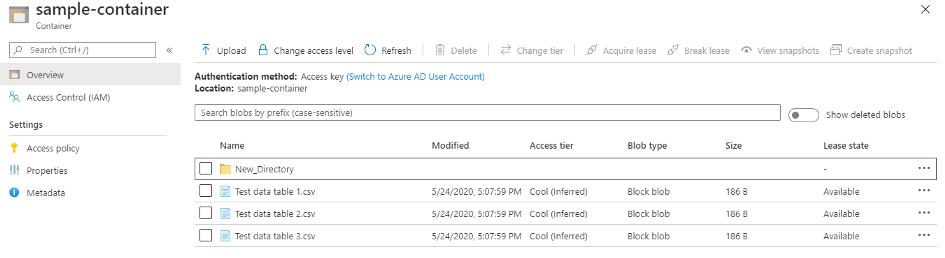
Files Copied in Blob Container.
You can verify the files by switching back to Blob Container, here’s the image of the copied .csv files and sub directory in the storage container.
Source: Medium
The Tech platform


Comments