
How to trigger a Microsoft Flow from Power Apps form?
- The Tech Platform

- Mar 13, 2019
- 2 min read
Updated: Mar 20, 2024
Microsoft Power Apps and Power Automate (formerly known as Microsoft Flow) are powerful tools that allow you to create custom applications and automate workflows. One common scenario is triggering a Flow from a Power Apps form. By doing so, you can seamlessly integrate your app with backend processes, such as sending emails, updating records, or performing other actions.
In this guide, we’ll walk through the steps to set up a button in your Power Apps form that triggers a specific Flow.
How to trigger a Microsoft Flow from Power Apps form
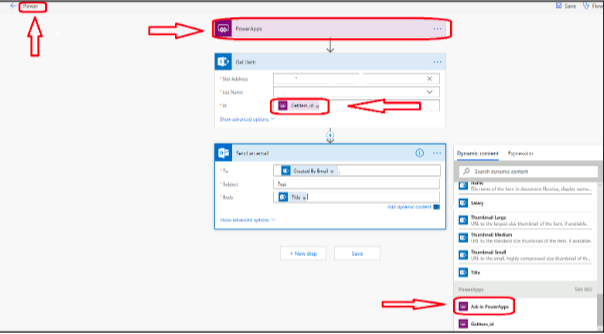
STEP 1: Create the Microsoft Flow
Begin by creating a new Microsoft Flow that you want to trigger when a button is clicked in your Power Apps form.
Choose the “Blank Template” to create a new flow.
Set “Power Apps” as the trigger for the flow.
In the “Get item” block, provide the “Site Address” and the “List Name.” For the ID, select “Ask in Power Apps,” which will create a Power Apps variable called “Getitem_id” that will be passed by Power Apps.
Rename the flow to something convenient for your design.

STEP 2: Add a Button in Power Apps
Open your Power Apps app. Add a new button to your screen and rename it as needed.
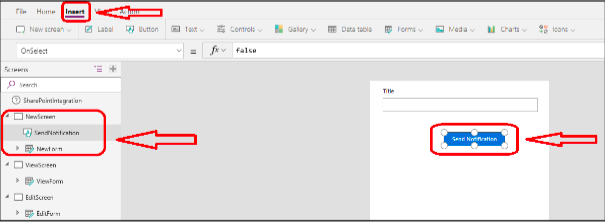
STEP 3: Configure the Button Click Event
Select the button, and in the top navigation, choose the “OnSelect” event.
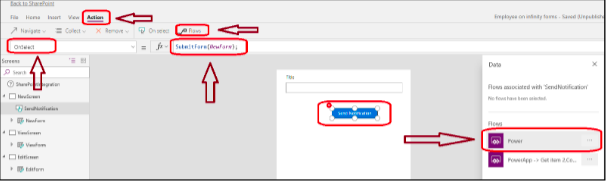
In the “OnSelect” event, add the following value: SubmitForm(NewForm). This will save the form data.
Use a semicolon (;) to separate multiple statements.
Still in the top navigation, select “Action,” then choose “Flow.”
From the right navigation, select the flow that you want to trigger.
STEP 4: Pass the Item ID to the Flow
After adding the flow, it will require the item ID to pass to the method. The ID can be found using the formula: NewForm.LastSubmit.ID (for the “NewForm”) or EditForm.LastSubmit.ID (for the “EditForm”).

STEP 5: Save and Publish the Form
Once all the setup is ready, save your Power Apps form. To reflect the changes in the list form, follow these steps:
Click “File” in the top navigation.
Click “Save.” The “Publish to SharePoint” button will become visible.
Click “Publish to SharePoint.”

By following these steps, your Power Apps form will save the item and trigger the specified flow.


Comments