How to Localize Content Types in SharePoint 2010 Using Visual Studio 2010
- Vijai Anand Ramalingam

- Mar 1, 2019
- 2 min read
Updated: Mar 18, 2019
Introduction
In this article you will be seeing how to localize content types in SharePoint 2010 using Visual Studio 2010.
Steps Involved
The following steps must be performed to localize the content types in SharePoint 2010 using Visual Studio 2010:
Create Empty SharePoint Project
Create Resource files
Add Content Type
Deploy the solution
Test the Localized content type
Create Empty SharePoint Project
Open Visual Studio as administrator.
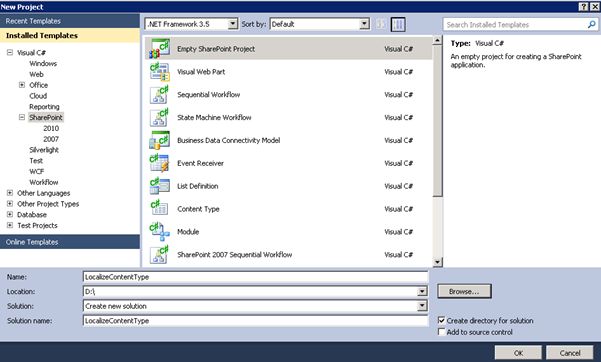
Go to File, select New and then click on Project.
Select Empty SharePoint Project from the installed templates.
Enter the Name as LocalizeContentType and then click on Ok.
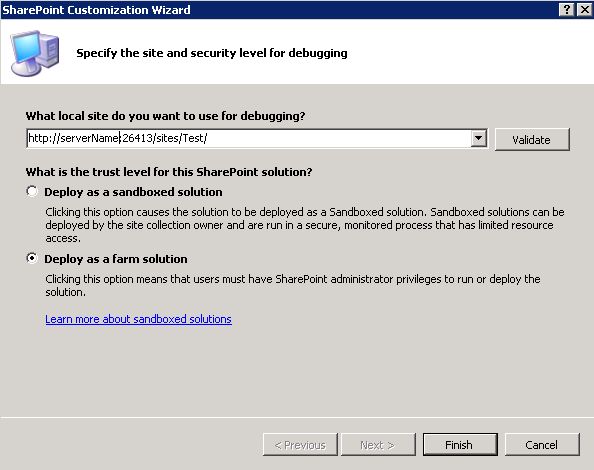
Enter the site URL and select "Deploy as farm solution".
Click on Finish.
Create Resource files
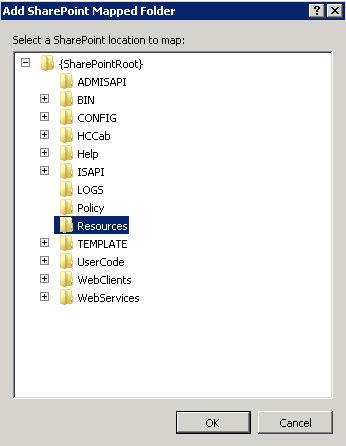
Right-click on solution, select Add and then click on the SharePoint Mapped Folder.
Select the Resources folder and then click on Ok.
Right-click on the Resources folder, then select Add and click on New Item.
Select the Resources File template from the installed templates, name it as LocalizeContentType and then click on Ok.
Double-click on LocalizeContentType.resx and add the following name and values.
Similarly add one more resource file for the French language, name it as LocalizeContentType.fr-FR.resx and add the following name & values:
The Resources folder looks like the following:
Add Content Type
Right-click on solution, select Add and then click on New Item.
Select the Content Type template from the installed templates, name it LocalizeContentType and then click on Ok.
3. Double-click on Elements.xml and replace with the following:
<?xmlversion="1.0"encoding="utf-8"?> <Elementsxmlns="http://schemas.microsoft.com/sharepoint/"> <!-- Parent ContentType: Item (0x01) --> <ContentTypeID="0x01000188a30d01ae4607bbe5800bbbaf2550" Name="$Resources:LocalizeContentType,ContentTypeTitle" Group="Custom Content Types" Description="$Resources:LocalizeContentType,ContentTypeDescription" Inherits="TRUE" Version="0"> <FieldRefs> </FieldRefs> </ContentType> </Elements>
Deploy the solution
Right-click on solution and click on Deploy.
Test the Localized content type:
Navigate to the site, click on Site Actions.
Click on Site Settings.
Click on Site Content Types under Galleries section.
Select Custom Content types from the Show Group drop down.
You could be able to see new content type created under Custom Content Types (Will be in English which is the default language for the site).
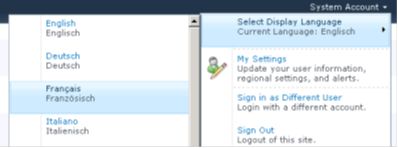
6. Change the language to French and you could be able to see the localized content types as shown in figure:
Note: Make sure the language packs are installed in the SharePoint server.
Summary
Thus in this article you have seen how to localize content types in SharePoint 2010 using Visual Studio 2010.


Comments