
How to disable IPv6 protocol in Kali Linux
- The Tech Platform

- Jun 8, 2021
- 2 min read
Internet Protocol version 6 (IPv6) is the latest version of the Internet Protocol (IP), a system that provides identification and location for computers on the network and routes traffic over the Internet. IPv6 was developed in 1998 and is used to replace the IPv4 protocol.
IPv6 is designed to improve security and performance while ensuring that we don’t exhaust IP addresses. It assigns a unique address globally to each device and stores it in 128-bit form, while IPv4 has only 32 bits. Although the goal of IPv6 is to replace IPv4, there is still a long way to go. For now, only about 30% of websites or users on the Internet can use IPv6 connections, and IPv6 can also cause problems for some applications.
If the IPv6 protocol is enabled, you should be able to see

If for some reason you want to completely disable the IPv6 protocol in your Kali Linux system, here is the way to disable IPv6 protocol in Kali Linux.
Disable IPv6 Protocol via GRUB
Edit the /etc/default/grub configuration file
Modify GRUB_CMDLINE_LINUX_DEFAULT and GRUB_CMDLINE_LINUX to disable IPv6 at startup

GRUB_CMDLINE_LINUX_DEFAULT=”quiet splash ipv6.disable=1″ GRUB_CMDLINE_LINUX=”ipv6.disable=1″
To make the settings take effect, run command below update-grub
Disable IPv6 protocol via Sysctl
To temporarily disable IPv6, you only need to execute the following 3 commands in the Terminal:
sysctl -w net.ipv6.conf.all.disable_ipv6=1 sysctl -w net.ipv6.conf.default.disable_ipv6=1 sysctl -w net.ipv6.conf.lo.disable_ipv6=1
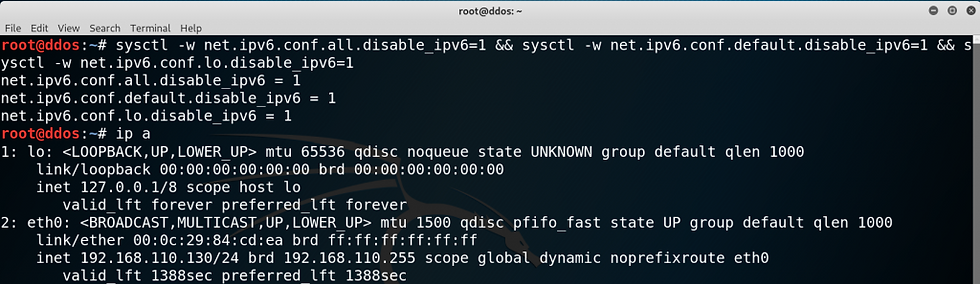
The above command only temporarily disables the IPv6 protocol in the Kali Linux system. After the restart, the system will automatically enable IPv6 again.
To permanently disable IPv6 on your Kali Linux system, you can modify the /etc/sysctl.conf file with your editor. Add the following 3 lines to the /etc/sysctl.conf configuration file:
net.ipv6.conf.all.disable_ipv6=1 net.ipv6.conf.default.disable_ipv6=1 net.ipv6.conf.lo.disable_ipv6=1
To make the settings take effect, run command below
sysctl -p
Source: Windowsclub
The Tech Platform


Comments