
How to deploy a WSP using PowerShell in SharePoint 2010
- Vijai Anand Ramalingam

- Feb 20, 2019
- 1 min read
In this article we will be seeing how to deploy a wsp file using Power Shell in SharePoint 2010 and how to install, activate, deactivate and uninstall the features.
Steps Involved:
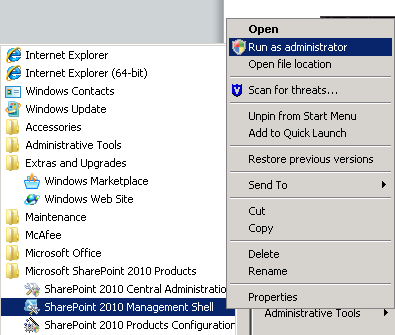
Go to All Programs => Microsoft SharePoint 2010 Products =>SharePoint 2010 Management Shell =>Run as administrator.
Adding the solution:
Add-SPSolution "C:\Users\sjfa\Desktop\WSPTest\WSPTest\bin\Debug\WSPTest.wsp"
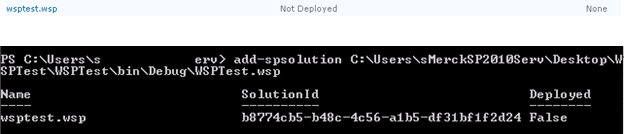
You have successfully added the solution; it gives the Name, Solution Id and Deployed status of the wsp file.
The Deployed status is false, we have just added the wsp file but not deployed.
Deploying the solution:
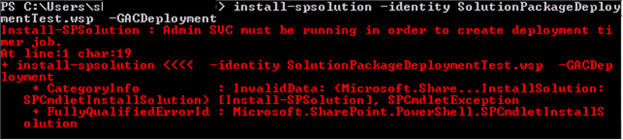
Install-SPSolution -identity "WSPTest.wsp" –GACDeployment

Sometimes when you install the solution you may get the following error.
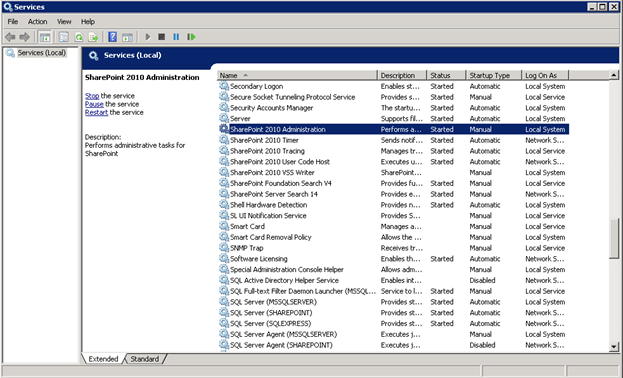
How to resolve this:
Go to Run.
Type services.msc.
Services window will open.
Start SharePoint 2010 Administration service.
Retracting the Solution:
Uninstall-SPSolution -identity "WSPTest.wsp"
Removing the solution:
Remove-SPSolution -identity "WSPTest.wsp"
Installing the feature:
Install-SPFeature "C:\Program Files\Common Files\Microsoft Shared\Web Server Extensions\14\TEMPLATE\FEATURES\WSPTest_WSPContentTypeFeature"

Where "C:\Program Files\Common Files\Microsoft Shared\Web Server Extensions\14\TEMPLATE\FEATURES\WSPTest_WSPContentTypeFeature" is the Folder Name Path.
Activating the feature:
Enable-SPFeature -Identity "GUID" -Url "http://servername:2010"
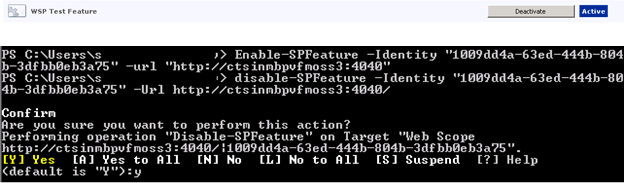
Deactivating the feature:
Disable-SPFeature -Identity "GUID" -Url "http://servername:2010"

Uninstalling the feature:
Uninstall-SPFeature -Identity "GUID"


Comments