How to Create NINTEX Form in SharePoint 2013 Online
- Vijai Anand Ramalingam

- Mar 5, 2019
- 1 min read
Updated: Mar 18, 2019
In this article you will see how to create a NINTEX form in SharePoint 2013 Online.
I have created a custom list named “Employee Details” that has the following columns:
Create NINTEX Form
Navigate to the Office 365 site (https://c986.sharepoint.com/).
Click on the Employee Details link in the Quick Launch bar.
Click on the List tab and then click on the NINTEX Forms button in the ribbon interface.
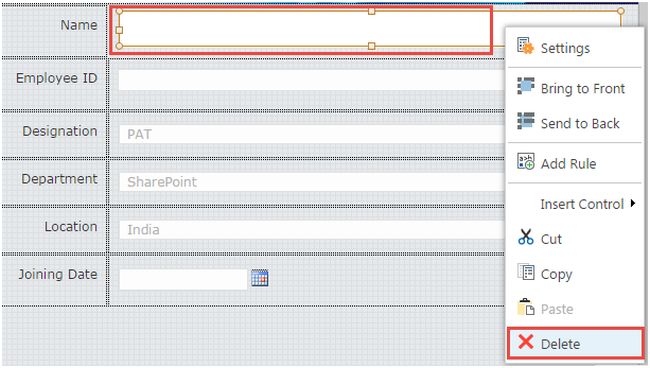
Right-click on the “Name” field control and then click on Delete.
Drag and drop the People control in the “Name” field.
Double-click on the People control.
Enter the Name then select the “Name” list column for “Connected to”.
Select “Specify default value” for “Default value source”.
Double-click on “Current User (Display Name)” that will be set as the default value.
Click on the Save button.
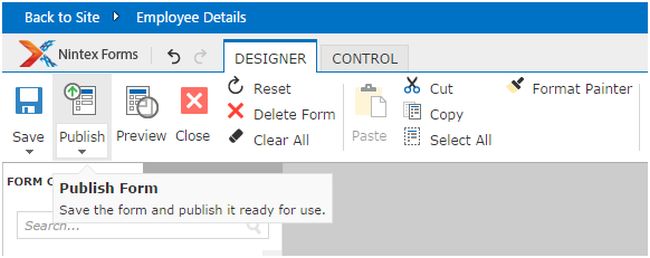
Click on the Publish button in the ribbon interface.
Publish the workflow
Click on the Publish button in the ribbon interface.
The form is published successfully.
Test the NINTEX Form:
Navigate to the Employee Details list
Click on the new item link
The NINTEX form is opened with the current user value in the “Name” field as shown below.
Enter the values for the other fields and then click on the Save button. The item is created successfully.
Summary
Thus in this article you saw how to create a NINTEX form in SharePoint 2013 Online.


Comments