How to Create Item in Another Site Using NINTEX Workflow in SharePoint
- Vijai Anand Ramalingam

- Mar 4, 2019
- 2 min read
In this article you will see how to create an item in another site using a NINTEX workflow in SharePoint.
Introduction
In this article you will see how to create an item in another site using a NINTEX workflow in SharePoint.
I have the following two sites:
http://serverName/sites/Vijai/
http://serverName/sites/Anand/
In which I have a custom list named "Custom List" and have the following columns:
I have created a NINTEX workflow in http://serverName/sites/Vijai/ and when I run the workflow for an item, an item will be created in another site http://serverName/sites/Anand/ in the "Custom List". I have used the "Create item in another site" NINTEX workflow action to do this.
Create an item in another site workflow:
Navigate to the SharePoint site http://serverName/sites/Vijai/.
Click on "Custom List" in the quick launch bar.
Click on the "List" tab and then click on "Workflow Settings".
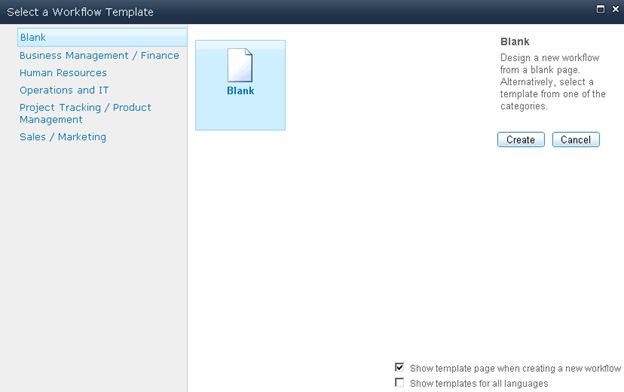
Click on "Create a Workflow" in the Nintex Workflow.
Click on "Cancel".
Drag and drop the "Create item in another site" action from the Libraries and lists section.
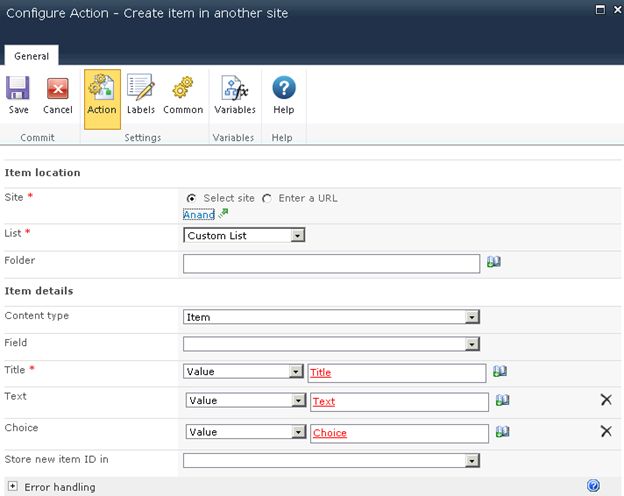
Click on "Configure" from the drop down list in the "Create item in another site" action.
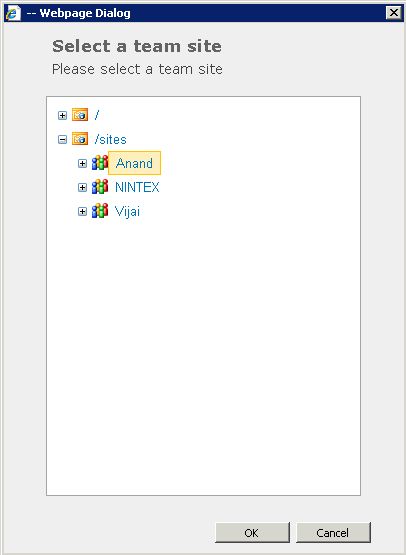
Select the site where the item is to be created.
The entire list will be populated from the "Anand" site. Select the "Custom List" where the item is to be created.
Select the content type.
Select the fields from the Field drop down list (when you select a field from the drop down a row will be generated to set the value for the field).
Set the values for the field.
Click on "Save".
Publish the workflow
Click on "Publish" button in the ribbon interface.
Ensure the Title is set; optionally you can set the values for Description and Change Comments.
Click on the "Submit" button.
The workflow is published successfully.
Test the workflow
Navigate to the SharePoint site http://serverName/sites/Vijai/.
Click on "Custom List" in the quick launch bar.
Select the item and then click on "Workflows" in the ribbon interface.
Click on "Create item workflow" and then click on "Start" button.
After few minutes the workflow status will be changed to "Completed".
Navigate to the other SharePoint site http://serverName/sites/Anand/.
Click on "Custom List" in the quick launch bar.
A new item is created successfully in the other site.
Summary
Thus in this article you saw how to create an item in another site using a NINTEX workflow in SharePoint.
Related Links
How to Remove User From SharePoint Group Using NINTEX Workflow
How to Check if SharePoint Group Exists Using NINTEX Workflow
How to Create User Defined Action For NINTEX Workflows in SharePoint
How to Remove Group From SharePoint Site Using NINTEX Workflow
How to Set Item Level Permission Using NINTEX Workflow in SharePoint


Comments