
How to create Custom SharePoint 2010 List Column using Visual Studio 2010
- Vijai Anand Ramalingam

- Feb 23, 2019
- 1 min read
In this article we are going to create custom column using visual studio 2010.
Steps Involved:
Creating Empty SharePoint Project:
Open Visual Studio 2010.
Go to File => New => Project.
Select 2010 from the installed templates SharePoint and choose Empty SharePoint Project.
Name it as CustomColumn.
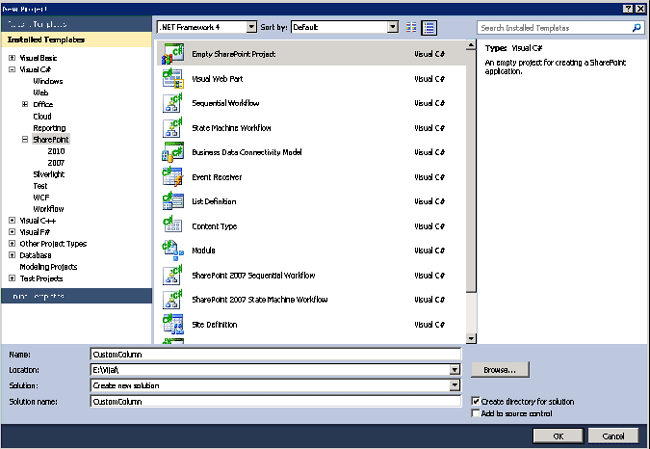
Click Add.
Enter the SharePoint server farm URL.
Select 'Deploy it as a Farm Solution".
Click Finish.
Adding an Empty Element:
Right click the Solution Explorer and select Add a new item.
Select Empty Element from the installed templates SharePoint and name it as CustomColumn.

Double click the Elements.xml file.

Replace the code with the below one.
<?xml version="1.0" encoding="utf-8"?> <Elements xmlns="http://schemas.microsoft.com/sharepoint/"> <Field ID="{4678C6A2-F296-432C-A4CA-8C4D96DA6B46}" Name="CustomColumn" DisplayName="Custom Column" Type="Text" Group="Custom Columns"> </Field> </Elements>In the above code, we are adding a custom column with the Type "Text" and with the group name as "Custom Columns".
Build the solution.
Deploy the solution.
Testing:
Go to the SharePoint site.
Go to Site Actions => Site Settings =>Galleries =>Site Columns.
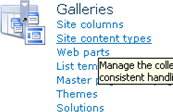
You will see the custom column that we have created in the group "Custom Columns".


Comments