How to create custom properties for visual webpart in SharePoint 2010.
- Vijai Anand Ramalingam

- May 28, 2019
- 1 min read
In this article we will be seeing how to create custom properties for visual webpart in SharePoint 2010.
Steps Involved:
a. Open Visual Studio 2010.
b. Create an "Empty SharePoint Project".
c. Right click on the solution and click on Add => New Item.
d. Select "Visual Web Part" template from SharePoint 2010 installed templates.
e. Entire solution looks like the following
f. Replace CustomPropertiesVisualWP.cs file with the following code.
using System;
using System.ComponentModel;
using System.Web;
using System.Web.UI;
using System.Web.UI.WebControls;
using System.Web.UI.WebControls.WebParts;
using Microsoft.SharePoint;
using Microsoft.SharePoint.WebControls;
namespace CustomProperties.CustomPropertiesVisualWP
{
[ToolboxItemAttribute(false)]
public class CustomPropertiesVisualWP :WebPart
{
public static string _value;
[System.Web.UI.WebControls.WebParts.WebBrowsable(true),
System.Web.UI.WebControls.WebParts.WebDisplayName("Enter the Value"),
System.Web.UI.WebControls.WebParts.WebDescription(""),
System.Web.UI.WebControls.WebParts.Personalizable(
System.Web.UI.WebControls.WebParts.PersonalizationScope.Shared),
System.ComponentModel.Category("anavijai Custom Properties"),|
System.ComponentModel.DefaultValue("")]
public string _Value
{
get { return _value; }
set { _value =value; }
}
// Visual Studio might automatically update this path when you change the Visual Web Part project item.
private const string _ascxPath =@"~/_CONTROLTEMPLATES/CustomProperties/CustomPropertiesVisualWP/CustomPropertiesVisualWPUserControl.ascx";
protected override void CreateChildControls()
{
Control control = Page.LoadControl(_ascxPath);
Controls.Add(control);
}
}
}
g. In CustomPropertiesVisualWPUserControl.ascx I have added one label "lblResult" and button "btnClick".
h. Replace CustomPropertiesVisualWPUserControl.ascx.cs with the following code.
using System;
using System.Web.UI;
using System.Web.UI.WebControls;
using System.Web.UI.WebControls.WebParts;
using System.ComponentModel;
namespace CustomProperties.CustomPropertiesVisualWP
{
public partial class CustomPropertiesVisualWPUserControl : UserControl
{
protected void Page_Load(object sender,EventArgs e)
{
}
protected void btnClick_Click(object sender,EventArgs e)
{
lblResult.Text = CustomPropertiesVisualWP._value;
}
}
}
i. Build and deploy the solution.
j. Go to the SharePoint Site =>Site Actions =>Edit Page =>Editing Tools => Insert =>Web Part
=>Categories => Custom =>Select CustomPropertiesVisualWP.
k. Click on Add.
l. The web part looks like the following with a button.
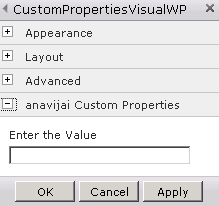
m. Edit the webpart you could see a new custom category in the webpart properties.
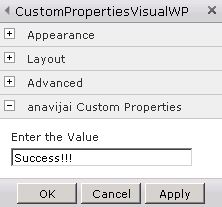
n. Enter the value and click on Ok.
o. In the CustomPropertiesWP click on the button.


Comments