How To Create An Azure Function App Using Visual Studio 2017
- Vijai Anand Ramalingam

- Mar 11, 2019
- 2 min read
Introduction
Azure Functions is used for executing a small piece of code or “function” in a cloud and you pay only for the time your code executes. You can use any development language of choice, such as C#, F#, PHP, Java etc. Some of the key features of Functions are Choice of language, Pay-per-use pricing model, bring your own dependencies, integrated security, simplified integration, flexible development, and open-source. Please refer Azure Functions for more details or read my previous articles.
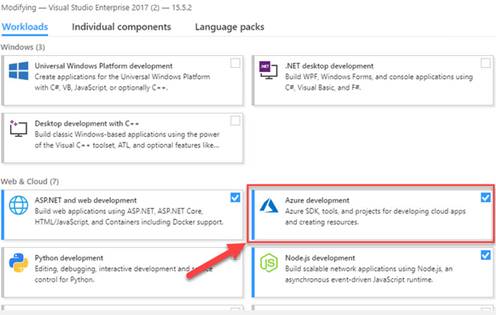
In this article, you will see how to create an Azure Functions app using Visual Studio 2017. Visual Studio 2017 version 15.4 or later including the Azure Development workload is required.
Create Azure Functions app using Visual Studio
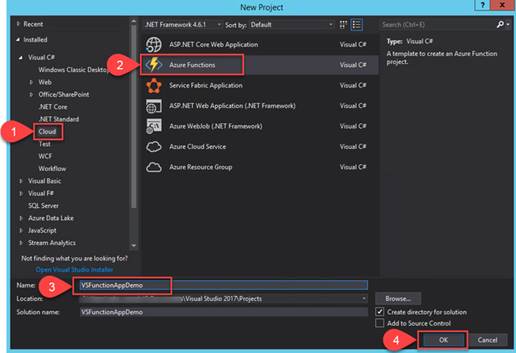
1. Open Visual Studio 2017.
2. Click File -> New -> Project.
3. Select Azure Functions template, enter the name of the Functions app, and click "OK".
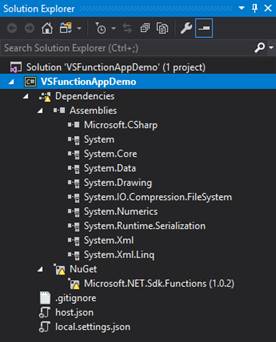
4. Functions App is created with the following structure.
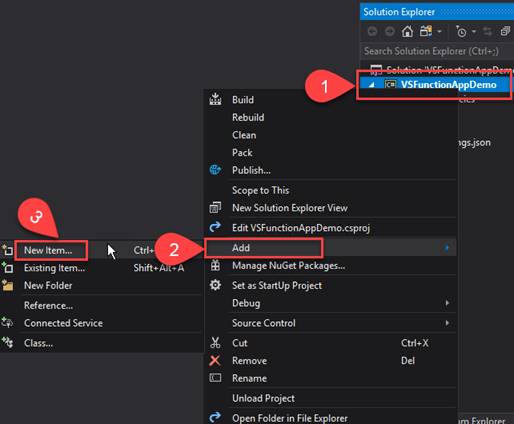
5. Right-click the solution, click Add, and then click "New Item".
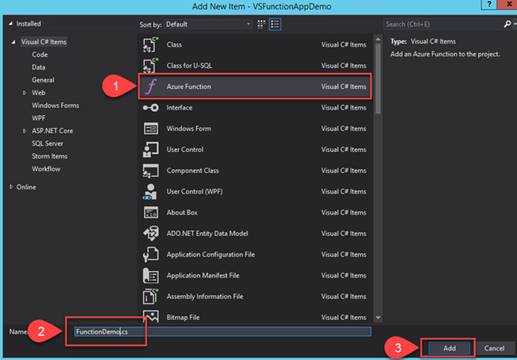
6. Select Azure Function, enter the Name, and click Add.
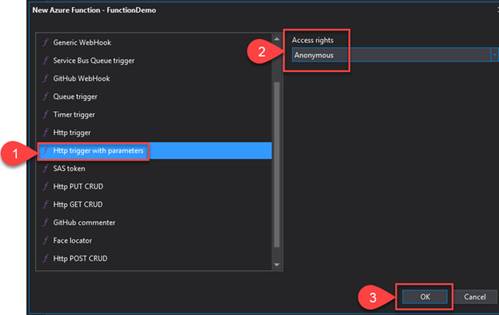
7. Select Http trigger with parameters and access rights as Anonymous. Click OK.
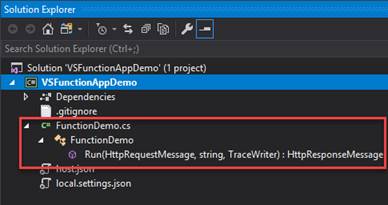
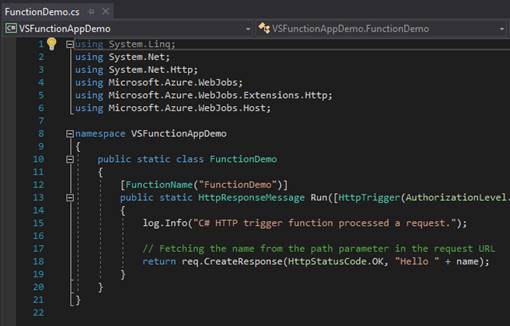
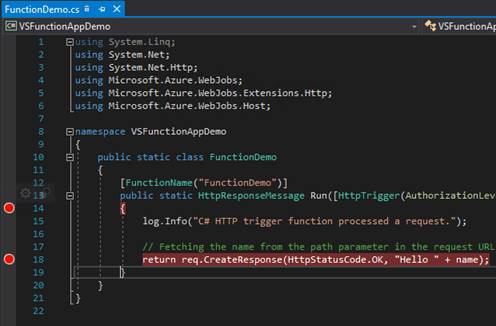
8. Function code file is added as shown below.
Test the function locally
1. Hit F5.
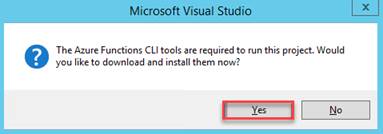
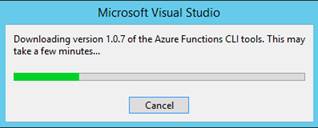
2. You need to install Azure Functions CLI tools to run this project. Click "Yes".
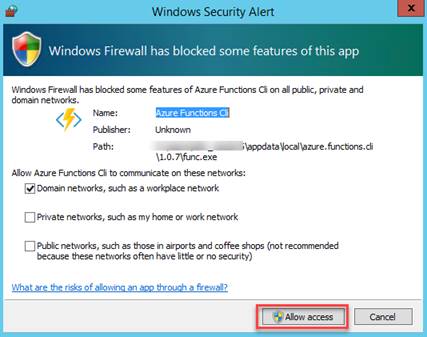
3. Click "Allow access".
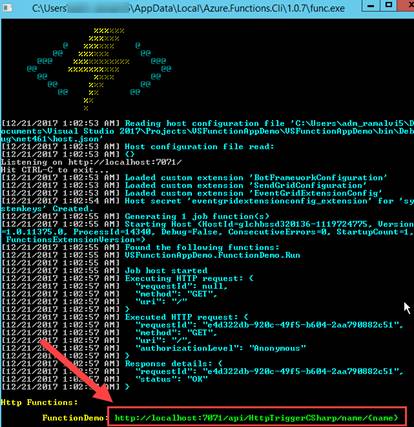
4. Copy the URL and paste it into the browser. The function will return the results.
5. You could also place the breakpoints and debug the code.
Publish to Azure
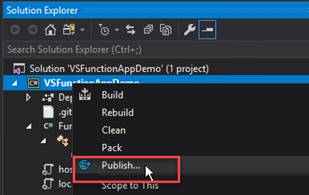
1. Right-click the solution and click "Publish".
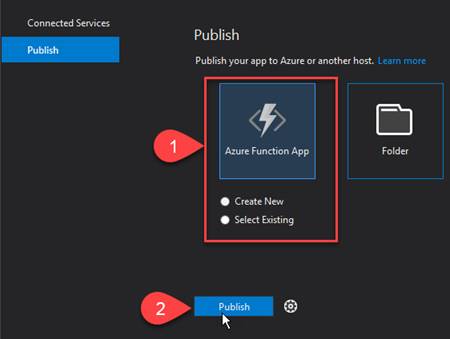
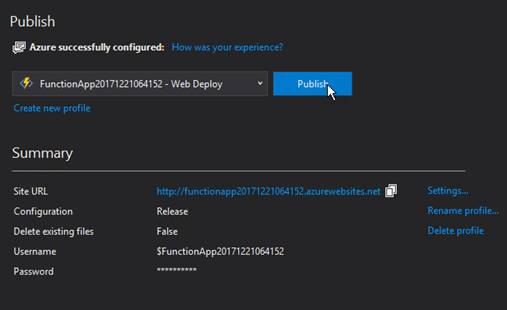
2. Add an account, select the subscription, select an existing Resource Group or create a new one, and add an App Service Plan. Click "Create".
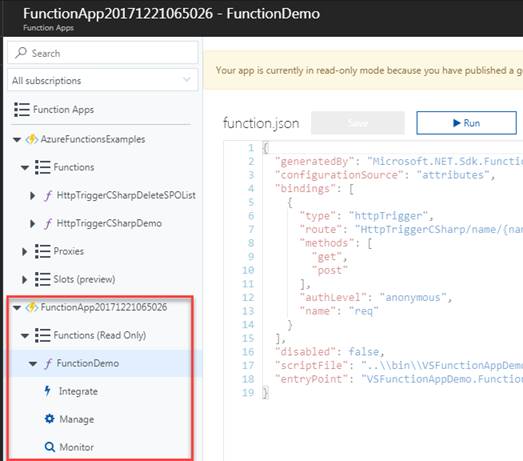
3. Log in to the Azure Portal and navigate to Azure Functions.
4. You will be able to see the newly created Functions App.
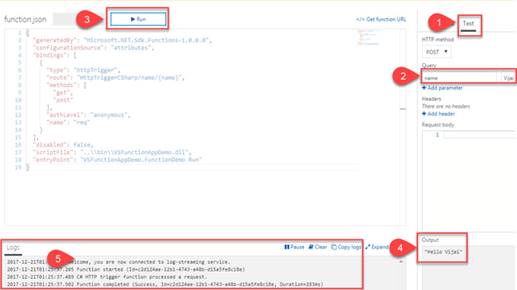
5. Run the function to see the output and logs.
Result
Thus, in this article, you saw how to create an Azure Functions App using Visual Studio 2017.




















Comments