
How to create a microservice
- The Tech Platform

- Aug 2, 2021
- 4 min read

To create a microservice, we need access to the following tools -
Visual Studio (For implementing C# based code for the service)
SQL Database server and studio (For creating database and tables for the application).
Also, you might need docker if you want to containerize the application.
The idea is to create an API for doing all the user services, where it has a separate database for storing all the user-related information.
To begin with, we will create the database that will be consumed by the API. To create the database, we will use the SQL Server Management Studio.

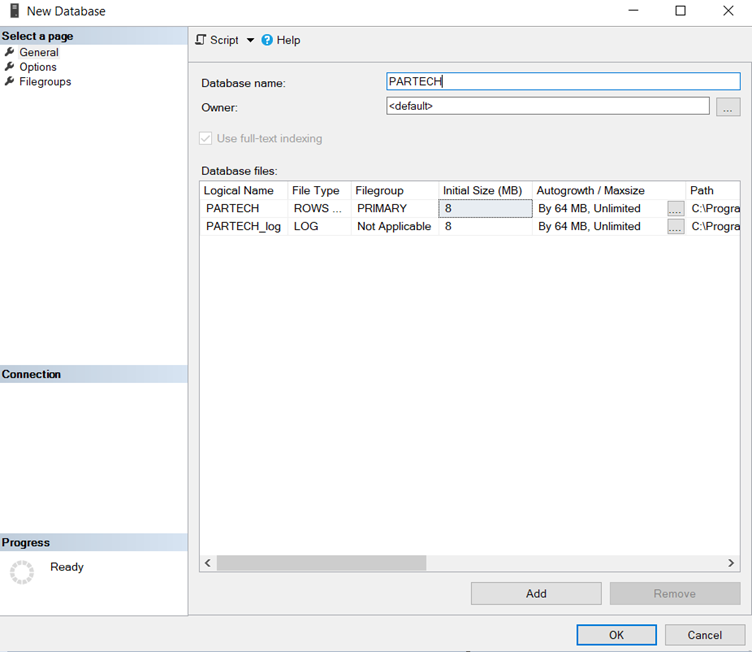
Right-click on the Databases and select the ‘New Database’ option.

On clicking it, a pop-up comes up asking for the database name.
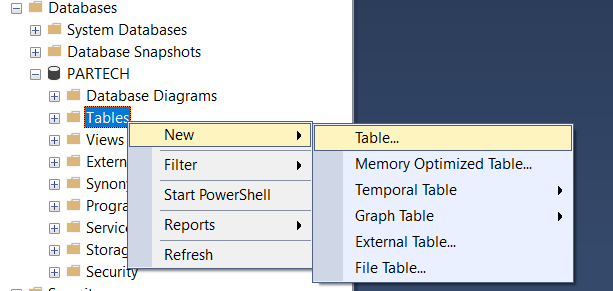
Once the database is created, the next step is to create the table for storing records. To Create them, right-click on the Tables folders inside the created database and select the ‘New’ option and ‘Table’ option within that.
Even though it is possible to do CRUD operation completely from API, but will implement only the read operation in the API. For that, we are going to add data to the table manually. To add data, right-click the table and select the ‘Edit Top 200 Rows’ option.

Add the data as required.

That is all we need for the database for our application.
The next step is to create an API that can consume the created database and respond to calls from the postman. To create a WebAPI, let’s choose ‘ASP.NET Core Web Application’ as the project.

And ‘API’ as the template of the project.

Once created, the project looks like below.

The first step is to create two folders, ‘Context’ and ‘Models’ for storing the class file of the database context and entity files of the database.
To create a folder, right-click on the project, go to ‘Add’ and look for ‘New Folder’

Here, we are going to use the Entity Framework approach for connecting the code with the database. To enable using the EF, we need to install the below two NuGet packages.
Microsoft.EntityFrameworkCore.SqlServer
Microsoft.EntityFrameworkCore.tools
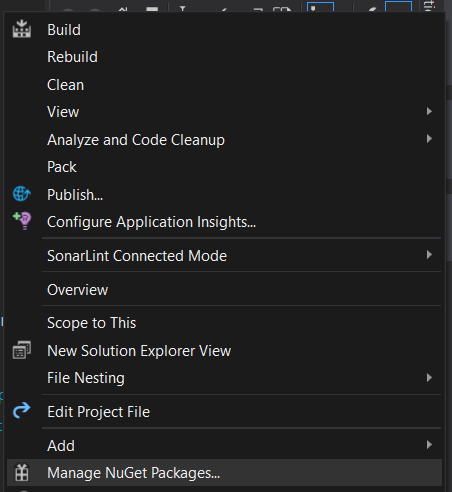
To install the NuGet packages, Right-click the project and look for the ‘Manage NuGet Packages’ option. Since we are using .Net Core 3.1, we have chosen the 3.1.14 version for both packages.
The next step is to connect the database to the code. To do that, we need to Scaffold the database tables and other objects to the code automatically by running the below command.
Scaffold-DbContext “Server=.;
Database=PARTECH;
Trusted_Connection=True;”
Microsoft.EntityFrameworkCore.SqlServer -OutputDir Context
It indicates that the output of the scaffolding will be stored in the Context folder.
Post the scaffolding, the entity files should be manually moved to the Models folder and the namespace has to be changed to Models. After that, the folder structure of the project looks like below.

Now, the database has been pulled to the code. Let’s implement some business logic here. To do that, we create another folder called ‘Services’ to have the class and interface files that are required for implementing the business logic.

The next step is to add the interface and class files. To add them to the ‘Services’ folder, Right-click on the folder and go to Add option, and select the ‘class’ option. Create two class files, one with the name of IUserService and another with UserService.

Open the ‘IUserService.cs’ file and edit the class to interface as shown in the below image.

Open the ‘UserService.cs’ file and inherit the IUserService as the interface as below.

Now, we are going to implement two methods for Getting the user data. One for getting it by specifying an id and another for getting all the records.
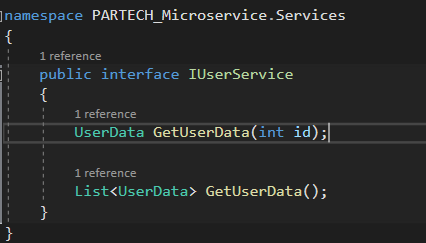
Create the declaration of the two methods in the interface file. And do the definition of the two methods in the UserService.cs file.
Here, the UserService.cs file depends on the database context, which we will be expecting as a part of constructor injection.

After implementing the business logic, move to the appsettings.json file. Where we are going to configure the database connection string which is going to be accessed inside the application.

Open the Startup.cs file and go to the configure services method. Here, add the injection for the dbcontext and use the config that needs to be referred from the config file. Also, the injection for UserService will be done, which will be used in the controller from which it is called.

Now, we have the business logic and connection string for the database in place. The only part that is remaining is creating the endpoint that can be consumed from the outside world.

Right-click the controller folder and click on Add -> Controller. And Choose the option — API Controller.

The Controller file by default comes with these options.

Now, add the Constructor which expects the IUserService object. Also, create a new HttpGet endpoint that uses the IUserService object to call the GetUserData method which we have created in the UserService.cs file.
The coding part for running the application has been completed. Now, let’s run the application. Do you see the default weather controller opened in the browser?
Copy its base URL to the port number (https://localhost:xxxxx). Now, with that append /API/user and change the HTTP method to get in postman and send the request.

Do you see the data in the database being fetched by our application and being displayed in the response section of the postman as a JSON object? If yes, congrats, you have created your first microservice!
Along with this, you can even implement docker for this project and run it as a docker image in the local.
Wrapping Up
Microservices are not only light but they enable faster deployment option and limits the scope of testing. This blog gives you a step by step procedure to create and test a microservice in your system.
Source: Medium-ParTech
The Tech Platform


Comments