Facebook Flow Using Microsoft Power Apps In Office 365 SharePoint
- Manpreet Singh

- Apr 13, 2019
- 2 min read
In my last article, we read about Microsoft Power apps and its new functionalities are available for developers and for our end users. Power apps is the future of Office 365 and with various other connections where flow through power apps will make process just a click process.
What is Flow?
You can create an automated workflow between your apps and Services to get the notifications or to synchronize the files, collect data and many more functionalities.
Flows will be the new workflows, which we are using through SharePoint Designer or through other third party workflow tool.
Now, Flow will be a part of them, providing the automotive solutions to all the tasks or process.
Whether it's a complex multi-step process or a simple one-step task, Flows improve the effectiveness, productivity and performance of the process assisting all the end users to get the benefits.
Let’s see, how we can create one.
Click Create a flow button on the corner.
On one click, you are ready to create a Flow.
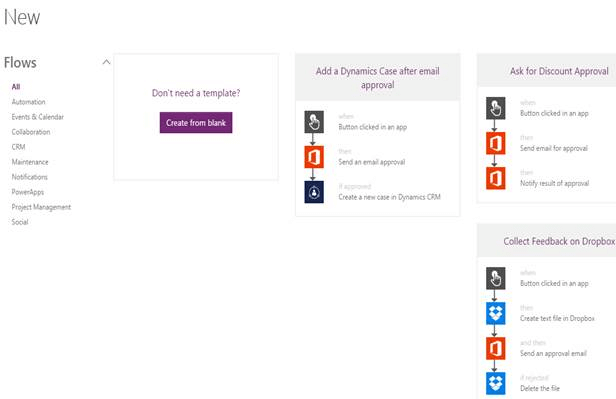
You can either create a blank Flow or choose from the templates, given below, as you can see on the screen.
We will choose a blank form.
Click it.
You will see the screen, given below to choose the action from a variety list of Services and products.
We will choose Office 365 SharePoint Sites Service and use Flow to create a process in SharePoint.
We selected “SharePoint- When a file is created” as a trigger to our flow.
Sign in to your SharePoint to connect flows to your site.
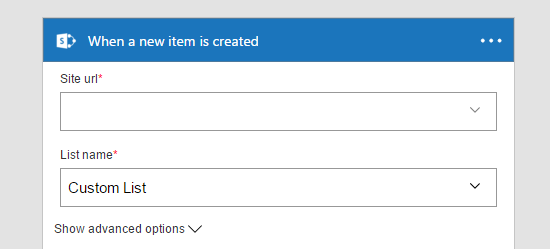
Once connected, provide a site URL.
Once you enter the site URL, it will fetch all the lists in the drop down, which is given below.
Choose the list, where Flow will trigger on Flow.
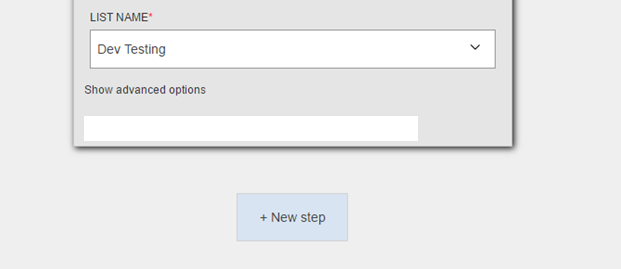
Click on New step.
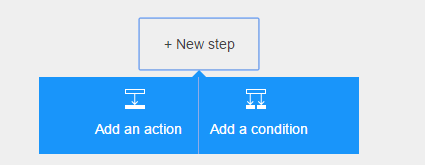
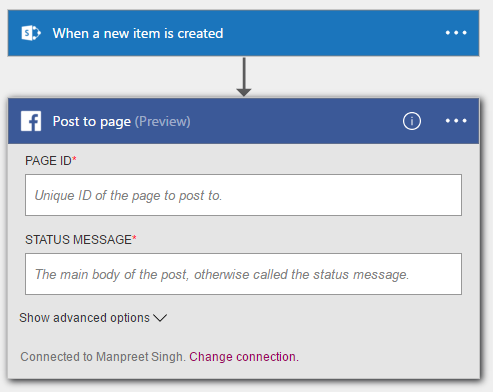
You can choose what should happen, when a new item is created in the SharePoint list.
a. You can either choose an action or
b. A condition
We will create an action.
Click on Add an action.
When you click on action, it will allow choosing actions from a list of Services.
We will use “Facebook – Post to page”.
Here, you need to identify the Page ID and a Status Message, which you can populate from the list’s column value.
Once done, click on create and Flow will be created.
Go to the SharePoint List “”Dev Testing” and create an item.
Provide Facebook’s status content on the Title field.
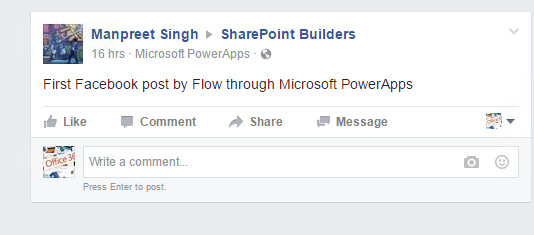
Once you save it, Flow will create a status on your Facebook page, as shown in the screen, given below.
Isn’t Flow in Power Apps amazing? There is more to come in my other articles. Keep reading & keep learning.








Comments