
Django Channels and WebSockets
- The Tech Platform

- Mar 5, 2021
- 8 min read

Django Channels facilitates support of WebSockets in Django in a manner similar to traditional HTTP views. It wraps Django’s native asynchronous view support, allowing Django projects to handle not only HTTP, but also protocols that require long-running connections, such as WebSockets, MQTT, chatbots, etc.
In this tutorial, we’ll show you how to create a real-time app with Django Channels. To demonstrate with a live example, we’ll create a two-player tic-tac-toe game, as illustrated below. You can access the full source code in my GitHub repository.
Configuring a Django project
Follow the steps outlined below to configure your Django project.
First, install Django and channels. You must also install channels_redis so that channels knows how to interface with Redis.
Run the following command:
pip install django==3.1
pip install channels==3.0
pip install channels_redis==3.2
You should use pip3 for Linux/mac instead of pip and python3 in place of python. I used django==3.1 and channels==3.0, channels_redis==3.2.0 for this guide.
Start the Django project:
django-admin startproject tic_tac_toeNext, create an app with the name game:
python manage.py startapp gameAdd channels and game in the INSTALLED_APPS inside your settings.py:
## settings.py
INSTALLED_APPS = [
    'django.contrib.admin',
    'django.contrib.auth',
    'django.contrib.contenttypes',
    'django.contrib.sessions',
    'django.contrib.messages',
    'django.contrib.staticfiles',
    'channels','game'
    ]
Run migrate to apply unapplied migrations:
python manage.py migrateAlso, add STATICFILES_DIRS inside your settings.py:
## settings.py
import os
STATICFILES_DIRS = [
    os.path.join(BASE_DIR, "static"),
    ]
Now it’s time to create the necessary files for our Django project. Throughout the guide, you may refer to the following directory structure:
├── db.sqlite3
├── game
│   ├── consumers.py
│   ├── routing.py
│   ├── templates
│   │   ├── base.html
│   │   ├── game.html
│   │   └── index.html
│   └── views.py
├── manage.py
├── requirements.txt
├── static
│   ├── css
│   │   └── main.css
│   └── js
│       └── game.js
└── tic_tac_toe
    ├── __init__.py
    ├── asgi.py
    ├── settings.py
    ├── urls.py
    └── wsgi.py
Integrate the Django Channels library
Now let’s integrate Channels into the Django project.
Django >2 doesn’t have built-in ASGI support, so you need to use Channel’s fallback alternative.
Update the asgi.py as shown below:
## tic_tac_toe/asgi.py

import os

import django
from channels.http import AsgiHandler
from channels.routing import ProtocolTypeRouter

os.environ.setdefault('DJANGO_SETTINGS_MODULE', 'tic_tac_toe.settings')
django.setup()

application = ProtocolTypeRouter({
    "http": AsgiHandler(),
## IMPORTANT::Just HTTP for now. (We can add other protocols later.)
}
)
Update settings.py and change the Django application from WSGI to ASGI by making the following changes. This will point the channels at the root routing configuration.
## settings.py
# WSGI_APPLICATION = 'tic_tac_toe.wsgi.application'
# Channels
ASGI_APPLICATION = "tic_tac_toe.asgi.application"
Next, enable the channel layer, which allows multiple consumer instances to talk with each other.
Note that you could the Redis as the backing store. To enable Redis, you could use Method 1 if you want Redis Cloud or Method 2 for local Redis. In this guide, I used Method 3 — In-memory channel layer — which is helpful for testing and for local development purposes.
To enable the channel layer, add the following CHANNEL_LAYERS in settings.py:
## settings.py
CHANNEL_LAYERS = {
    'default': {
        ### Method 1: Via redis lab
        # 'BACKEND': 'channels_redis.core.RedisChannelLayer',
        # 'CONFIG': {
        #     "hosts": [
        #       'redis://h:<password>@<redis Endpoint>:<port>'
        #     ],
        # },

        ### Method 2: Via local Redis
        # 'BACKEND': 'channels_redis.core.RedisChannelLayer',
        # 'CONFIG': {
        #      "hosts": [('127.0.0.1', 6379)],
        # },

        ### Method 3: Via In-memory channel layer
        ## Using this method.
        "BACKEND": "channels.layers.InMemoryChannelLayer"
        },
  }
Make sure that the channels development server is working correctly. Run the following command:
python manage.py runserver
Designing the index page
Let’s start by building the index page, where the user is asked for room code and character choice (X or O).
Create the function-based view in game/views.py:
# game/views.py

from django.shortcuts import render, redirect

def index(request):if request.method == "POST":
        room_code = request.POST.get("room_code")
        char_choice = request.POST.get("character_choice")
        return redirect(
                '/play/%s?&choice=%s'
                %(room_code, char_choice)
         )
        return render(request, "index.html", {}
        )
Next, create the route for the index view in tic_tac_toe/urls.py:
## urls.py

from django.urls import path
from game.views import index

urlpatterns = [
## ... Other URLS
    path('', index),]
Now, create the base template in game/templates/base.html (ignore if you have already created it). This template is going to be inherited to other template views.
<{% comment %} base.html {% endcomment %}
{% load static %}
<!DOCTYPE html>
<html lang="en">
<head>
<meta charset="UTF-8">
<meta name="viewport" content="width=device-width, initial-scale=1.0">
<title>Tic Tac Toe</title>
<link rel='stylesheet' href='{% static "/css/main.css" %}'>
</head>
<body>
{% block content %}
{% endblock content %}
<script src = "{% static 'js/game.js' %}"></script>
{% block javascript %}
{% endblock javascript %}
</body>
</html>Create the view template for the index view in game/templates/index.html:
{% comment %} index.html
{% endcomment %}
{% extends 'base.html' %}
{% block content %}
<div class="wrapper">
<h1>Welcome to Tic Tac Toe Game</h1>
<form method="POST">
{% csrf_token %}
<div class='form-control'>
<label for="room">Room id</label>
<input id="room" type="text" name="room_code" required />
</div>
<div class='form-control'>
<label for="character_choice">Your character</label>
<select for="character_choice" name = "character_choice">
<option value="X">X</option>
<option value="O">O</option>
</select>
</div>
;<input type="submit" class="button" value="Start Game" />
</div>
</form>
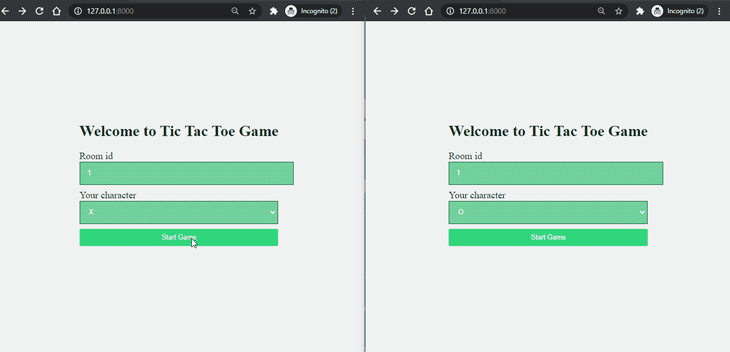
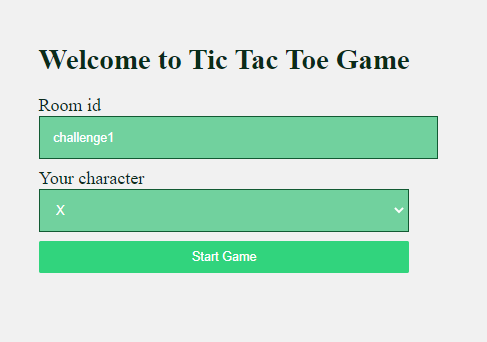
{% endblock content %}Start the Django development server and navigate to http://127.0.0.1:8000 to check whether the index page is working:

Designing the game page
Now that the index page is done, let’s build the game page.
Start by creating game/views.py:
## game/views.py

from django.shortcuts import render, redirect
from django.http import Http404
def game(request, room_code):
    choice = request.GET.get("choice")
    if choice not in ['X', 'O']:
        raise Http404("Choice does not exists")
    context = {
        "char_choice": choice,
        "room_code": room_code
    }
    return render(request, "game.html", context)
Add the URL route of the above view:
## urls.py

from django.urls import path
from game.views import game

urlpatterns = [
## other url routes
    path('play/<room_code>', game),
]
Now that the backend is done, let’s create the frontend of the game board. Below is the game/templates/game.html Django template:
{% extends 'base.html' %}
{% comment %} game.html
{% endcomment %}

{% load static %}{% block content %}
<div class="wrapper">
    <div class="head">
        <h1>TIC TAC TOE</h1>
        <h3>Welcome to room_{{room_code}}</h3>
    </div>
    <div id = "game_board" room_code = {{room_code}} char_choice = {{char_choice}}>
    <div class="square" data-index = '0'></div>
    <div class="square" data-index = '1'></div>
    <div class="square" data-index = '2'></div>
    <div class="square" data-index = '3'></div>
    <div class="square" data-index = '4'></div>
    <div class="square" data-index = '5'></div>
    <div class="square" data-index = '6'></div>
    <div class="square" data-index = '7'></div>
    <div class="square" data-index = '8'></div>
    </div>
    <div id = "alert_move">Your turn. Place your move <strong>{{char_choice}}</strong></div>
</div>
{% endblock content %}
To make the grid and index page look good, add the CSS, as shown below:
/* static/css/main.css */
body {
/* width: 100%; */
height: 90vh;
background: #f1f1f1;
display: flex;
justify-content: center;
align-items: center;
}
#game_board {
display: grid;
grid-gap: 0.5em;
grid-template-columns: repeat(3, 1fr);
width: 16em;
height: auto;
margin: 0.5em 0;
}
.square{
background: #2f76c7;
width: 5em;
height: 5em;
display: flex;
justify-content: center;
align-items: center;
border-radius: 0.5em;
font-weight: 500;
color: white;
box-shadow: 0.025em 0.125em 0.25em rgba(0, 0, 0, 0.25);
}
.head{
width: 16em;
text-align: center;
}
.wrapper h1, h3 {
color: #0a2c1a;
}
label {
font-size: 20px;
color: #0a2c1a;
}
input, select{
margin-bottom: 10px;
width: 100%;
padding: 15px;
border: 1px solid #125a33;
font-size: 14px;
background-color: #71d19e;
color: white;
}
.button{
color: white;
white-space: nowrap;
background-color: #31d47d;
padding: 10px 20px;
border: 0;
border-radius: 2px;
transition: all 150ms ease-out;
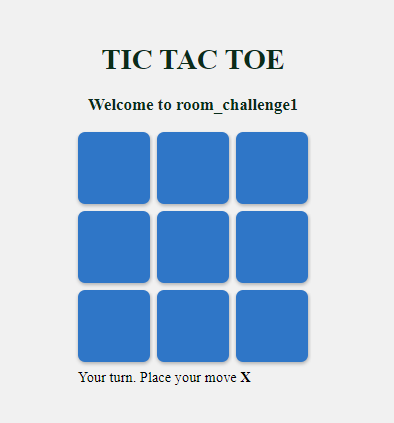
}When you run the development server, you’ll see the game board, as shown below:

Adding WebSockets to your Django app
Now that the pages are created, let’s add the WebSockets to it.
Enter the following code in game/consumers.py:
## game/consumers.py

import json
from channels.generic.websocket import AsyncJsonWebsocketConsumer

class TicTacToeConsumer(AsyncJsonWebsocketConsumer):
  async def connect(self):
    self.room_name = self.scope\['url_route'\]['kwargs']['room_code']
    self.room_group_name = 'room_%s' % self.room_name

     # Join room group
     await self.channel_layer.group_add(
        self.room_group_name,
        self.channel_name
        )
     await self.accept()

   async def disconnect(self, close_code):
     print("Disconnected")
     # Leave room group
     await self.channel_layer.group_discard(
       self.room_group_name,
       self.channel_name
      )

    async def receive(self, text_data):
        """
        Receive message from WebSocket.
        Get the event and send the appropriate event
        """
        response = json.loads(text_data)
        event = response.get("event", None)
        message = response.get("message", None)
        if event == 'MOVE':
          # Send message to room group
          await self.channel_layer.group_send(self.room_group_name, {
            'type': 'send_message',
            'message': message,
            "event": "MOVE"
         })
         if event == 'START':
           # Send message to room group
           await self.channel_layer.group_send(self.room_group_name, {
             'type': 'send_message',
             'message': message,
             'event': "START"
          })
          if event == 'END':
            # Send message to room group
            await self.channel_layer.group_send(self.room_group_name, {
              'type': 'send_message',
              'message': message,
              'event': "END"
           })
    async def send_message(self, res):
      """ Receive message from room group """
      # Send message to WebSocket
        await self.send(text_data=json.dumps({
          "payload": res,
      }))
Create a routing configuration for the game app that has a route to the consumer. Create a new file game/routing.py and paste the following code:
## game/routing.py

from django.conf.urls import url
from game.consumers import TicTacToeConsumer

websocket_urlpatterns = [
    url(r'^ws/play/(?P<room_code>\w+)/$',
    TicTacToeConsumer.as_asgi()),
]
The next step is to point the root routing configuration at the game.routing module. Update tic_tac_toe/asgi.py as follows:
## tic_tac_toe/asgi.py

import os

from django.core.asgi import get_asgi_application
from channels.auth import AuthMiddlewareStack
from channels.routing import ProtocolTypeRouter, URLRouter
import game.routing

os.environ.setdefault('DJANGO_SETTINGS_MODULE', 'tic_tac_toe.settings')

# application = get_asgi_application()
application = ProtocolTypeRouter({
   "http": get_asgi_application(),
   "websocket": AuthMiddlewareStack(
      URLRouter(
          game.routing.websocket_urlpatterns
        )
     ),
  }
)
Let’s build the final part of the code by creating the JavaScript, which is the client side that talks to the server asynchronously. Put the following code in static/js/game.js:
// static/js/game.js

var roomCode = document.getElementById("game_board").getAttribute("room_code");
var char_choice = document.getElementById("game_board").getAttribute("char_choice");
var connectionString = 'ws://' + window.location.host + '/ws/play/' + roomCode + '/';
var gameSocket = new WebSocket(connectionString);

// Game board for maintaing the state of the game
var gameBoard = [-1, -1, -1,-1, -1, -1,-1, -1, -1,];

// Winning indexes.
winIndices = [
[0, 1, 2],
[3, 4, 5],
[6, 7, 8],
[0, 3, 6],
[1, 4, 7],
[2, 5, 8],
[0, 4, 8],
[2, 4, 6]
]

let moveCount = 0;

//Number of moves done
let myturn = true;

// Boolean variable to get the turn of the player.
// Add the click event listener on every block.

let elementArray = document.getElementsByClassName('square');
for (var i = 0; i < elementArray.length; i++){
    elementArray[i].addEventListener("click", event=>
    {
    const index = event.path[0].getAttribute('data-index');
    if(gameBoard[index] == -1){
        if(!myturn){
           alert("Wait for other to place the move")}
        else{
           myturn = false;
          document.getElementById("alert_move").style.display = 'none';
            // Hide
                make_move(index, char_choice);
             }
           }
        }
      )
     }

 // Make a move
 function make_move(index, player){
    index = parseInt(index);
    let data = {"event": "MOVE","message":
        {
        "index": index,"player": player
        }}
        if(gameBoard[index] == -1){

        // if the valid move, update the gameboard
        // state and send the move to the server.
        moveCount++;if(player == 'X')
            gameBoard[index] = 1;else if(player == 'O')
            gameBoard[index] = 0;else{
            alert("Invalid character choice");return false;}
        gameSocket.send(JSON.stringify(data))
        }

    // place the move in the game box.
    elementArray[index].innerHTML = player;

    // check for the winner
    const win = checkWinner();
    if(myturn){
     // if player winner, send the END event.
       if(win){
          data = {"event": "END","message": `${player} is a winner. Play again?`}
            gameSocket.send(JSON.stringify(data))
           }
        else if(!win && moveCount == 9){
            data = {"event": "END","message": "It's a draw. Play again?"}
            gameSocket.send(JSON.stringify(data)
           )
         }
      }
  }

  // function to reset the game.
  function reset(){
    gameBoard = [-1, -1, -1,-1, -1, -1,-1, -1, -1,];
    moveCount = 0;
    myturn = true;
    document.getElementById("alert_move").style.display = 'inline';

    for (var i = 0; i < elementArray.length; i++){
        elementArray[i].innerHTML = "";}
        }
        // check if their is winning move
        const check = (winIndex) =>
        {
        if (
          gameBoard[winIndex[0]] !== -1 &&
          gameBoard[winIndex[0]] === gameBoard[winIndex[1]] &&
          gameBoard[winIndex[0]] === gameBoard[winIndex[2]])
          return true;
          return false;
          };

        // function to check if player is winner.
        function checkWinner()
        {
        let win = false;
        if (moveCount >= 5) {
          winIndices.forEach((w) => {if (check(w))
          {
          win = true;
          windex = w;
          }
        }
        );
      }
   return win;
 }

// Main function which handles the connection
// of websocket.
function connect() {
    gameSocket.onopen = function open()
    {
    console.log('WebSockets connection created.');

    // on websocket open, send the START event.
    gameSocket.send(JSON.stringify({"event": "START","message": ""})
    );
 };

    gameSocket.onclose = function (e)
    {
    console.log('Socket is closed. Reconnect will be attempted in 1 second.', e.reason);
        setTimeout(function () {
            connect();
        },
       1000);
  };

// Sending the info about the room
    gameSocket.onmessage = function (e)
    {

    // On getting the message from the server
    // Do the appropriate steps on each event.
    let data = JSON.parse(e.data);
        data = data["payload"];
    let message = data['message'];
    let event = data["event"];
    switch (event)
    {
        case "START":
          reset();
          break;
        case "END":
           alert(message);
           reset();
           break;
        case "MOVE":if(message["player"] != char_choice)
        {
           make_move(message["index"], message["player"])
           myturn = true;
           document.getElementById("alert_move").style.display = 'inline';
             }
             break;
         default:console.log("No event")}};
         if (gameSocket.readyState == WebSocket.OPEN)
         {
        gameSocket.onopen();}}

        //call the connect function at the start.
connect();
Now we’re finally finished coding and ready to play our tic-tac-toe game!
Conclusion
We covered a lot of topics in this tutorial: Django Channels, WebSockets, and some frontend. Our game so far has only minimal, basic functionality. You’re welcome to use your new foundational knowledge to play around and add more functionality to it. Some additional exercises you can do include:
Adding user authentication
Showing online users
Adding game data to the database
Making the application scalable by adding Redis instead of the in-memory channel layer
Adding AI


In addition to logging Redux actions and state, LogRocket records console logs, JavaScript errors, stacktraces, network requests/responses with headers + bodies, browser metadata, and custom logs. It also instruments the DOM to record the HTML and CSS on the page, recreating pixel-perfect videos of even the most complex single-page apps.
Source: logrocket
The Tech Platform


Comments