
Development Of SharePoint Add-In Solutions On Office 365
- Manpreet Singh

- Mar 22, 2019
- 3 min read
In this article on “Development of SharePoint Add-In Solutions on Office 365 – Azure”, we will be learning how we use SharePoint Add-In Solutions on Office 365.
What is SharePoint Add-In?
There are two kinds of SharePoint add-ins: SharePoint-hosted, and provider-hosted add-ins. In this article, we will see a SharePoint hosted add-in and depending on various scenarios, you can conclude what kind of host you would require.
As quoted in Microsoft Docs,
“A SharePoint Add-in is a self-contained piece of functionality
that extends the capabilities of SharePoint websites to
solve a well-defined business problem.”
Simply put, we use add-ins to keep the custom code off the websites to prevent any security or performance glitch on our servers but also manage to achieve the same functionality by storing them elsewhere. It is easily manageable and keeps our sites and servers safe.
We can use all the SharePoint components such as pages, lists, workflows, custom content types, list templates, web parts, and more using the SharePoint add-in feature.
The SharePoint add-ins that we will develop and install today will be featured as a tile on the Site Contents page of the SharePoint website where you can click on them and execute your business logic.
Now, it’s time to achieve the same. So, kindly follow the steps below and learn how to develop a SharePoint add-in on Office 365-Azure.
Open Visual Studio and create a project.

Under the template Category of “Office/SharePoint” add a “SharePoint add-in” solution.


It will take some time and will create a solution as below.


Open up the pages section and click on the Default.aspx page.

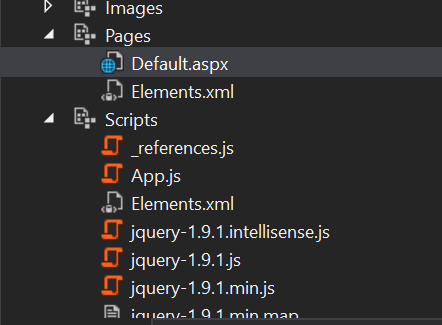
In the code, comment the App.js reference as we will bypassing the code to open our default.aspx page.

On the same code editor, Under the “PlaceHolderMain”, write in the name of the tile or of the add-in you are about to develop.
In for me, it's “We are learning SharePoint Development”.

We are done, let’s build the solution

Once the solution is built, Publish it.

Once publishing is done, you will see the screen below.
Click on the “Package the add-in” as we will be packaging our code and uploading it to the app catalog to use according to our business needs.

As soon as you click on the “Package the add-in”, it will create a package and open the file location for you

Upload this file to a App Catalog of the dev site or on the tenant level through where you will be able to access the app which you have just created. In this way you will be able to have the logic of the app without the code attached on to your site.

Once the code is uploaded, your app has been pushed in your tenant or on your site
Click on the settings icon on the right corner and click on “Add an App”


Search for your app you have developed


It will ask you to Trust the app


Click on Trust It
You will see your app installed under the site content

Click on it, it will open your app with your message:

This was our article about SharePoint Add-In on Office 365. This add-in can be pages, lists, workflows, custom content types, list templates, web parts, and more. As it says more, we will see many more aspects of the SharePoint add-in feature.
Until then, keep reading & keep learning.


Comments