
DEPLOY WORDPRESS WITH RDS BACKEND ON AWS USING TERRAFORM
- The Tech Platform

- Jan 23, 2021
- 5 min read

Amazon Elastic Kubernetes Service
Amazon Elastic Kubernetes Service (Amazon EKS) is a fully managed Kubernetes service. Customers such as Intel, Snap, Intuit, GoDaddy, and Autodesk trust EKS to run their most sensitive and mission critical applications because of its security, reliability, and scalability.
Amazon Relational Database Service
Amazon Relational Database Service (or Amazon RDS) is a distributed relational database service by Amazon Web Services (AWS). It is a web service running “in the cloud” designed to simplify the setup, operation, and scaling of a relational database for use in applications.
Terraform
Terraform is an open-source infrastructure as code software tool created by HashiCorp. Users define and provision data center infrastructure using a declarative configuration language known as HashiCorp Configuration Language (HCL), or optionally JSON.
Wordpress
WordPress (WP, WordPress.org) is a free and open-source content management system (CMS) written in PHP and paired with a MySQL or MariaDB database.
Pre-requisites
AWS Account
Terraform installed
AWS CLI configured
Process
1. First we need to specify the providers. For deploying the whole setup we need the aws and kubernetes providers.
provider "aws"
{
region                  = "ap-south-1"
shared_credentials_file = "C:/Users/HP/.aws/credentials"
profile                 = "default"
}

provider "kubernetes"
{
host                   = aws_eks_cluster.ekscluster.endpoint
cluster_ca_certificate = base64decode(aws_eks_cluster.ekscluster.certificate_authority[0].data)
token                  = data.aws_eks_cluster_auth.eksauth.token
load_config_file       = false
}
Terraform uses the aws provider to login to aws using the credentials file. The kubernetes provider on the other hand allows terraform to authenticate into the eks cluster and create the deployments, services etc.
2. Next part is creating the security groups.
resource "aws_security_group" "secure"
{
name        = "secure"
description = "Allow TLS inbound traffic"
vpc_id      = "vpc-fa9a8792"

ingress
{
description = "SSH"
from_port   = 22
to_port     = 22
protocol    = "tcp"
cidr_blocks = ["0.0.0.0/0"]
}

ingress
{
description = "HTTP"
from_port   = 80
to_port     = 80
protocol    = "tcp"
cidr_blocks = ["0.0.0.0/0"]
}

ingress
{
description = "Service"
from_port   = 30001
to_port     = 30001
protocol    = "tcp"
cidr_blocks = ["0.0.0.0/0"]
}

ingress
{
description = "Database"
from_port   = 3306
to_port     = 3306
protocol    = "tcp"
cidr_blocks = ["0.0.0.0/0"]
}

egress
{
from_port   = 0
to_port     = 0
protocol    = "-1"
cidr_blocks = ["0.0.0.0/0"]
}

tags =
{
Name = "wordpress"
}
}

resource "aws_security_group" "rdssecure"
{
name        = "rds-secure"
description = "Allow TLS inbound traffic"
vpc_id      = "vpc-fa9a8792"

ingress
{
description = "Database"
from_port   = 3306
to_port     = 3306
protocol    = "tcp"
cidr_blocks = ["0.0.0.0/0"]
}

egress
{
from_port   = 0
to_port     = 0
protocol    = "-1"
cidr_blocks = ["0.0.0.0/0"]
}

tags =
{
Name = "rds"
}
}
Two security groups will be created. One for the eks cluster and the other is for the RDS db instance. The security groups allow network traffic on some specific ports and block traffic on other ports therefore keeping the deployments secure.
3. For the backend I used MySQL 5.7. The following code snippet provisions a database instance on AWS with MySQL 5.7.
resource "aws_db_instance" "rdsinstance"
{
allocated_storage    = 20
max_allocated_storage= 40
storage_type         = "gp2"
engine               = "mysql"
engine_version       = "5.7"
instance_class       = "db.t2.micro"
name                 = "mydb"
username             = "admin"
password             = "abcd1234"
parameter_group_name = "default.mysql5.7"
skip_final_snapshot  = true
auto_minor_version_upgrade = true
vpc_security_group_ids = [aws_security_group.rdssecure.id]
publicly_accessible = true
port = 3306
}
4. For creating the EKS cluster an IAM role and few IAM role policy attachments are needed. This code snippet will create all the required ones.
resource "aws_iam_role" "IAM"
{
name = "eks-cluster-example"
assume_role_policy = <<POLICY
{
"Version": "2012-10-17",
"Statement": [
{
"Effect": "Allow",
"Principal":
{
"Service": "eks.amazonaws.com",
"Service": "ec2.amazonaws.com"
},
"Action": "sts:AssumeRole"
}
]
}
POLICY
}
resource "aws_iam_role_policy_attachment" "Cluster-Policy"
{
policy_arn = "arn:aws:iam::aws:policy/AmazonEKSClusterPolicy"
role       = aws_iam_role.IAM.name
}
resource "aws_iam_role_policy_attachment" "WorkerNodePolicy"
{
policy_arn = "arn:aws:iam::aws:policy/AmazonEKSWorkerNodePolicy"
role       = aws_iam_role.IAM.name
}
resource "aws_iam_role_policy_attachment" "EKS_CNI_Policy"
{
policy_arn = "arn:aws:iam::aws:policy/AmazonEKS_CNI_Policy"
role       = aws_iam_role.IAM.name
}
resource "aws_iam_role_policy_attachment" "EC2ContainerRegistryReadOnly"
{
policy_arn = "arn:aws:iam::aws:policy/AmazonEC2ContainerRegistryReadOnly"
role       = aws_iam_role.IAM.name
}
5. Next part is cluster creation. The following code with create an EKS cluster and configure the nodes.
resource "aws_eks_cluster" "ekscluster"
{
name     = "eks-cluster"
role_arn = aws_iam_role.IAM.arn
vpc_config
{
subnet_ids = ["subnet-3df9c355","subnet-8b076cc7"]
security_group_ids = [aws_security_group.secure.id]
}
depends_on = [
aws_iam_role_policy_attachment.Cluster-Policy,
]
tags =
{
"Name" = " EKS-CLUSTER"
}
}
resource "aws_eks_node_group" "eks-ng"
{
cluster_name    = aws_eks_cluster.ekscluster.name
node_group_name = "task6"
node_role_arn   = aws_iam_role.IAM.arn
subnet_ids      = ["subnet-3df9c355","subnet-8b076cc7"]
instance_types  = ["t2.micro"]
scaling_config
{
desired_size = 2
min_size     = 1
max_size     = 3
}
depends_on = [
aws_iam_role_policy_attachment.WorkerNodePolicy,
aws_iam_role_policy_attachment.EKS_CNI_Policy,
aws_iam_role_policy_attachment.EC2ContainerRegistryReadOnly,
]
}
6. After the eks cluster is created kubernetes provider needs to authenticate into the cluster. The data source “aws_eks_cluster_auth” provides the token attribute which can be used in doing so.
data "aws_eks_cluster_auth" "eksauth"
{
name = aws_eks_cluster.ekscluster.name
}
7. The following snippets will create the deployment, pvc and service for wordpress.
resource "kubernetes_service" "kubeservice"
{
metadata
{
name = "wordpress"
labels =
{
"app" = "wordpress"
}
}
spec
{
selector = {
"app" = "wordpress"
"tier"= "frontend"
}
port {
port        = 80
node_port = 30001
}
type = "LoadBalancer"
}
depends_on = [aws_eks_node_group.eks-ng]
timeouts {
create = "15m"
}
}
resource "kubernetes_persistent_volume_claim" "kubepvc"
{
metadata {
name = "wordpress-pv-claim"
labels = {
"app" = "wordpress"
}
}
spec
{
access_modes = ["ReadWriteOnce"]
resources
{
requests = {
storage = "1Gi"
}
}
}
depends_on = [aws_eks_node_group.eks-ng]
timeouts
{
create = "15m"
}
}
resource "kubernetes_deployment" "kube"
{
metadata {
name = "wordpress"
labels = {
"app" = "wordpress"
}
}
spec {
replicas = 1
selector
{
match_labels = {
"app" = "wordpress"
"tier"= "frontend"
}
}
strategy {
type = "Recreate"
}
template
{
metadata {
labels = {
"app" = "wordpress"
"tier"= "frontend"
}
}
spec {
container {
image = "wordpress"
name  = "wordpress"
env
{
name = "WORDPRESS_DB_NAME"
value= aws_db_instance.rdsinstance.name
}
env {
name = "WORDPRESS_DB_HOST"
value= aws_db_instance.rdsinstance.endpoint
}
env {
name = "WORDPRESS_DB_USER"
value= aws_db_instance.rdsinstance.username
}
env {
name = "WORDPRESS_DB_PASSWORD"
value= aws_db_instance.rdsinstance.password
}
port {
container_port = 80
name = "wordpress"
}
volume_mount {
name = "wordpress-ps"
mount_path = "/var/www/html"
}
}
volume {
name = "wordpress-ps"
persistent_volume_claim {
claim_name = "wordpress-pv-claim"
}
}
}
}
}
depends_on = [aws_eks_node_group.eks-ng]
timeouts {
create = "30m"
}
}
8. To automate the whole process I have used a null resource which will start the browser on my device and open wordpress. I have also added a few outputs.
output "endpoint" {
value = aws_eks_cluster.ekscluster.endpoint
}
output "kubeconfig-certificate-authority-data" {
value = aws_eks_cluster.ekscluster.certificate_authority[0].data
}
output "loadbalancer" {
value = kubernetes_service.kubeservice.load_balancer_ingress[0].hostname
}
output "db_name" {value = aws_db_instance.rdsinstance.name
}
output "db_endpoint" {
value = aws_db_instance.rdsinstance.endpoint
}
resource "null_resource" "start-chrome"  {
provisioner "local-exec" {
command = "start chrome ${kubernetes_service.kubeservice.load_balancer_ingress[0].hostname}"
}
depends_on = [
kubernetes_service.kubeservice,
kubernetes_deployment.kube
]
}
9. Now that the code is ready, the build can be started. Open the termininal, navigate to the directory containing the code and execute the following command.
terraform init
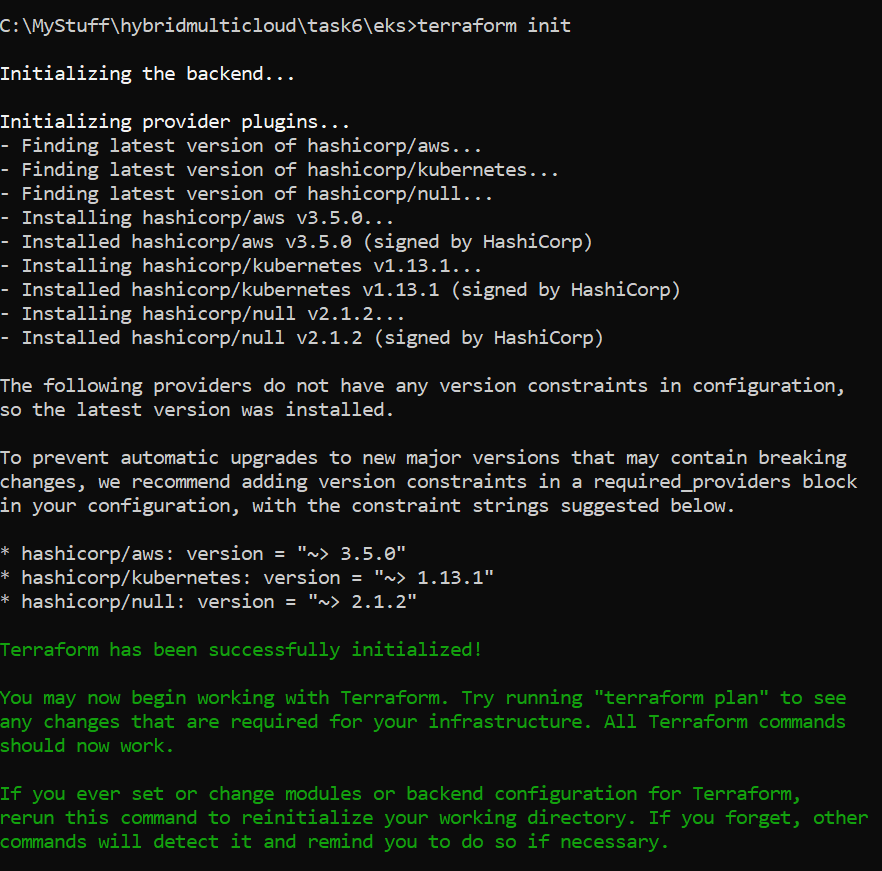
Now run
terraform apply --auto-approveto start the build. The build will take sometime to complete.

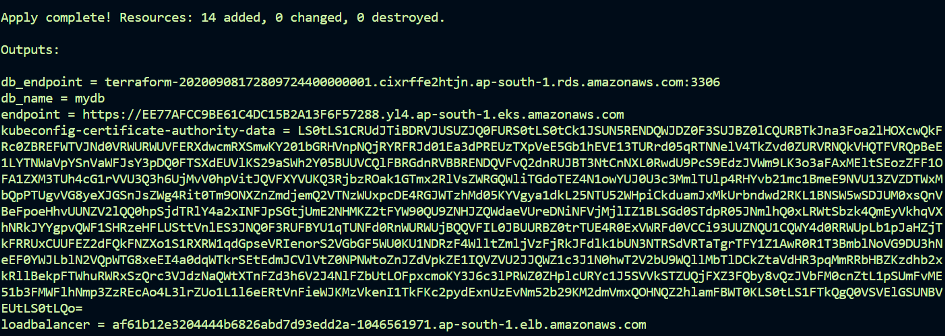
build successful


nodes

DB instance

eks cluster
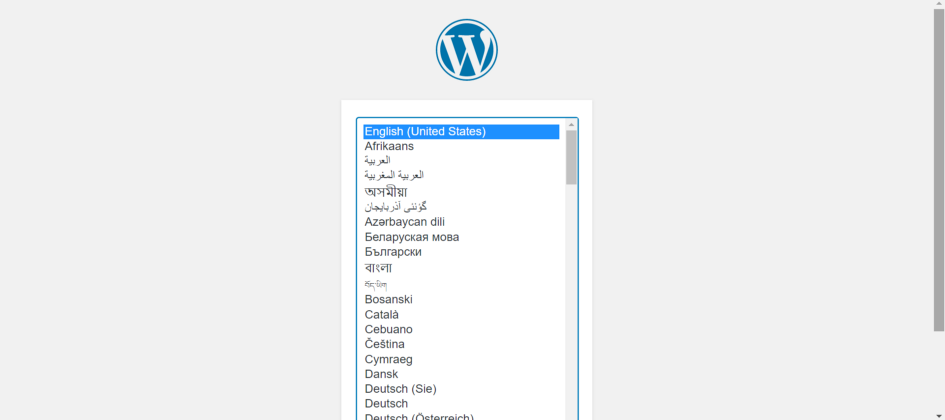
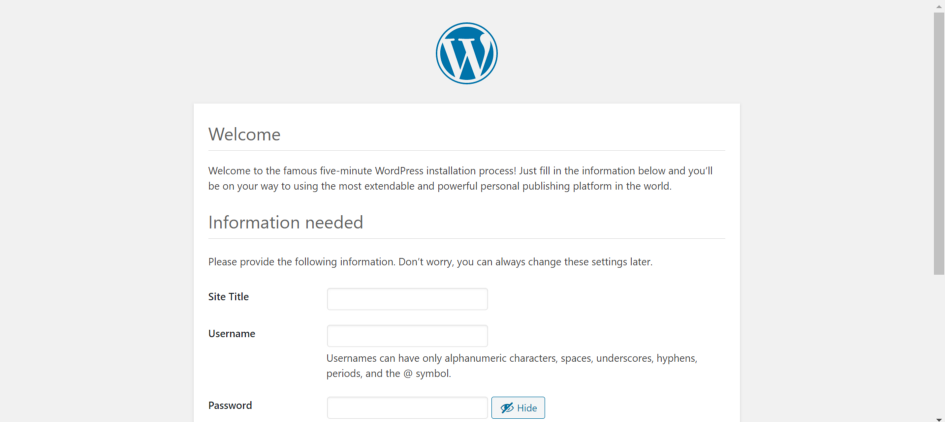
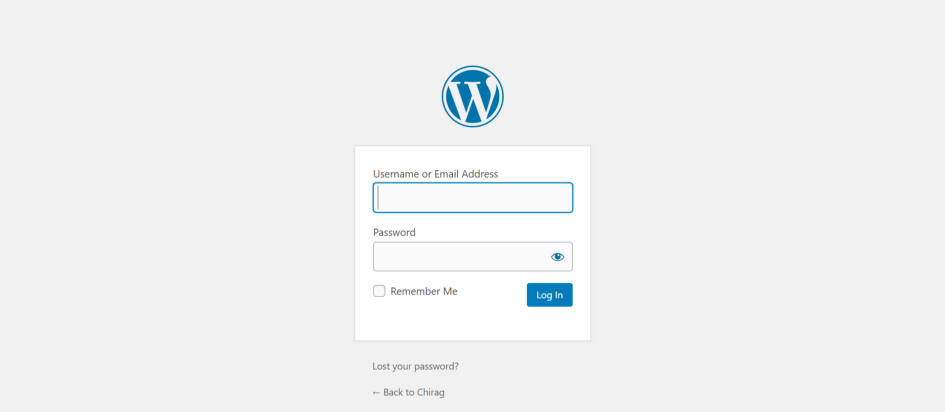
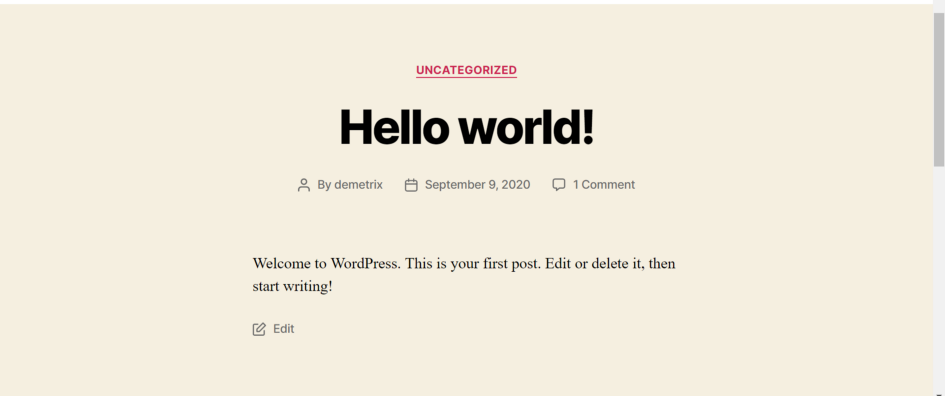
Wordpress is accessible now.


Source: Medium


Comments