
DEPLOY WEB SERVER ON AWS EC2 INSTANCE USING ANSIBLE
- The Tech Platform

- Jan 25, 2021
- 3 min read


This article covers the Integration of Ansible with AWS. Here I have used AWS-EC2 instance as my base OS to launch my web page and this setup is created and managed by Ansible modules, playbooks and Roles.
Task Description:
♦️ Provision EC2 instance through Ansible.
♦️ Retrieve the IP Address of instance using dynamic inventory concept.
♦️ Configure the web-server through Ansible and deploy the web page to the root directory.
To begin with the practical login to your RedHat VM and install boto library in it using the command
pip3 install botoNow to provision the EC2 instance we need to make an IAM user (here I have given it administrative powers) and its access keys.
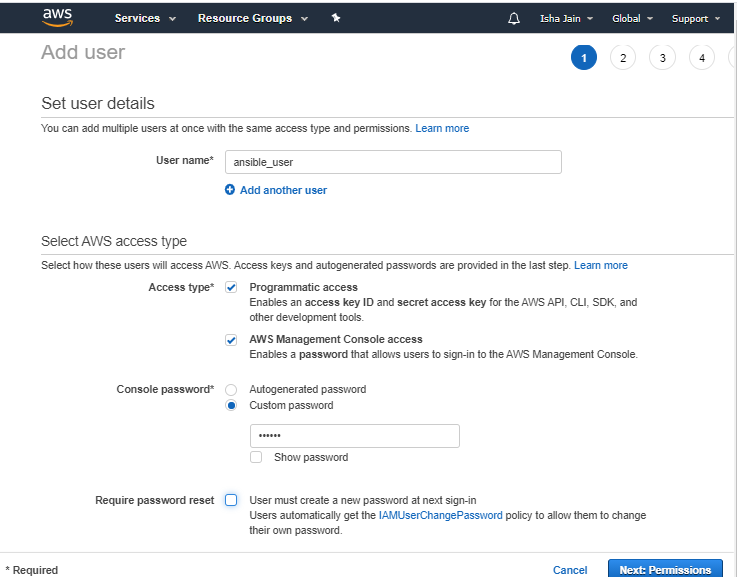
Let's create an IAM user with the name ansible_user : fill in the details as shown and click on Next: Permissions button.

IAM user ansible_user being created
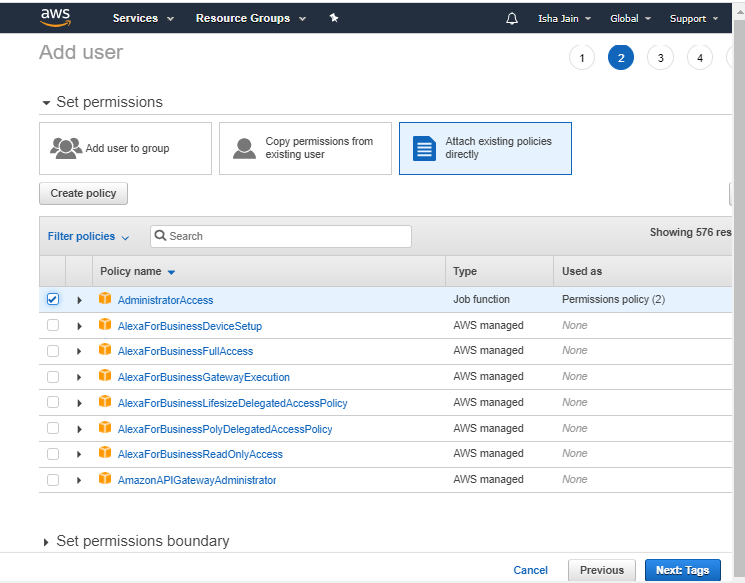
In the permissions click on attach existing policies directly and select AdministratorAccess.

Click on Next and give desired tags(optional) and click in Next to review all details about the user and select create user.

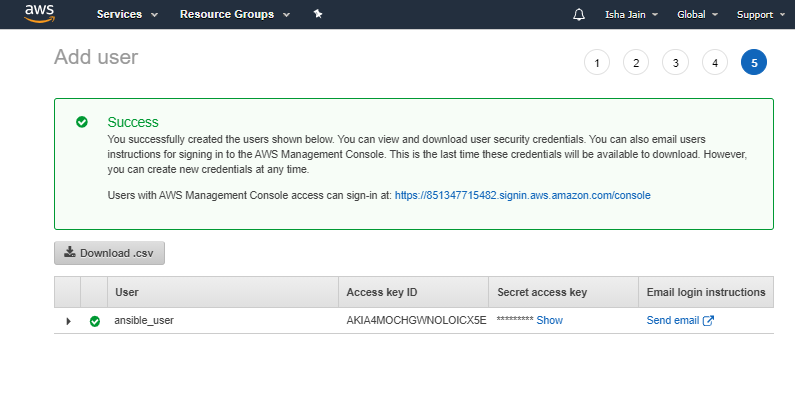
Once the user is created a screen like the one given above will appear. Select the Download.csv option to download the credentials. Now the new IAM user is ready to be used.
Also, create a key pair to launch the EC2 instance and copy it into your RedHat VM. Once done, change the permission of the key using the following command.
chmod 400 keyname.pemNow we are all set to create our role to provision the EC2 instance. For this create a role using the command :
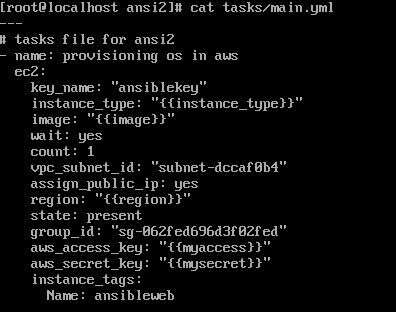
ansible-galaxy init rolenameIn this role go to the main.yml file of the tasks folder and write the code as follows to provision the instance.

The code is available for download from the Github repository :
In this main.yml file, the aws_access_key and the aws_secret _key are passed as variables and the actual keys are saved in a vault file named credentials.yml to ensure the privacy.
Note: The value of these keys are in the .csv file downloaded after creating the IAM user
To create a vault use the command:
ansible-vault create credentials.ymlGive the desired password. Now to add data to this file use :
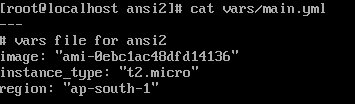
ansible-vault edit credentials.ymlIn this file add the value of the variables myaccess and mysecret which are used in the main.yml file. The rest of the variable’s value can be passed in the main.yml file of the vars folder of this role as:
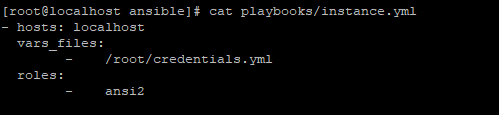
Now we will finally create and run our playbook to provision the instance. Playbook instance.yml has the code:
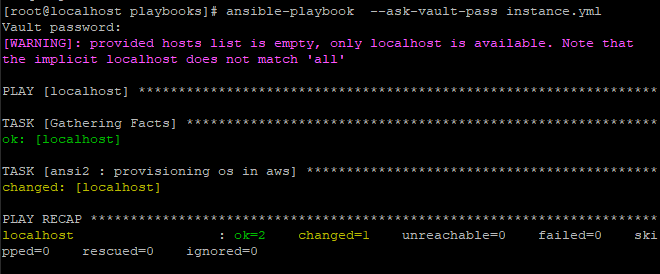
To run this playbook use :
ansible-playbook --ask-vault-pass instance.yml
Now check your AWS console for any launched instance :

To retrieve the IP of our instance dynamically we need two files ec2.py and ec2.ini and need to modify them. To download the files use the command:
wget https://raw.githubusercontent.com/ansible/ansible/stable-2.9/contrib/inventory/ec2.pywget https://raw.githubusercontent.com/ansible/ansible/stable-2.9/contrib/inventory/ec2.iniIn the ec2.py file edit the line as #!/usr/bin/python3 instead of #!/usr/bin/env python
Make these files executable by using the commands:
chmod +x ec2.py
chmod +x ec2.ini
Now export the region name access key id and secret key id using the command:

To retrieve the dynamic IP use :
ansible all --list-hosts
Note: Make sure that your RedHat VM time and date matches with that of AWS.
Next, we need to configure the web-server in the instance launched. For this, we create another role as web.
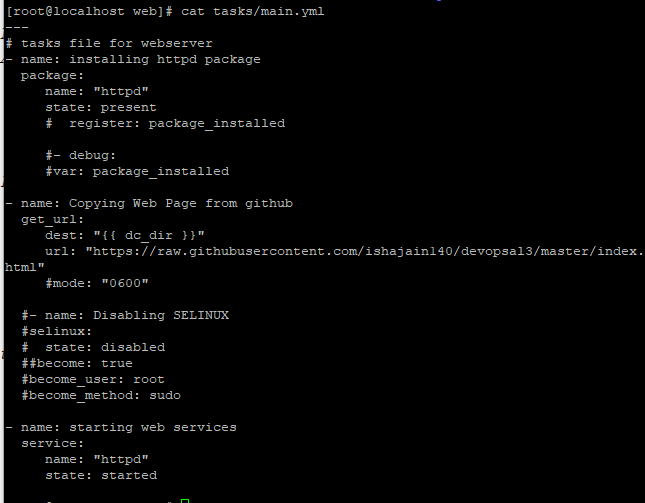
ansible-galaxy init webIn this role we will write the following code in main.yml of the tasks folder:

To run this task make a playbook as webserver.yml:
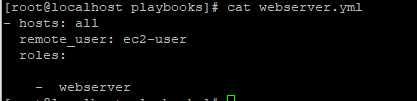
Run the playbook using:
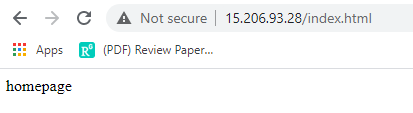
ansible-playbook webserver.ymlNow we can go to the public IP of the instance or the public DNS to reach our webpage.
All the files along with the ansible configuration file are available for download on the GitHub repository
Source: Medium
The Tech Platform


Comments