
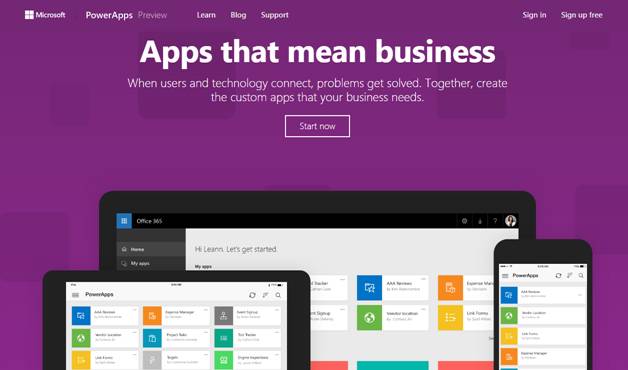
Creating An App For Daily Tasks Using Microsoft PowerApps
- Manpreet Singh

- Apr 12, 2019
- 3 min read
Welcome to an article on creating an app using Microsoft PowerApps. In our market, we have apps everywhere. So, why don't all organizations have their own apps too? It can be used for various purposes and when it’s so simple to build, why not build it?
Why PowerApps?
Organizations can’t always be a free source of apps. They need to store some data with secured access, and who can provide better security than Microsoft?
You need to have Microsoft PowerApps for allowing users to access the apps. So, you not only save money on the app hosting but also, you host that on one of the world’s best platforms.
When it comes to development, it is a right tool to use, for a quicker and smarter app development process.
Let’s see how we do it.

Go to Power Apps
Use this link to sign in with your organization’s Office 365 ID or with your Windows' ID.
Once you login, you will arrive to the following portal.

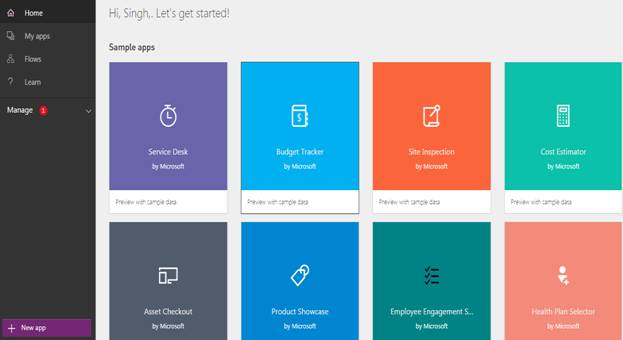
The left tool bar provides you various options to build or explore, as shown below.

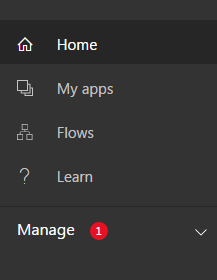
Apps
PowerApps offers an amazing platform for creation of apps in just a few simple clicks. The apps are compatible to all devices and browsers.
As PowerApps says, "Innovation just got easier". Here, you can create an app while connecting to different apps which you are already using without even writing a single line of code, and publish them on all the devices you want.
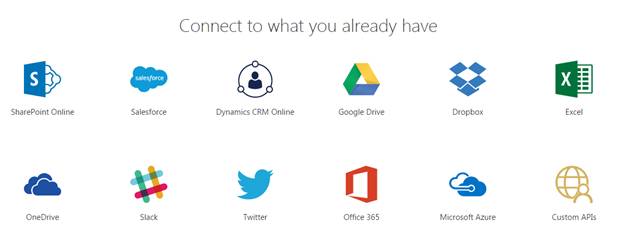
You can connect your app with various everyday social or custom apps and use them in your process of development of your own PowerApps.
You can connect to existing data sources and services like Excel files, SharePoint lists, CRM records, your custom APIs, your Dropbox, or any such, to collaborate with your app. The best part is that you use a designer to customize or build an app that uses device capabilities, including cameras, GPS, and pen control, without writing any code.
So, click on “My Apps”.

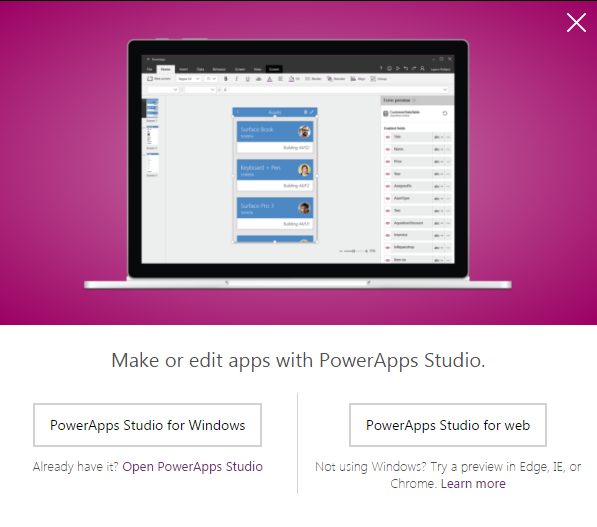
Choose if you want the designer to be installed on your machine or if you want to use a web designer on your browser.

Once you have your studio ready, you will see the screen below.

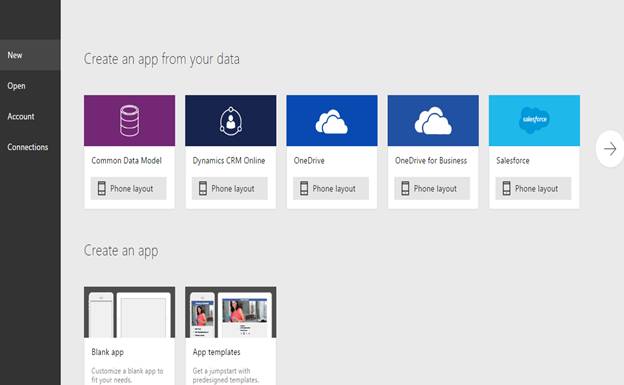
You can either start using an application to connect to your app or create a blank app.
We are using PowerApps Studio for Web. Click on Blank App.
You can choose what source of data you want to use in your app. As for me, I will choose SharePoint.

Enter the site URL.
Fill in your credentials. Your app will get connected to your SharePoint site.
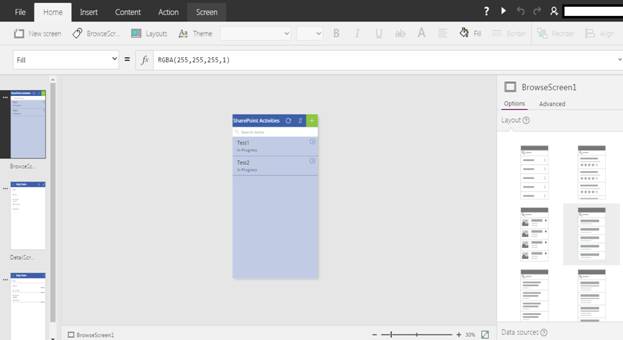
I will be choosing a custom list to store the data, as per the screen below.
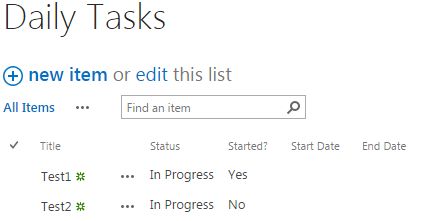
We are going to build an app to see the team’s daily task activities and their progress.
Let’s see how we can create this app.
Once you connect to your PowerApps Studio, you will see the platform being ready, as in the screen below.

Once your platform is ready, you will see the following build.

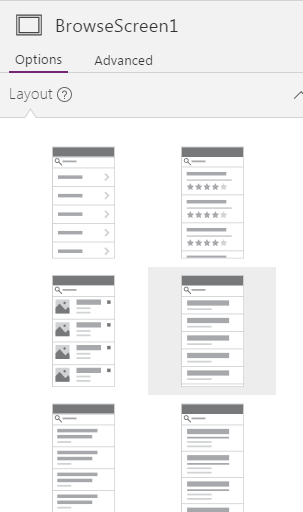
On the right hand side, you can choose various layouts for how your app should look.

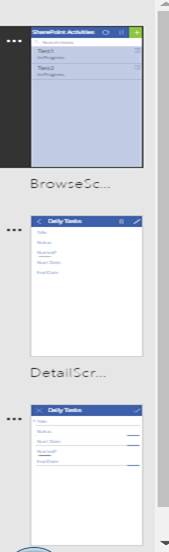
Similarly, you can see your app screens on the left what changes you made.

Development of App
When you select a format as phone or tablet, the Studio gives you a blank platform to build your app.
Using the platform, you can align what kind of data you want.

You can insert the following on your apps.
a. A New Screen
b. A Text Box
c. Button
d. Text
e. Controls - The following controls can be used.


f. Gallery
g. Forms- you can have edit and view forms on your app.
h. Media
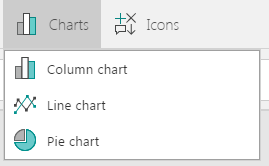
i. Charts - The following types of chart can be used.
j. Icons
You just need to drag and drop them to your app’s screen.
As we are currently using the SharePoint services, I am loading the title of the tasks and their status from the SharePoint list.
Here is our App

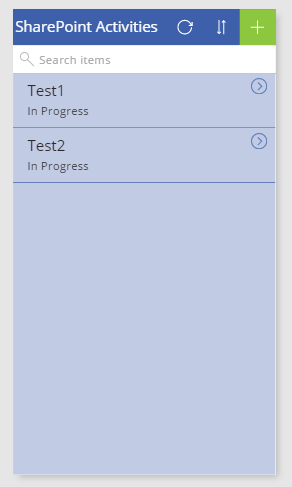
We are using a refresh icon on the top. Then, we are using the sort functions and a new tasks icon.
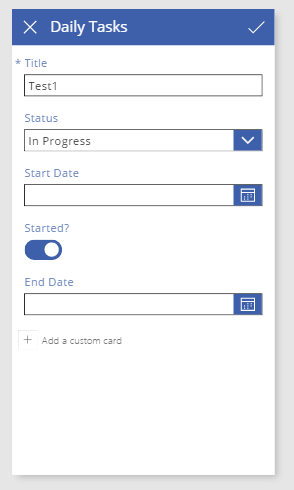
When you click on "Add New", you will see the following screen on your app.

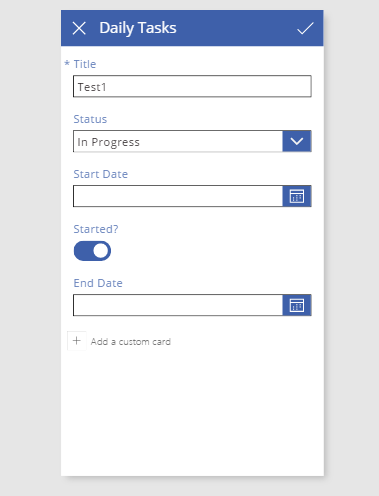
Or when you click on edit on the items of the app, you see the following screen on your app.

As my app is ready, I will go in and save the app.

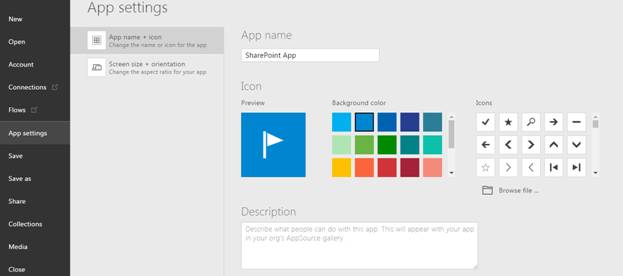
Provide a name and description to your app and click on Save.
Your app is Live now, within your organization and ready to use.
Its quick, isn’t it?
That’s the best part of creating apps through Microsoft PowerApps. There is more to come.
Keep reading & keep learning!


Comments