
Configuring GEO Replication In SQL Azure Database
- The Tech Platform

- Mar 1, 2021
- 2 min read
Geo-replication is a feature which allows you to configure a maximum of four readable copies of your database in the same or different geo-locations. When there is a failover, one of the secondary databases becomes primary and the rest of the secondary databases stay as a secondary linked to the new primary database. When the database that was a failover comes online again, it becomes the new primary, while the rest of the secondary links to the new primary database. There is a small chance of data loss while performing an unplanned failover. When Geo-replication is enabled, the database copies the transactions asynchronously to the secondary Servers. You can not write any transaction directly to the secondary database but you can perform the read operations. You can configure the geo-replication feature, using Powershell, TSQL or Azure portal. We will use Azure portal in this demo. I assume that you have an active Azure subscription and a SQL Azure database running. In this demo, we will create two secondary databases for an existing primary database. Step 1: Create the first secondary database for the existing primary.
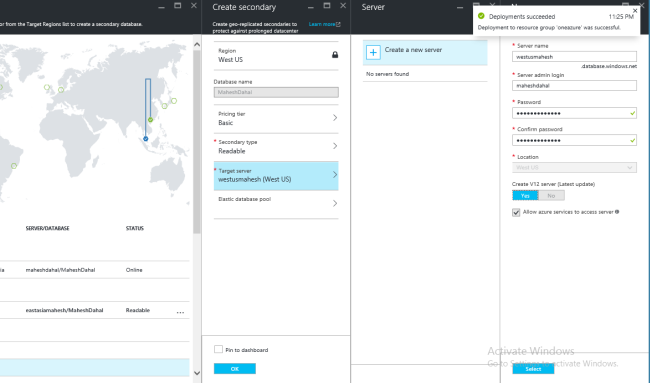
First, go to your database and then to all setting. Click Geo-replication under the High Availability. This will open a new blade, which shows a map and a suggestion for possible secondary database. On the map, choose the secondary Server and configure it.


Provide admin credentials and Server name for the new database. Click select. Wait for some time, until the new database server is provisioned. Step 2: Follow the same process shown above and create another secondary Server also. For this purpose, I have created another secondary database in the West US Datacenter. You can create up to four secondary databases.

When the deployment completes, you can see the geo-replication in the map also.

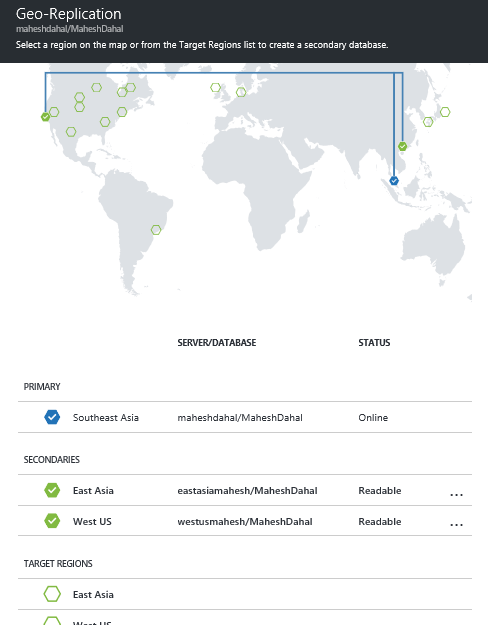
You can clearly see that my database in Southeast Asia is primary and online, whereas those in East Asia and West US are secondary and readable. Now, let's initiate a failover.
Failover
Click one of the secondaries that you want to failover and change to primary. A new blade will open.


Click the failover button. A notification will pop out, as shown below:

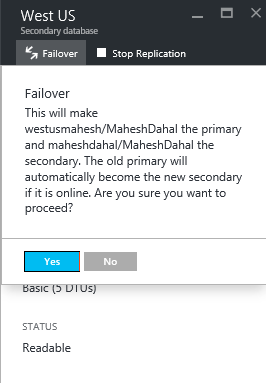
Click Yes. After waiting for some minutes, you will see that the secondary has become the new primary. The secondaries are linked to the new primary.


Source: C# Corner
The Tech Platform


Comments