Configure Connections At The SharePoint Admin Center on Office 365
- Manpreet Singh

- Apr 16, 2019
- 2 min read
Welcome to an article on how to configure Connections under Records Management at the SharePoint Admin Center on Office 365. Here in this article, we will see what are the options available for us to manage Connections at the SharePoint Admin Center.
To see that, you need to be a tenant admin. If you are, let’s see how we can do it,
Click on the left corner of your SharePoint site to view the apps.
Click on Admin.
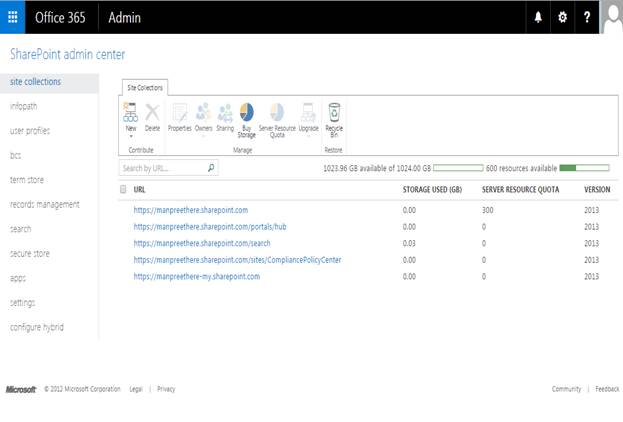
You will come to the “SharePoint admin center”.
Select records management on the left navigation. You will come here.
Use this form to configure the connections on the SharePoint Admin Center. Let’s see how can we do it.
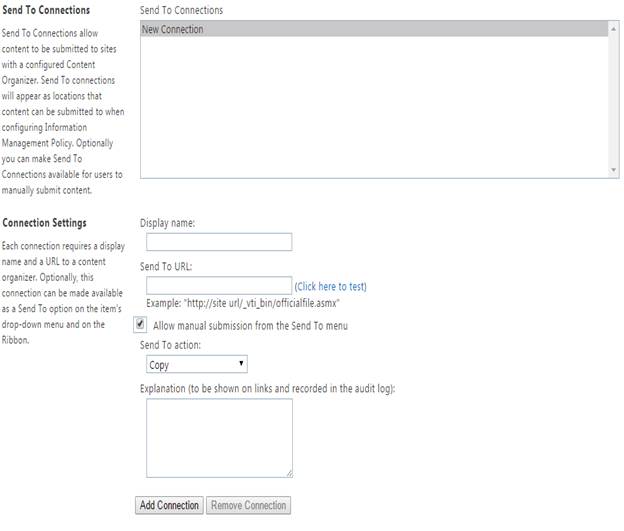
Send To Connections:-
Here you can use connections to allow submission of content with a configured content as per the connection. Let’s see how.
Connection Settings:-
Here you need to configure the connection to do the process.
Display Name: Provide a display name to your connection.
Send to URL: Provide a connection URL where you want to perform the process.
Allow manual submission from the Send To menu: - If you want you can have a send to menu manual option to be used to initiate the process.
Send to Action: Here you can perform the following actions to Copy, Move or Move and Leave a Link.
Explanation: You can provide an explanation for using this connection.
Once you configure, click on Add Connection. The connection will come up under the Send To section and you can use it to initiate the process.
Here we saw in this article, how to manage Connections on the SharePoint Admin Center.
Keep reading and keep learning.
Read more articles on SharePoint:


Comments