Build Your First for iOS & Android App with Xamarin and Visual Studio
- The Tech Platform

- Dec 1, 2020
- 9 min read
Let's start our journey together to build beautiful native cross-platform apps with .NET, Xamarin, and Visual Studio! In this blog I am going to guide you through the entire process and describe everything that is in File -> New for Xamarin. If you are a more visual learner, I have a full video that you can watch:
Let's set some groundwork first by answering some frequent questions.
What is .NET?
.NET is a cross-platform, high-performant, and open-source runtime that is used with multiple languages, editors, and libraries that enables apps to be built for web, mobile, desktop, games, and more. It is the foundation that enables code to be run on different platforms such as iOS, Android, and Windows. If you are a web developer this is like the V8 runtime that executes JavaScript or if you are a Java developer, the JVM that executes Java.
What is Xamarin?
.NET has a series of frameworks that are built for it that enable unique scenarios for developer for specific platforms. For example, ASP.NET Core and Blazor are frameworks built for .NET for web development. WPF and UWP are frameworks built for .NET for desktop development. Xamarin is a framework and tooling that enables apps to be built for iOS, Android, and macOS. It also contains several libraries that enable cross-platform development across iOS, Android, macOS, and Windows including Xamarin.Forms for cross-platform user interface and Xamarin.Essentials for accessing native platform features cross-platform.
What programming languages can I use?
.NET supports several languages including C#, F#, and Visual Basic. You can use any of these programming languages to build apps with Xamarin, however I am a C# developer, and it is the primary language for app development. However, there are some fantastic frameworks for F# such as Fabulous for functional development.
XAML is another "language" that will be used to build user interface with Xamarin. XAML has been used for a long time to build Windows applications with WPF and UWP and has some great features including easy to read markup, Hot Reload technology, and advanced data binding to make UI development a breeze.
What tools can I use?
.NET enables developers to use a wide range of tools including command line, code editors such as Visual Studio Code, and full IDEs (Integrated Development Environment) with Visual Studio 2019 and Visual Studio 2019 for Mac. To develop mobile apps with Xamarin we will need to use either Visual Studio 2019 or Visual Studio 2019 for Mac as they have the full features to build apps.
So, let's get started building our first mobile apps with Xamarin!
Installing Visual Studio for Mobile Development
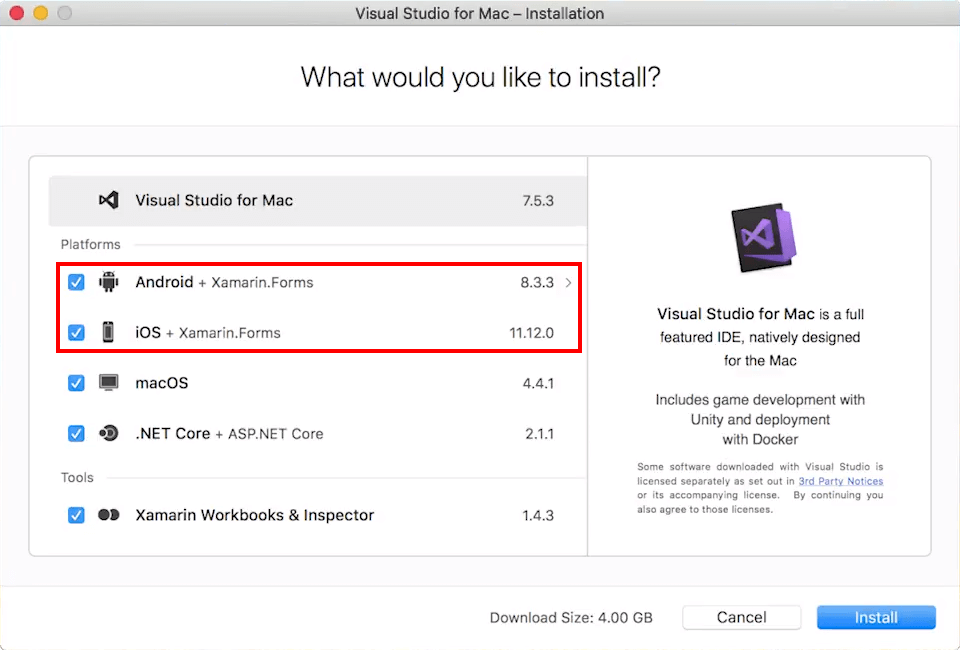
The first step in your cross-platform journey is to install Visual Studio 2019 for Windows or Visual Studio 2019 for Mac.
When installing Visual Studio 2019 on Windows all you need to do is select the Mobile development with .NET workload:
On Visual Studio 2019 for Mac you can select to install Android and iOS.
If you are doing iOS development you will also need to install Xcode on your macOS machine.
After this you are all set and ready for mobile development!
When you create and run an Android project you may get asked to install additional Android SDKs and create Android emulators.
Creating your project
Now that we have Visual Studio 2019 and Xamarin installed let's get to work! When you launch Visual Studio 2019 you will have an option to create a new project. On Windows you can search for Xamarin.Forms or use the project types filter and select Mobile. We will want to select Mobile App (Xamarin.Forms).
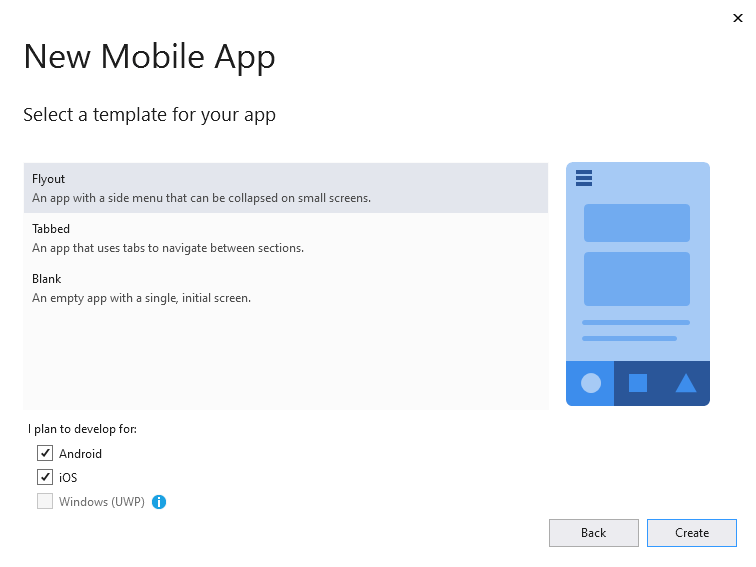
When you select this new project, you will see a new dialog asking what type of template for the app that you would like to use:
We have a few options to select based on the type of application that we want to build.
Flyout, Tabbed, & Blank
Flyout & Tabbed app templates are based on the latest Xamarin.Forms technology called Shell. It enables quicker scaffolding of apps and offers unique features such as URL based navigation. These templates are similar with a main difference if you want a flyout menu or bottom tabs for the base of your app.
Blank app is just that and offers a quite simple template with a single page and nothing else.
Let's go with Flyout! I want us to start here as most tutorials don't go through Shell and to me it is the future of Xamarin app development. This template has a lot in is so in future posts we will go through each section, but for today we will just create the project and go through what a Shell is.
If you are on Visual Studio 2019 for Mac you will want to select Multiplatform > App > Flyout Forms App
What's in the project?
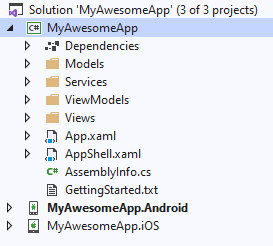
Now that the app project has been created you will see several projects inside of a single solution.
Let's walk through what is here in our new solution:
The first project contains several folders, code files, and user interface files. This project is a .NET Standard project that enables us to have a single project that can be shared across different operating systems. This project is where we will write most of our code.
iOS & Android projects are the "head" or "parent" project that is used to house platform specific code, settings, assets, and more. This is where you will want to configure different settings such as display name, app icon, version numbers, and any code that is needed for iOS or Android specific things that aren't available cross-platform. At some point you will need to go into these project and tweak things around, but for now we will stay in the cross-platform project.
Xamarin.Forms Cross-Platform UI
Inside of our cross-platform .NET Standard project we will find a bit of code for our app. This template shows off a sample app that has a list of items and an about page. Items are organized into folders:
Models: These are classes that represent data in your apps such as Person, Car, Dog, Cat, etc. In this app we have a single model called Item.
Services: Inside of this folder is where you would put code that access non-UI related things such as web service calls, databases, etc. In the project in a simple MockDataStore that is used to store items in memory.
Views: This is where our XAML user interface files will live!
ViewModels: In this folder you will find files that map nearly 1:1 to the Views folder. This is because each View has a ViewModel that is bound that Xamarin.Forms can bridge the two together so the View can display information or call methods in each ViewModel.
Let's look at the AboutPage.xaml which is the first page we will see when we launch the app. Here we see a few things, first is the top-level element ContentPage:
<ContentPage xmlns="http://xamarin.com/schemas/2014/forms"
             xmlns:x="http://schemas.microsoft.com/winfx/2009/xaml"
             x:Class="MyAwesomeApp.Views.AboutPage"
             xmlns:vm="clr-namespace:MyAwesomeApp.ViewModels"
             Title="{Binding Title}">
Here are a few xmlns tags that represent where specific code lives. The default and x are included in every file and are for base functionality. The xmlns:vm tag allows us to access our own code from XAML, which we will see in a bit. The x:Class is a reference to the namespace and name of the page, this matches the code behind. Finally, there is a Title property that is data bound to a property called Title in our ViewModel.
We can set additional properties such as the BindingContext and Resources with XAML content. Here we are going to use that xmlns:vm tag to set the BindingContext to a new instance of the AboutViewModel:
<ContentPage.BindingContext>
    <vm:AboutViewModel />
</ContentPage.BindingContext>
Next up is a Color resource that can be used on the page. Resources allow us to remove duplicated code and create re-usable key/value pairs. This is similar in a way to CSS in web development.
<ContentPage.Resources>
    <ResourceDictionary>
        <Color x:Key="Accent">#96d1ff</Color>
    </ResourceDictionary>
</ContentPage.Resources>
We can add more things to the Resources including strings, styles, and more.
Finally, each Page can have one root element control. This is normally a Layout such as StackLayout, ScrollView, or a Grid like we have here. The grid is an awesome control that has rows and columns. We won't go much into detail of layouts, but this one displays an image, some text, and a button that can be clicked to open a web browser.
<Button Margin="0,10,0,0"
        Text="Learn more"
        Command="{Binding OpenWebCommand}"
        BackgroundColor="{StaticResource Primary}"
        TextColor="White" />
Note the {StaticResource Primary}, which is a reference to a resource we defined Accent earlier, but Primary is located in our App.xaml, which are resources avaialble across the entire app.
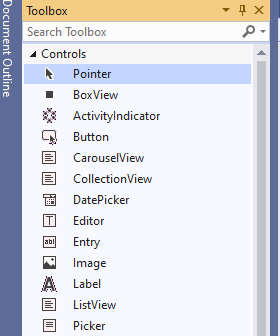
To find more layouts and controls you can open the Toolbox to see what is available:
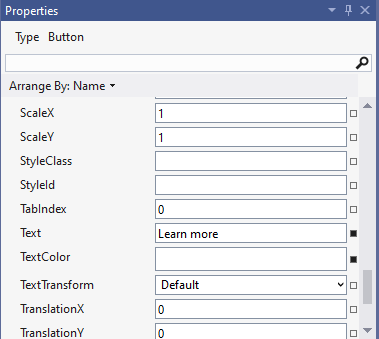
Finally, if you select a control or layout the Property pane will show you all the different properties that are available on that control.
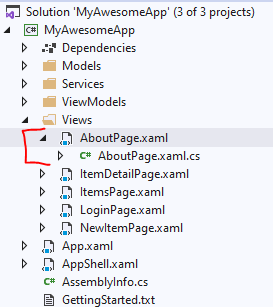
One thing that is very important is that each of these XAML pages has code behind that is important for the XAML view and has specific methods for the constructor and event such as when the pages is shown or disappears. You can use the little arrow drop down to see the .xaml.cs code behind file.
If you open it up, you will see that it is very simple as for this view there isn't any special events that are needed right now.
public partial class AboutPage : ContentPage
{
public AboutPage(){InitializeComponent();
}
}
User Interaction and ViewModels
Now, let's talk about the ViewModel for this page that was created in the XAML. Open up the ViewModels -> AboutViewModel.cs file by double clicking on it.
public class AboutViewModel : BaseViewModel
{
public AboutViewModel()
{
        Title = "About";
        OpenWebCommand = new Command(async () => await Browser.OpenAsync("https://aka.ms/xamarin-quickstart"));
}
public ICommand OpenWebCommand
 { get; }
}
This is an amazingly simple ViewModel, but is a notable example of how data binding works. Here the ViewModel sets the Title to About and then creates a new Command that is calling Browser.OpenAsync to open a web browser on the page.
That Command is something special. Unlike Title which is a simple string that will be displayed, the Command is a special class that we can use to tell our user interface to do something when the user interacts with it. For example on our Button we saw the following code:
Command="{Binding OpenWebCommand}"This code is telling Xamarin.Forms that there is a public Command in our ViewModel that has code to execute when the user clicks on the button. In this case we want to open the brower, which is one of the many native features available from Xamarin.Essentials. Calling Browser.OpenAsync will launch the browser specific for iOS and Android with a single line of code.
Quick Changes with XAML Hot Reload
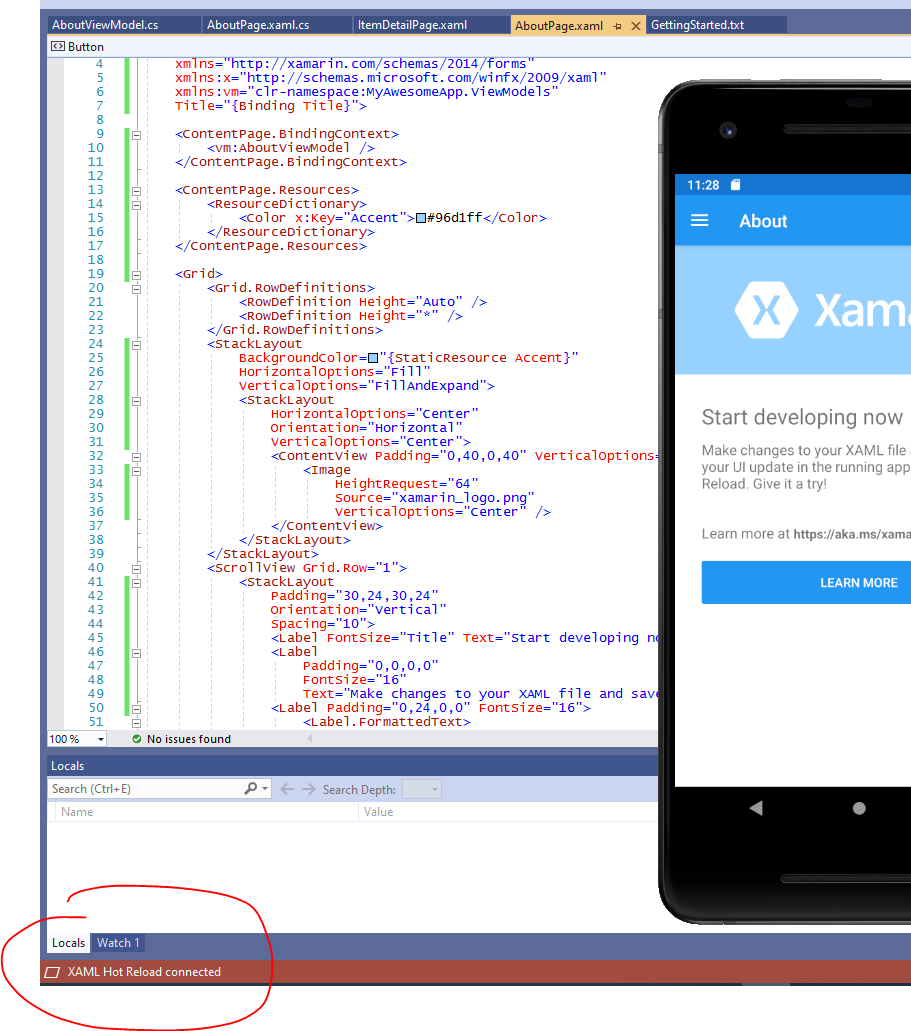
Now, it is time to launch our application. I like to start on Android because emulators are available locally on both Windows and macOS. In the menu of Visual Studio you will see that Android is the default project and will the debug button is available and will show your Android Emulators available. When you click the debug button if you don't have any emulators you will be asked to created one.
When the app launches it will enter Debug mode which allows us to set break points on our code to see the values, but also enables XAML Hot Reload where we can make changes to the UI without having to stop debugging.
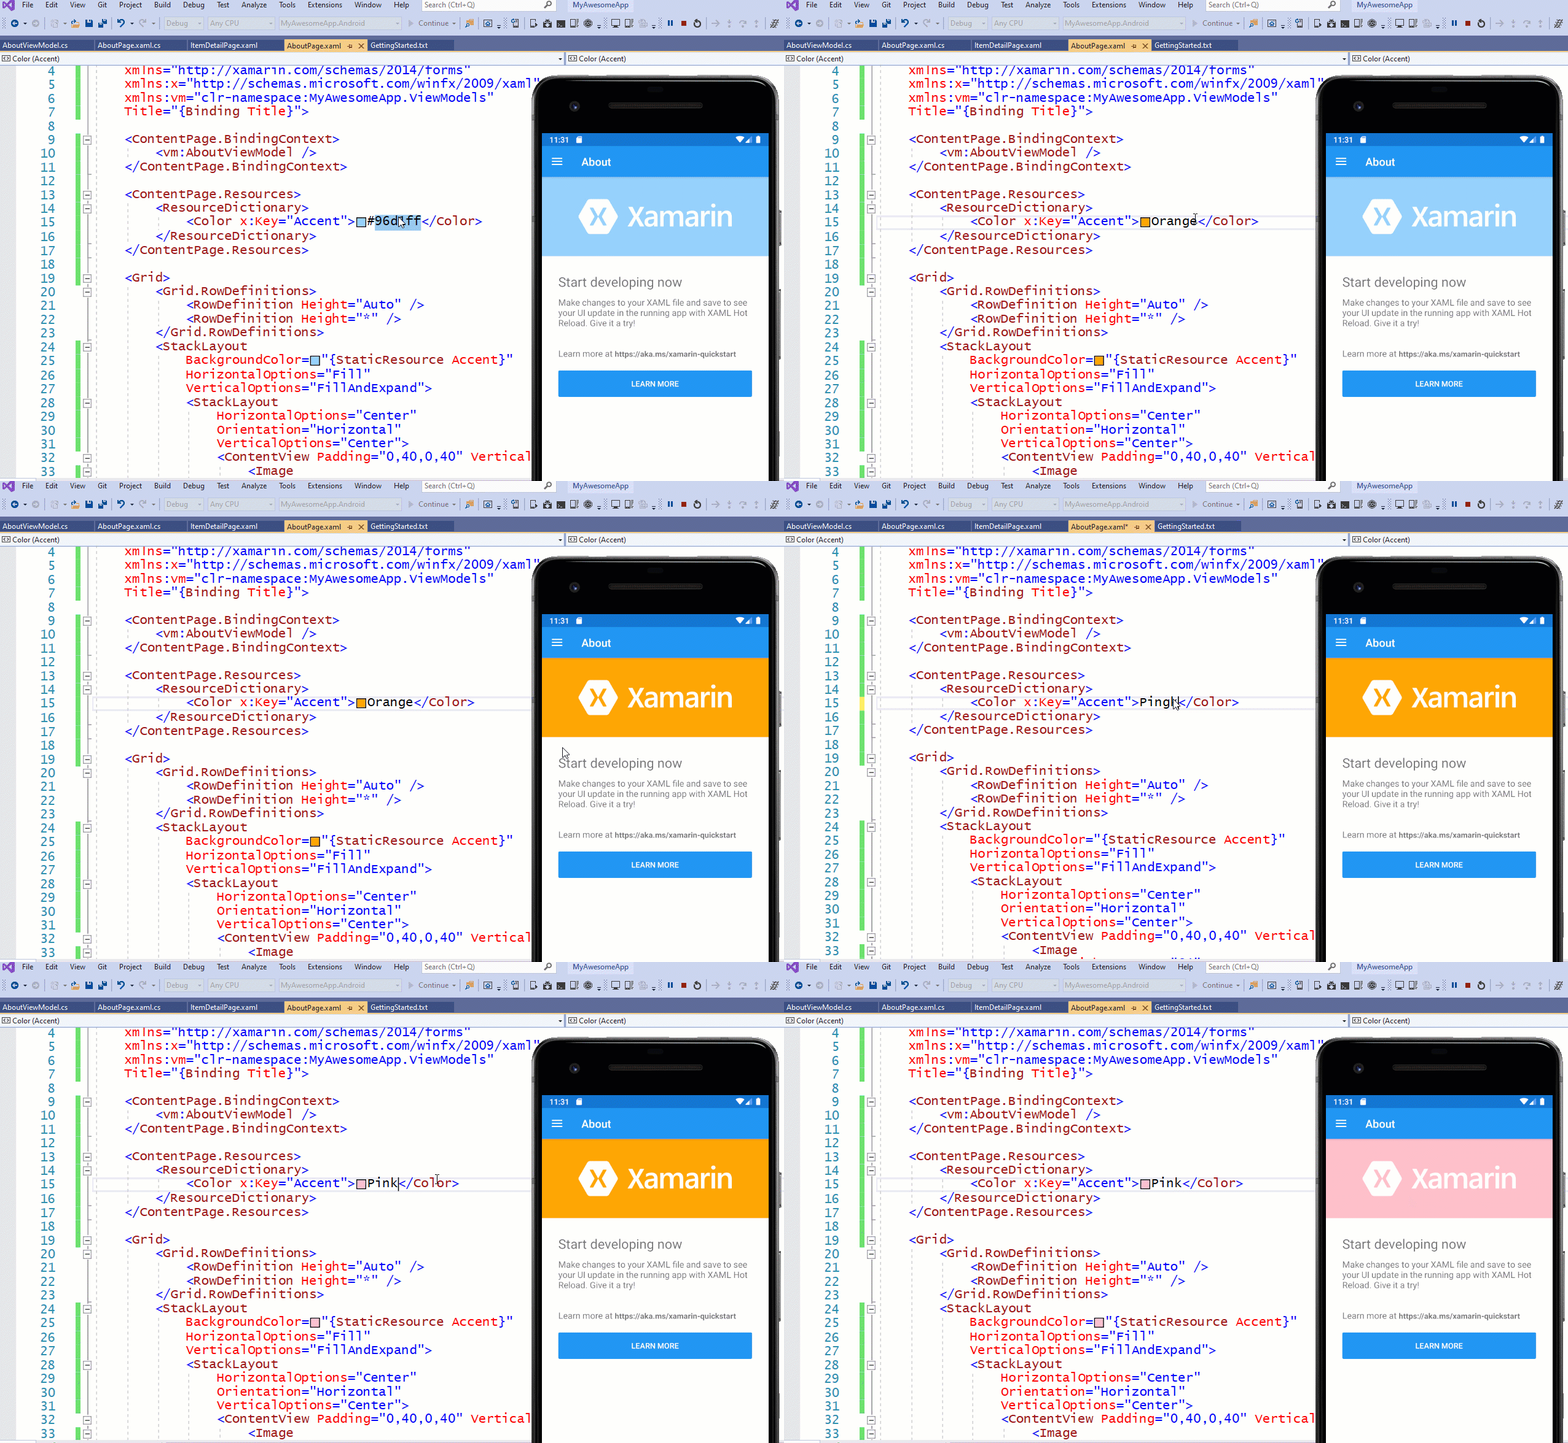
Let's open the AboutPage.xaml and change the Accent color to a different color. Here I will update it to Orange and I will hit save to see thechanges.
At this point we can add new controls, update the user interface, and continue to work on our app on Android.
Deploy to iOS with Hot Restart
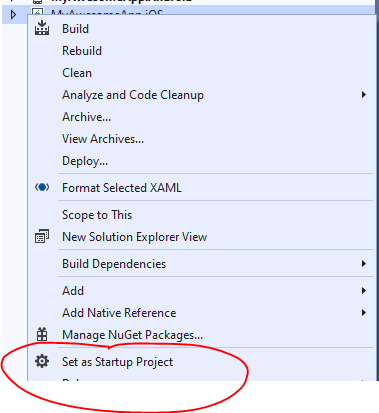
Let's get iOS deployed! Right click on the iOS project and select Set as Startup Project:
On iOS things are a bit different for developers. If you are on macOS and install Xcode you will have iOS Simulators available. If this is you, you can select a simulator and then debug your app. On Windows, there are no iOS simulators :( so there are two ways to get your
iOS Remoted Simulator: If you have a macOS machine you can install Visual Studio 2019 for Mac and Xcode and connect to it from your Windows machine to use it as a remote build machine. The iOS simulator can then be launched from displayed on your Windows machine, which is very cool!
iOS Hot Restart: This is a new preview technology that enables you to deploy a debug build of your app directly to your iOS device that is plugged into your Windows machine. This is great if you don't have a mac and want to debug your application and use awesome features like XAML Hot Reload.
Based on your setup and equipment available there is a great option for you to start debugging your iOS app from Windows. Read through the documentation that I linked to for a full setup guide.
Understanding App and Shell
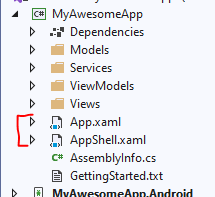
The last thing I want to talk about is what is in our *App and what is in our Shell:
Inside of our App.xaml you will find global resources such as Primary that we used earlier on the button, but also styles such as a global Button style that we are using with states when enabled and disabled. If you open up the App.xaml.cs code behind you will the creationg of the App that is setting the MainPage to our AppShell and also has additional events similar to our page, but for the app such as when it started, went to sleep (aka background), and resumed.
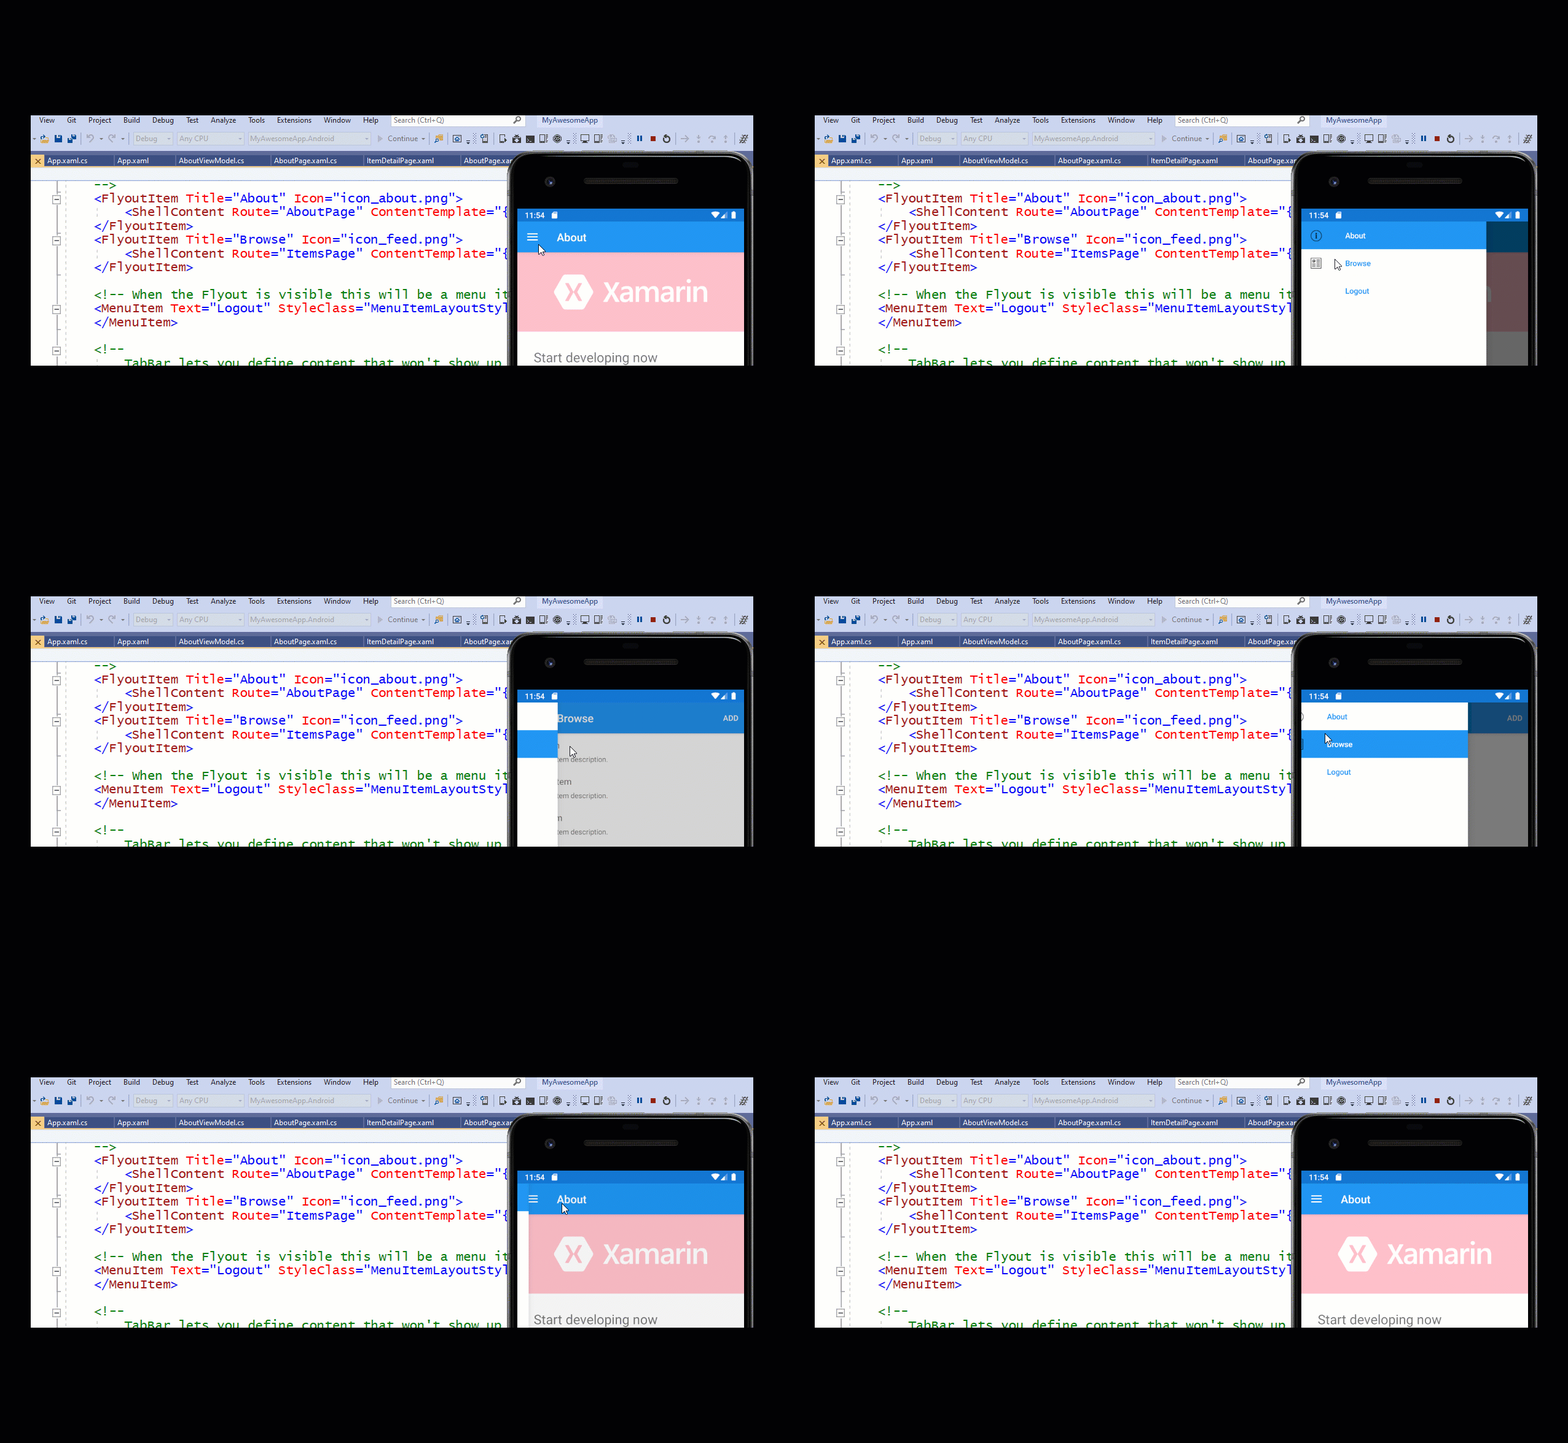
The AppShell.xaml houses the Shell of our application structure. It includes styles and colors for our app shell, and then has additional items for tabs, flyouts, and pages that are displayed. Here we will find two FlyoutItem elements that represent the AboutPage and the BrowsePage. Additionally, it has a MenuItem to display a login/logout button. The ShellContent has a binding to our page that we created and automatically the pages will appear and navigate to each of them when selected.
There is a lot more to Xamarin.Forms Shell and creating apps with Xamarin, but hopefully this puts you on the starting path to getting going with your app. Be sure to follow the .NET dev.to account for more entries in this series.
Source: Paper.li












Persevering players of geometry dash lite have reported improvements in their focus, rhythm awareness, and reaction time.