
Analyze and Classify Images on Office 365 SharePoint using MS Flow and Azure Service
- Nakkeeran Natarajan

- Feb 18, 2019
- 3 min read
Let us see how the Office 365 SharePoint library images are analyzed using Microsoft Flow and Azure Cognitive Service. By analyzing the images, we can classify the images. Also, we can extract the image description, tags or taxonomy data of image, locations present on images, or even the image categories.
Azure Cognitive service provides Computer Vision API, which helps providing tools to understand the content of any images. Computer vision API helps in classifying the image, identifying captions of image and even image categorizations. Further API helps in recognizing celebrities and landmarks, reading out text from images, analyzing video in real time and generating thumbnails for the videos.
Computer vision API can be leveraged on multiple platforms. Microsoft Flow is one such powerful platform, where we integrate computer vision API for analyzing the images uploaded to SharePoint.
Use Case: Let us see how the images uploaded can be analyzed classified on SharePoint images library. At the end of article, you will know how the below image uploaded can be updated classification and description data.

Let us look into the step by step approach involved in configuring the flow for above scenario.
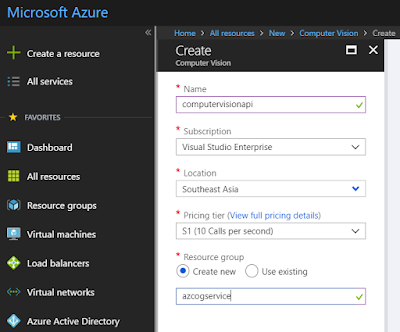
Creating Computer Vision API:
Login to the Microsoft Azure Portal.
Add on new icon and search for computer vision API.
Click on create button and provide the necessary inputs. For POC’s, you can select the free pricing tier (F0).
Then navigate to the API and copy any of the keys. The key will be used at later point of time on MS flow.

Configuring Microsoft Flow:
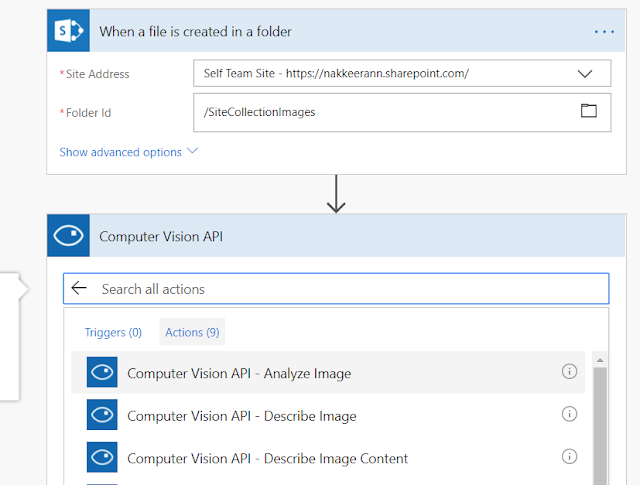
Login to the Microsoft Flow account. Create File Trigger: Create app from blank template. From the connectors listed, select SharePoint. From the triggers listed, select “When a file is created in folder” trigger. Then fill in the necessary details like site address and folder id (Folder Id can be selected using the picker available).
Adding Analyze Image API Action: From computer vision API connector and select Analyze Image action.

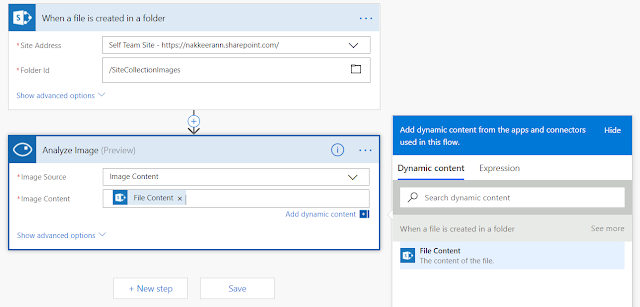
Select “Image Content” as source of the image in the action. In the image content text box, select file content of the previous step with the help of dynamic content.

The above step will yield captions, tags and categories of image uploaded.

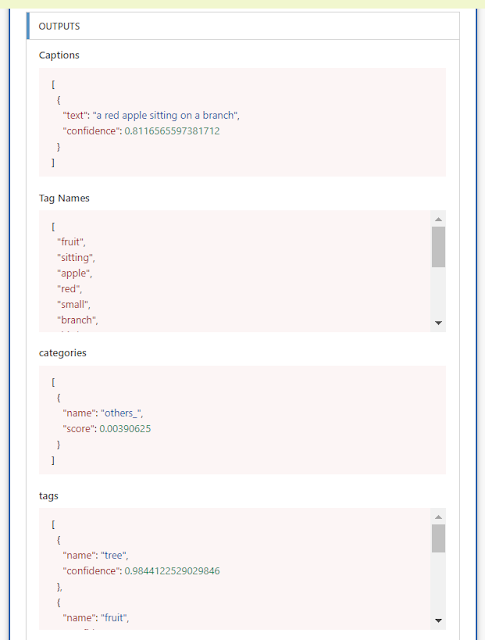
The result needs to parsed and it can be updated back as file properties. Tags identified will be in the form of array. The tag values need to be joined as a string value, which can be updated in the keyword field of SharePoint file.
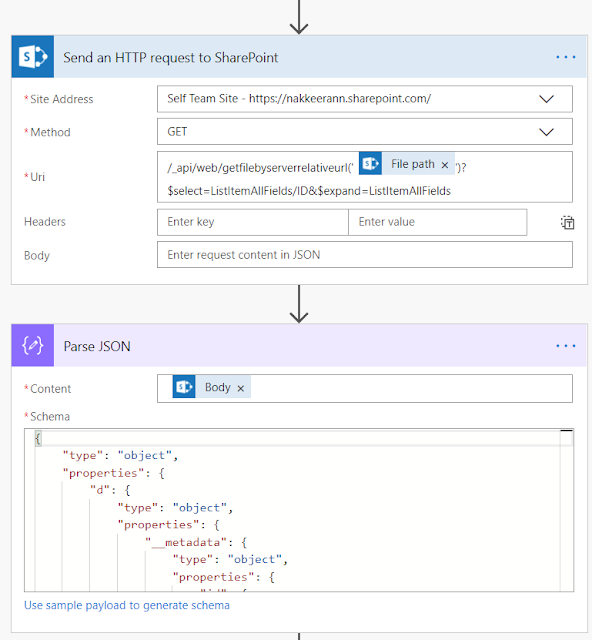
Identify SharePoint File Item ID (for updating file properties): To update the SharePoint file, we need to identify the file ID or item ID. This can be done by making the REST API call to SharePoint, with the help of file path available. Select "Send an HTTP request to SharePoint" action from the SharePoint connector and fill in necessary details like site address, method and REST API URL (API will include the file path). Then the result from REST API call is parsed by generating the schema. The schema is generated using the result JSON of REST API call (Generating schema content for parsing JSON results is explained in the previous article).

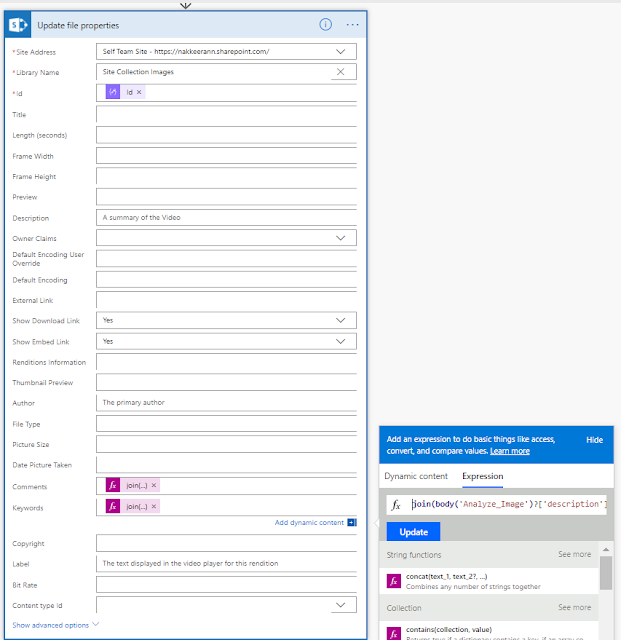
Then update the SharePoint file properties with the help of ID retrieved from the above step (parse JSON step). The file properties updated are tags and captions. Since the properties are available as string array, join expressions are used to make it as string. The below points shows the expression being used for updating.
Keywords field updated with tags using the expression: join(body('Analyze_Image')?['description']?['tags'],',')
Comments Field updated with caption using the expression: join(body('Analyze_Image')?['description']?['captions'],',')
Note: In this case, I am updating the caption with text and confidence as string array in the properties.

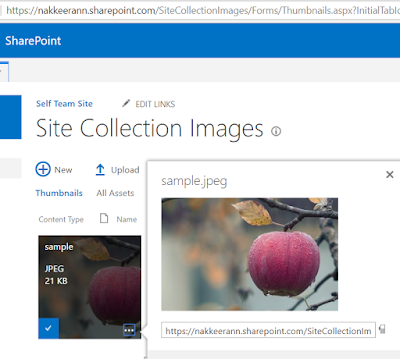
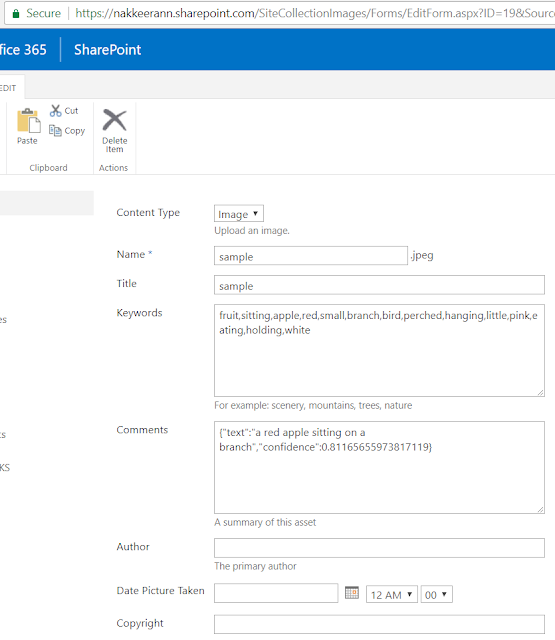
Let us test the flow by uploading images to SharePoint images library. Navigate to the respective images library and upload any image. The following snapshot shows the image uploaded.


After few movement, go back to the Microsoft Flow and check the results. The following flow results snapshot shows the analyzed image data with tags as keywords and caption data as comments.


Comments