Add a polygon to the Silverlight Bing Map
- Vijai Anand Ramalingam

- May 2, 2019
- 1 min read
In this article we will be seeing how to add a polygon on top of the Silverlight Bing Map.
Refer this Article for creating Silverlight Bing Map Control.
MapPolygon:
The MapPolygon class accepts a list of points that define its shape and location on the map.
MapPolygon class is used to represent a polygon on the map.
Namespace: Microsoft.Maps.MapControl
Assembly: Microsoft.Maps.MapControl (in microsoft.maps.mapcontrol.dll)
Create Silverlight application:
1. Open Visual Studio 2010.
2. Go to File => New => Project.
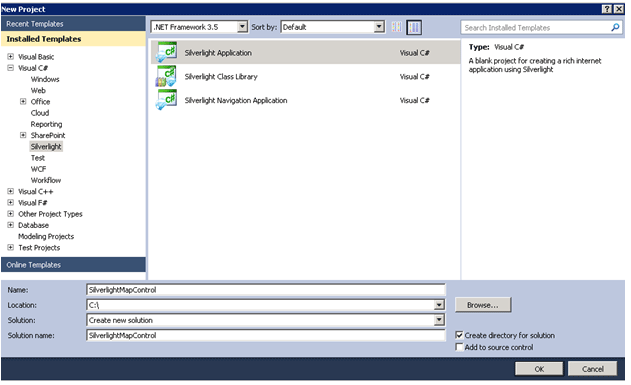
3. Select Silverlight Application from the installed templates Silverlight.
4. Enter the Name and click on Ok.
5. Click OK.
6. Go to C:\Program Files (x86)\Bing Maps Silverlight Control\V1\Libraries\ (Check the path where you have installed Bing Maps Silverlight Control).
7. Add the following assemblies to the project.
o Microsoft.Maps.MapControl.Common.dll o Microsoft.Maps.MapControl.dll
8. Replace MainPage.xaml with the following code
<UserControl x:Class="SilverlightMapControl.MainPage"
xmlns="http://schemas.microsoft.com/winfx/2006/xaml/presentation"
xmlns:x="http://schemas.microsoft.com/winfx/2006/xaml"
xmlns:d="http://schemas.microsoft.com/expression/blend/2008"
xmlns:mc="http://schemas.openxmlformats.org/markup-compatibility/2006"
xmlns:map="clr-namespace:Microsoft.Maps.MapControl;assembly=Microsoft.Maps.MapControl" mc:Ignorable="d"
d:DesignHeight="300" d:DesignWidth="400">
<Grid x:Name="LayoutRoot" Background="White">
<Grid.RowDefinitions>
<RowDefinition Height="35" />
<RowDefinition Height="*" />
</Grid.RowDefinitions>
<Button x:Name="btnCreatePolygon" Width="100" Height="25" Content="Create Polygon" HorizontalAlignment="Left" Tag="false" Click="btnCreatePolygon_Click">
</Button>
<map:Map x:Name="MapWithPolygon" CredentialsProvider="your key" Mode="Road"Grid.Row="1" Grid.ColumnSpan="2">
</map:Map>
</Grid>
</UserControl>
9. Add the following in MainPage.xaml.cs.
private void btnCreatePolygon_Click(object sender, RoutedEventArgs e)
{
MapPolygon polygon = new MapPolygon();
polygon.Fill = newSystem.Windows.Media.SolidColorBrush(System.Windows.Media.Colors.Gray);
polygon.Stroke = newSystem.Windows.Media.SolidColorBrush(System.Windows.Media.Colors.Black);
polygon.StrokeThickness = 1;
polygon.Opacity = 0.7;
polygon.Locations = new LocationCollection() {
new Location(15,-15),
new Location(15,15),
new Location(-15,15),
new Location(-15,-15)};
MapWithPolygon.Children.Add(polygon);
}
10. Build the solution.
11. Hit F5.
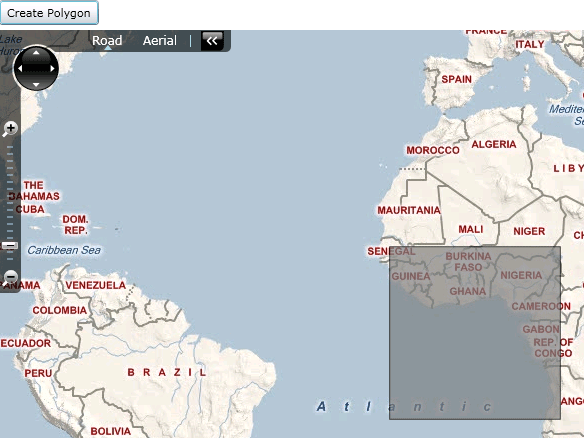
12. The output looks like the following
Location:
Contains the altitude and coordinate values of a location on the map.
Fill:
It is used to get or set the fill of the shape.
Opacity:
It is used to get or set the opacity of the shape.
Stroke:
It is used to get or set the stroke color of the shape.
erver'>


Comments