
Add a Custom Search Vertical to Your Search Results Page in SharePoint 2013 Online
- Vijai Anand Ramalingam

- Mar 7, 2019
- 2 min read
This article shows how to add a custom search vertical to your search results page in SharePoint 2013 Online.
Sign up for an Office 365 Developer Site. Ensure you have access to an Office 365 Developer Site. Here are three ways to get one:
Are you an MSDN subscriber? Visual Studio Ultimate and Visual Studio Premium with MSDN subscribers receive an Office 365 Developer Subscription as a benefit. Redeem your benefit today.
Do you have one of the following Office 365 subscription plans? Office 365 Midsize Business Office 365 Enterprise E1, E3, E4, or K1 Office 365 Education A2, A3, or A4 Office 365 Government G1, G3, G4, or K1 If so, you can provision a Developer Site from the Office 365 admin center. For more information, see How to: Create a Developer Site within your existing Office 365 subscription.
You can either start with a free 30-day trial, or buy an Office 365 developer subscription (with a one-user license for either option) using one of the following links. This subscription costs $99.00 per year.
Please refer to Set up a development environment for SharePoint Add-ins on Office 365 for more details.
Search Verticals
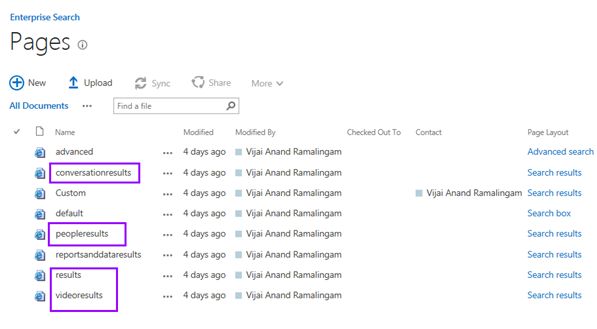
In SharePoint 2013, there are four default search verticals displayed in the Enterprise Search Center as shown below. They are placed in the Search Navigation Web Part.

When the user clicks on each vertical they are redirected to one of the following search pages:
All these results pages are available in the pages library. The Search Results Web Part are configured to use different result sources in these pages.

The following describes how to create a search results page:
Navigate to the Enterprise Search Site: https://c986.sharepoint.com/sites/Test/Enterprise%20Search/.
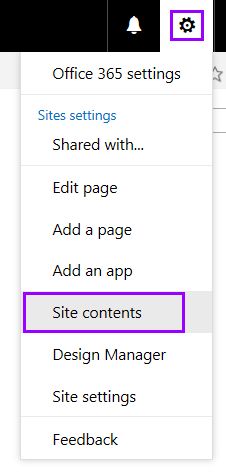
Click on Site Actions and then click on Site Contents.

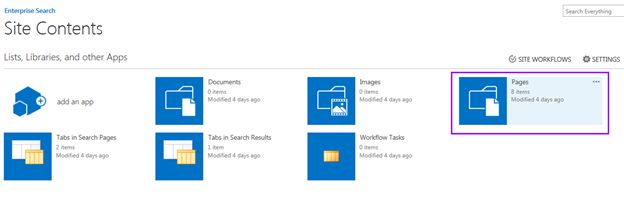
Click on the Pages app.
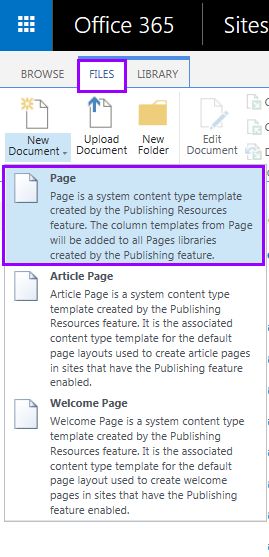
Click on the Files tab in the ribbon interface, select Page from the New Document drop down.

Enter the Title, Description and URL for the page. Click on the Create button.


The Search Page (custom.aspx) is created successfully.


The following is how to create a search vertical:
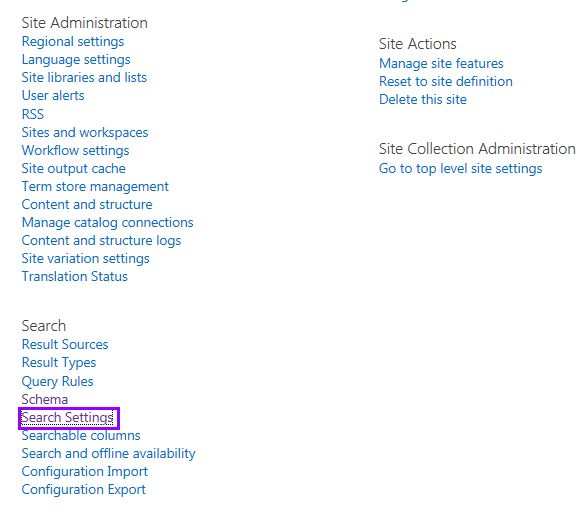
Click on Site Actions and then click on Site Settings.
Click on Search Settings available in the Search section.

On the Configure Search Navigation section, click on the Add link.

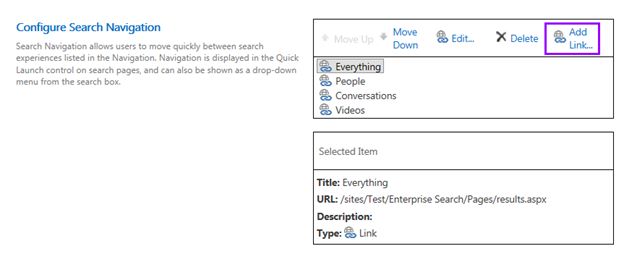
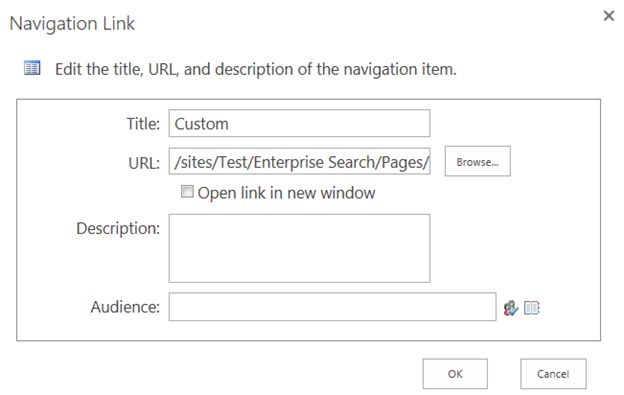
Enter the Title and the URL (the URL of the results page we have created in the previous section).
Click on the OK button.

Click on the OK button on the search settings page.
Testing
Navigate to the Search default page: https://c986.sharepoint.com/sites/Test/Enterprise%20Search/Pages/default.aspx.
Search for some keyword and it will be redirected to results.aspx page. You will see a new search vertical that we created.

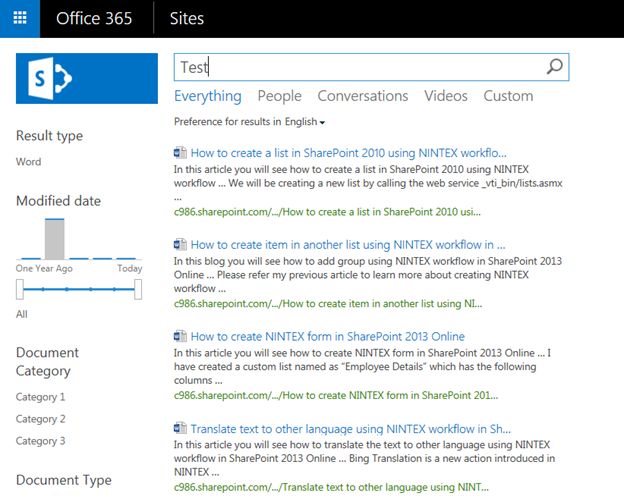
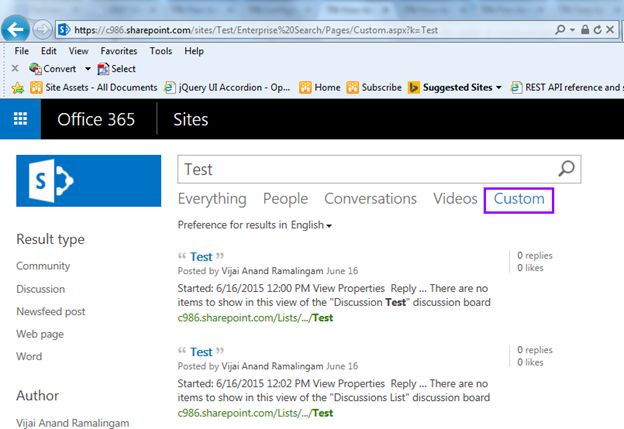
Click on Custom, it will be redirected to the custom.aspx page.
Note: You can edit the search results web part and configure your custom query on the custom.aspx page.

Summary
Thus in this article you saw how to add a custom search vertical to your search results page in SharePoint 2013 Online.


Comments