Manage Farm Features In SharePoint 2013 Central Administration
- Manpreet Singh

- Apr 4, 2019
- 1 min read
This configuration assists the admins to manage the farm features and activate/deactivate the features on central admin for all the Web Applications.
How to configure it?
Let’s open Central Admin of SharePoint on your machine. On your Windows desktop screen, click Start >> Administrative Tools >> SharePoint 2013 Central Administration.
Run it as an administrator to have the elevated privileges.
You will see the screenshot given below.
Central admin is configured under the categories given below.
Click System Settings.
Go to Farm Management.
Click Manage farm features.
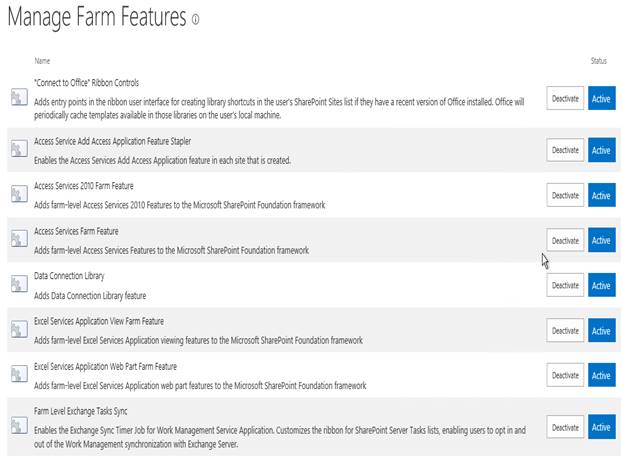
You will see the screen given below.
Configure
Here, you can map the public URLs, internal URLs and the external resources with the Web applications.
Let’s see how.
Edit public URL's
Features
"Connect to Office" Ribbon Controls.
Access Service Add Access Application feature.
Access Services 2010 Farm feature.
Access Services Farm feature.
Data Connection library.
Excel Services Application View Farm feature.
Excel Services Application Web Part Farm feature.
Farm level exchange tasks synchronization.
Global Web parts
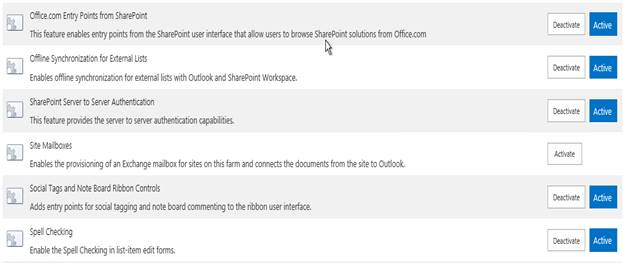
Entry Points from SharePoint
Offline synchronization for external lists
SharePoint Server to Server Authentication
Site Mailboxes
Social tags and Note Board Ribbon controls
Spell checking
User Profile user settings provider
Visio Process Repository
Visio Web access
You can manage the above features on a farm level, where the activation and de-activation of the features will be inherited to all the sites under the farm.
This is the best way to configure the features, as it makes all the sites in all different site collections have the same features throughout.
In this article, we saw how to manage farm features in SharePoint 2013 central administration. There are more articles to come on central administration. Until then, keep reading and keep learning.


Comments